
Step-by-Step Guide to Testing Your Washing Machine’s Drain Pump
← Home Appliance Repair Guides | LG
How to Replace a Drain Pump on an LG Washing Machine
If you’re searching for “how to replace drain pump on lg washing machine”, this page gives the short answer first.
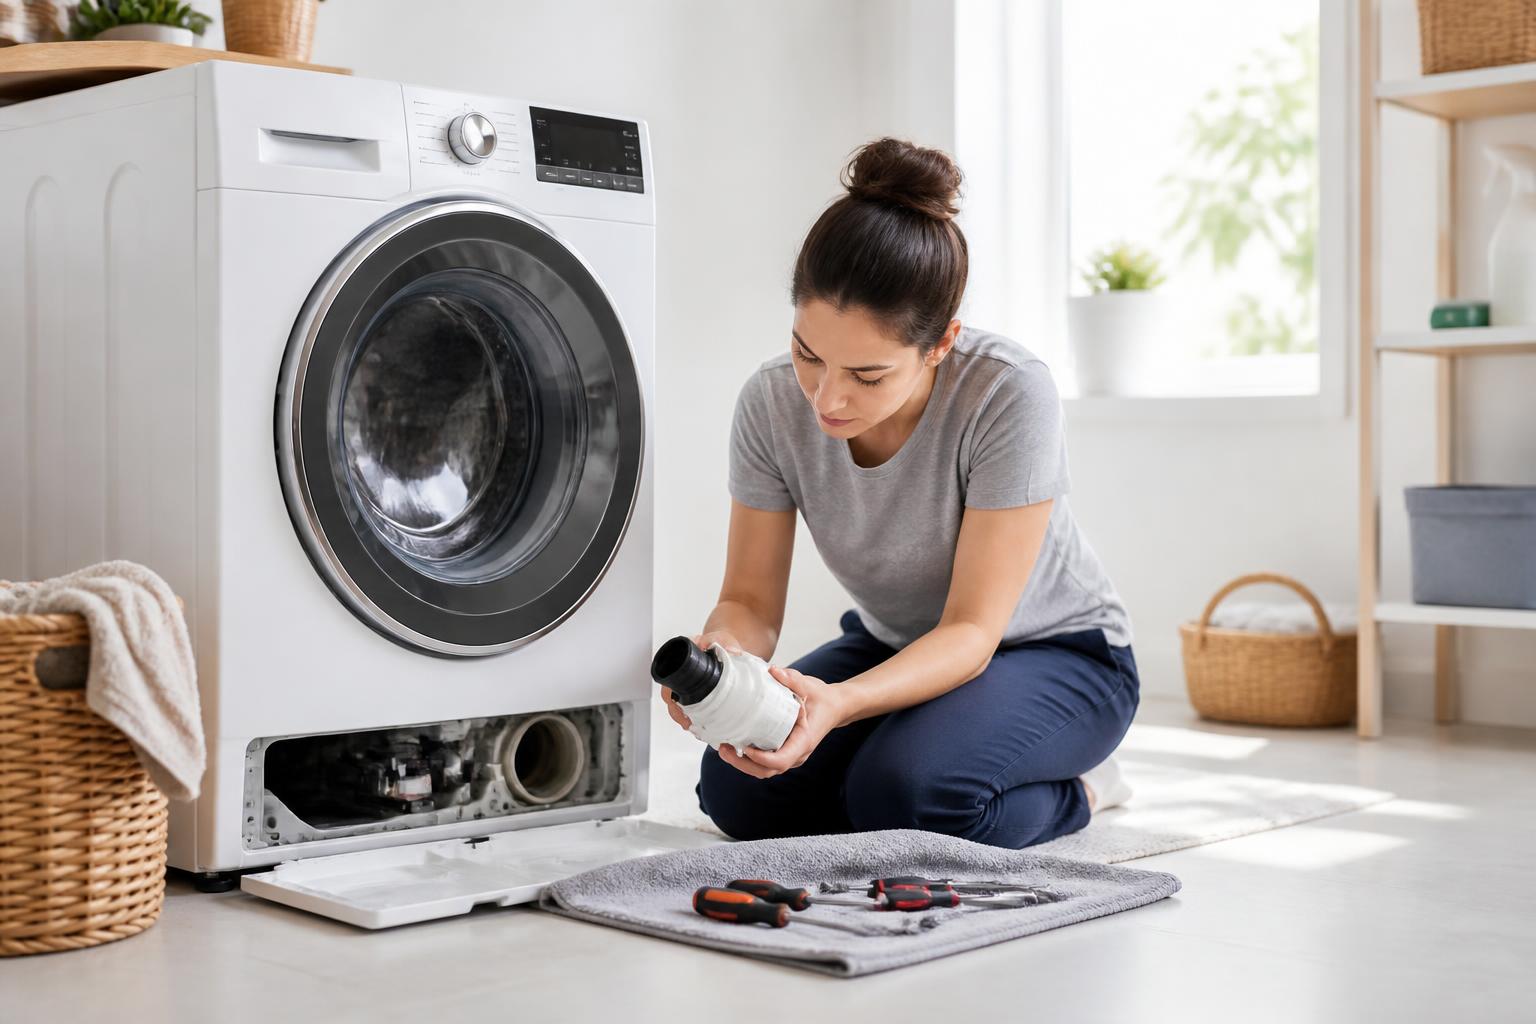
Understanding the LG Washing Machine Drain Pump and
When to Replace It The drain pump is the unsung hero of your washing machine, responsible for expelling water from the drum after the wash and rinse cycles. It’s a relatively simple but crucial component. When this pump fails, water remains trapped, leading to the dreaded “wet clothes” scenario. When is a drain pump replacement necessary? *
* No Draining: The most obvious sign is the machine failing to drain water at all.
-
Slow Draining: If water drains out very slowly or incompletely, the pump might be struggling.
-
Unusual Noises: Grinding, buzzing, or humming noises during the drain cycle can indicate a worn-out or obstructed pump.
- “Drain Pump Error” Code: Many LG washing machines will display a specific error code related to the drain pump. Refer to your owner’s manual for code interpretation. Is it always the pump? Before you commit to a pump replacement, it’s essential to consider other possibilities. A clogged drain hose or a blocked pump filter can mimic the symptoms of a failing pump.
These are often much simpler and cheaper to fix.
- Pump Filter: Most front-loading LG washing machines have an accessible pump filter, usually located behind a small panel at the bottom front of the machine. This filter catches lint, coins, buttons, and other debris. Regularly cleaning this filter is good preventative maintenance. If you find significant debris here, cleaning it might solve your draining issue.
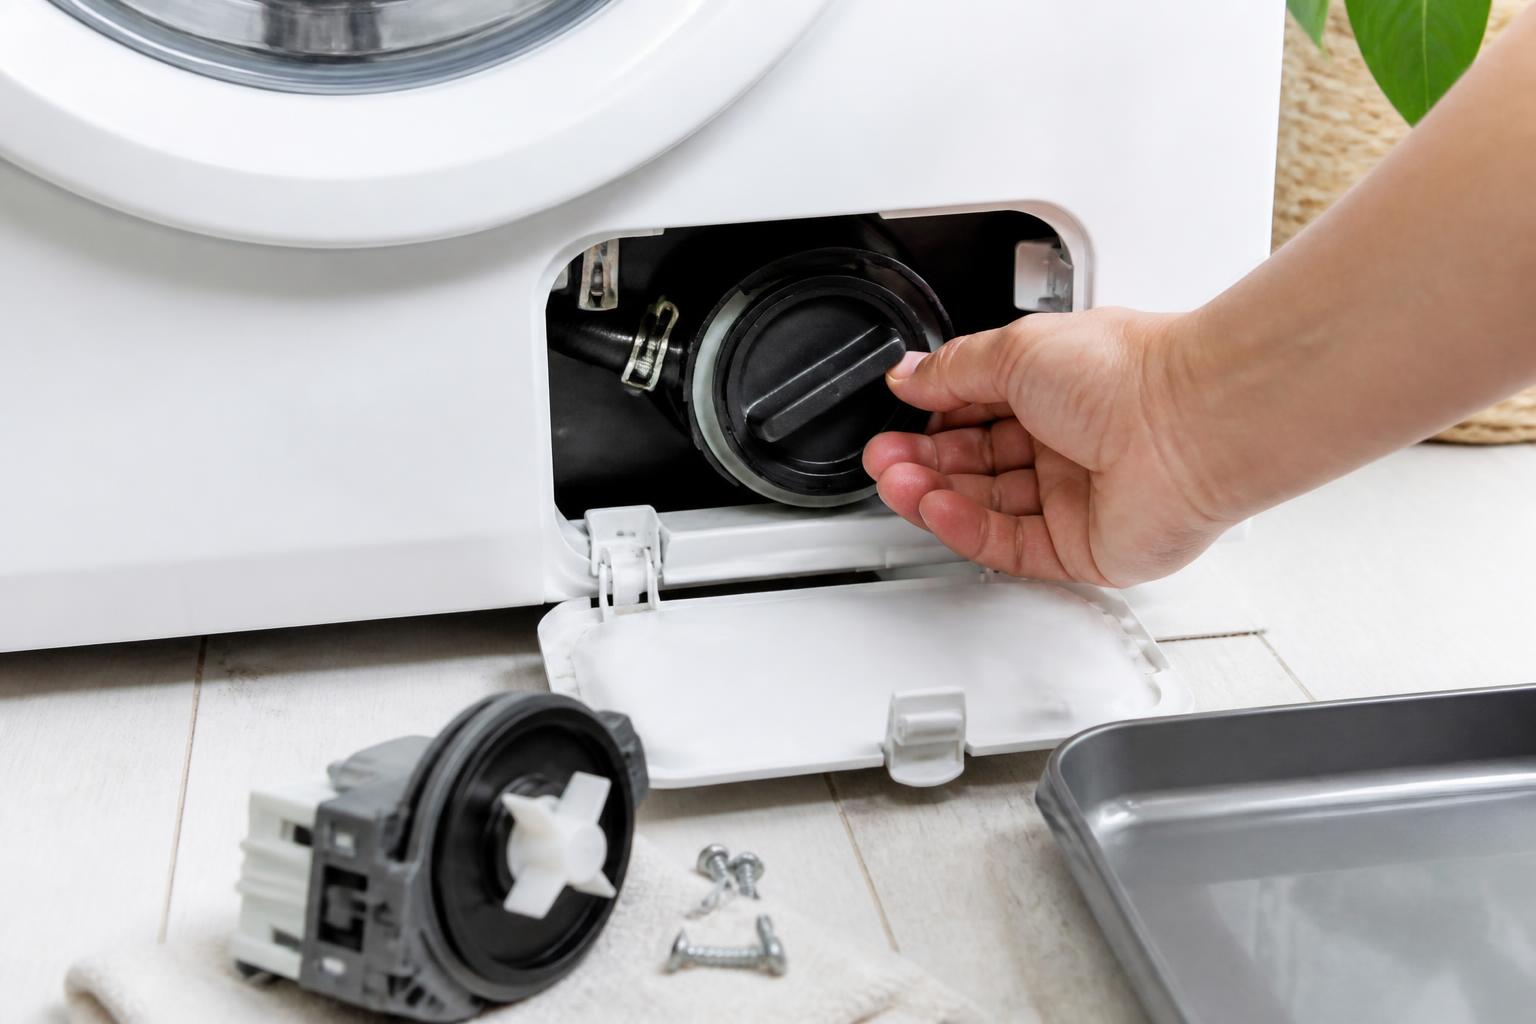
- Drain Hose: The drain hose that runs from the back of the machine to your standpipe or sink can become kinked or clogged with lint and sediment. Check for kinks and try to disconnect the hose (after draining any residual water) to see if it’s blocked internally. If you’ve thoroughly checked and cleaned the filter and drain hose, and the machine still isn’t draining, then a faulty drain pump is the most likely culprit.
Preparing for Your LG Washing Machine Drain Pump Replacement
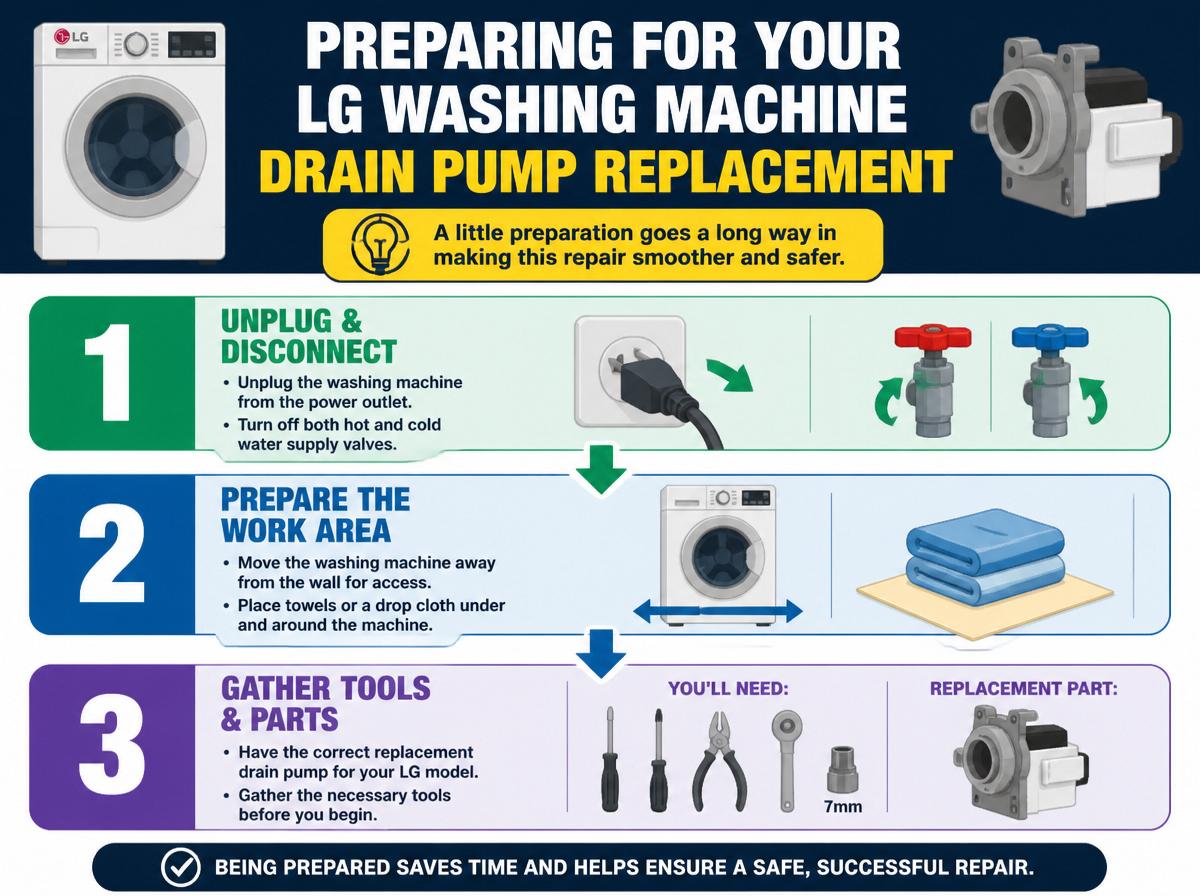
A little preparation goes a long way in making this repair smoother and safer.
Quick Answer
To replace the drain pump on an LG washing machine, you’ll need to shut off power and water, drain residual water, access the pump (usually from the back or front bottom), disconnect hoses and wiring, remove the old pump, install the new one, reconnect everything, and test.
Before You Start
- Safety First: Power and Water Off!**
-
Unplug the washing machine from the wall outlet. Do not rely on just turning off the breaker; unplugging directly is the safest method. * Turn off the water supply. Locate the hot and cold water valves behind the machine and turn them clockwise until snug.
-
Gather Your Tools:
- New Drain Pump: Ensure you have the correct replacement pump for your specific LG washing machine model. You can usually find the model number on a sticker inside the door or on the back of the machine. Ordering the exact part will prevent compatibility issues.
- Screwdrivers: Phillips head and flathead screwdrivers are essential for removing panels and securing clamps.
- Pliers: Needle-nose pliers and regular pliers will be useful for hose clamps.
- Towels and Buckets: You’ll need these to catch any residual water that drains out.
- Work Gloves: To protect your hands.
-
Optional: A socket set might be helpful depending on your model’s panel fasteners.
-
Drain Residual Water: Even with the pump out, there will be water left in the machine. Connect a hose to the drain pump outlet (where the drain hose attaches) and run it into a bucket or to your floor drain. You may need to manually siphon or use a wet/dry vacuum to remove as much water as possible from the tub and hoses before proceeding.
Decision Checklist: Is it Worth Replacing the Drain Pump Yourself?
Before diving in, consider these factors. Use this checklist to decide if a DIY replacement is the right path for you. * [ ] Model Accessibility: Is the drain pump easily accessible on your LG washing machine model (e.g., via a front or back panel)?
- [ ] Technical Comfort Level: Do you feel comfortable working with tools and disassembling appliance components?
- [ ] Time Availability: Do you have at least 1-2 hours of uninterrupted time to complete the repair?
- [ ] Tool Availability: Do you possess the basic tools listed above?
- [ ] Part Cost vs. Service Call: Has the cost of the new pump been compared to an estimated service call fee from a professional technician? If you answered “yes” to all these questions, you’re likely a good candidate for this DIY repair. If not, it might be more prudent to call a professional.
Step-by-Step:
[How to Replace](https://homeappliancefixing.com/how-to-replace-drive-belt-on-ge-washing-machine/) the Drain Pump on an LG Washing Machine
This section outlines the general procedure. Always refer to your specific LG model’s service manual or online diagrams if available, as designs can vary.
Step 1: Access the Drain
Pump *
* Front-Loading Machines: Often, you’ll need to remove the front lower access panel. This is usually held in place by a few screws. Some models might require removing the entire front panel, which involves more screws and potentially disconnecting door latches.
* Top-Loading Machines: Access is typically gained by removing the back panel or by tilting the machine onto its back and accessing it from underneath.
Step 2: Locate and Disconnect the Old Pump
Once you have access, you’ll see the drain pump, usually a small motor with inlet and outlet ports connected to hoses.
- Identify Inlet and Outlet Hoses: The inlet hose comes from the bottom of the tub, and the outlet hose goes to the external drain hose.
- Remove Hose Clamps: Use pliers to loosen the spring-style hose clamps on both the inlet and outlet hoses. Carefully slide the clamps back along the hoses.
- Detach Hoses: Gently twist and pull the hoses off the pump ports. Be prepared for a small amount of residual water to drain out.
- Disconnect Electrical Connector: The pump will have an electrical connector attached. Gently pull on the connector itself, not the wires, to detach it. There might be a small clip to press.
Step 3: Remove the Old Drain Pump
The pump is typically secured to the machine’s frame or housing with screws.
- Unscrew the Pump: Locate the mounting screws holding the pump in place and remove them.
- Carefully Remove the Pump: Once free of screws and hoses, carefully maneuver the old pump out of its housing.
Step 4: Install the New Drain Pump
This is essentially the reverse of removal.
- Position the New Pump: Align the new pump with the mounting holes.
- Secure the Pump: Reinstall the mounting screws and tighten them firmly, but do not overtighten.
- Reconnect Hoses: * Slide the hose clamps back onto the new pump’s inlet and outlet ports. * Push the inlet hose firmly onto its port, ensuring a snug fit. * Push the outlet hose firmly onto its port. * Slide the hose clamps back into their original positions, securing the hoses tightly. Ensure there are no kinks in the hoses.
Step 5: Reconnect Electrical Connector
- Attach the Wiring Harness: Align the electrical connector from the machine’s wiring harness with the terminals on the new pump and push it firmly until it clicks into place.
Step 6: Reassemble the Machine
- Replace Panels: Reattach any access panels or the main front/back panel you removed, ensuring all screws are reinserted and tightened.
Where People Get Stuck or Common Mistakes
Many DIYers run into issues during reassembly or when testing.
-
Hose Clamp Placement: Forgetting to slide the hose clamps back onto the hoses before attaching them to the new pump is a common oversight. If you realize this after the hoses are on, you’ll have to detach them again.
-
Kinked Hoses: Not ensuring the inlet or outlet hoses are straight and free of kinks after reassembly. A kinked hose will restrict water flow, leading to draining problems.
-
Loose Connections: Failing to secure hose clamps tightly or not ensuring the electrical connector is fully seated.
This can lead to leaks or the pump not receiving power.
-
Forgetting the Pump Filter: In some models, the pump filter needs to be removed and reinstalled with the new pump, or it might be integrated. Ensure you haven’t forgotten this small but vital part.
-
Reassembly Errors: Putting panels back on incorrectly, leaving screws out, or not aligning them properly can lead to a wobbly or ill-fitting appliance.
Success Check: What to Look For After Replacement
Once everything is reassembled, it’s time for a test run.
-
Turn Water Back On: Slowly turn the hot and cold water supply valves back on. Check for any immediate leaks around the valves or hoses.
-
Plug In the Machine: Plug the washing machine back into the wall outlet.
-
Run a Drain/Spin Cycle: Select a short drain and spin cycle on your washing machine.
-
Observe: Listen for the pump motor to engage. * Watch for water to be effectively pumped out of the machine. * Check carefully around the pump area and hose connections for any signs of leaks. * Ensure the machine completes the cycle without error codes related to draining. If the machine drains properly, the pump is quiet (as expected), and there are no leaks, congratulations! You’ve successfully replaced your LG washing machine drain pump.
Frequently Asked Questions
Q1: How long does it typically take to replace an LG washing machine drain pump? A: For most DIYers, the process of replacing an LG washing machine drain pump can take anywhere from 1 to 2 hours, depending on your model’s accessibility and your familiarity with appliance repair. Q2: Can I use a universal drain pump if I can’t find the exact LG part?
A: It’s strongly recommended to use the exact replacement part for your LG washing machine model. Universal pumps may have different mounting configurations, electrical connections, or flow rates, which could lead to improper fitment or malfunction.
Always verify the part number before purchasing. Q3: What should I do if my washing machine still doesn’t drain after replacing the pump?
A: If the machine still doesn’t drain, double-check that the new pump is correctly installed, all hose clamps are tight, and there are no kinks in the drain hose. Also, ensure the drain hose itself isn’t clogged where it connects to your household plumbing (standpipe or sink drain). If these are all clear, there might be an issue with the main control board or a wiring problem.
Conclusion
Replacing a drain pump on an LG washing machine is a rewarding DIY project that can save you money and get your appliance back to its full functionality. By following these steps carefully, preparing adequately, and paying attention to common pitfalls, you can confidently tackle this repair.
If you’ve completed the replacement and the machine is draining correctly, you’ve successfully revived your laundry companion! Ready to tackle this repair? Gather your tools and the correct replacement pump, and follow this guide to get your LG washing machine draining like new again! ***
Explore This Topic
- Start here: LG
- Broader hub: Home Appliance Repair Guides
Related guides in this cluster:
– How to Replace a Drive Belt on a GE Washing Machine
– How to Replace a Lid Switch on a Kenmore Washing Machine
– How to Replace a Drive Belt on a Whirlpool Washing Machine