
Quick Diagnostics for Your Ice Maker Issues Before Calling for Service
If your ice maker isn’t working, don’t fret! First, check if it’s plugged in and inspect the power cord for damage. Next, make sure the water line is connected and free of kinks. Look for any clogs or ice build-up, too. Verify the settings and temperature are correct. If all else fails, try resetting the machine. A little troubleshooting can go a long way, making it easier to enjoy that ice later on. Discover more tips ahead!
Key Takeaways
- Check the power supply by ensuring the cord is plugged in and inspect for any damage or loose connections.
- Verify the water line is connected and free from kinks, clogs, or leaks that might disrupt ice production.
- Ensure the ice maker’s temperature setting is between 0°F and 5°F for optimal freezing.
- Reset the ice maker by pressing the reset button or unplugging the unit briefly to resolve minor operational issues.
- Seek professional help if problems persist after multiple resets or if there are signs of electrical issues or water leakage.
Check the Power Supply
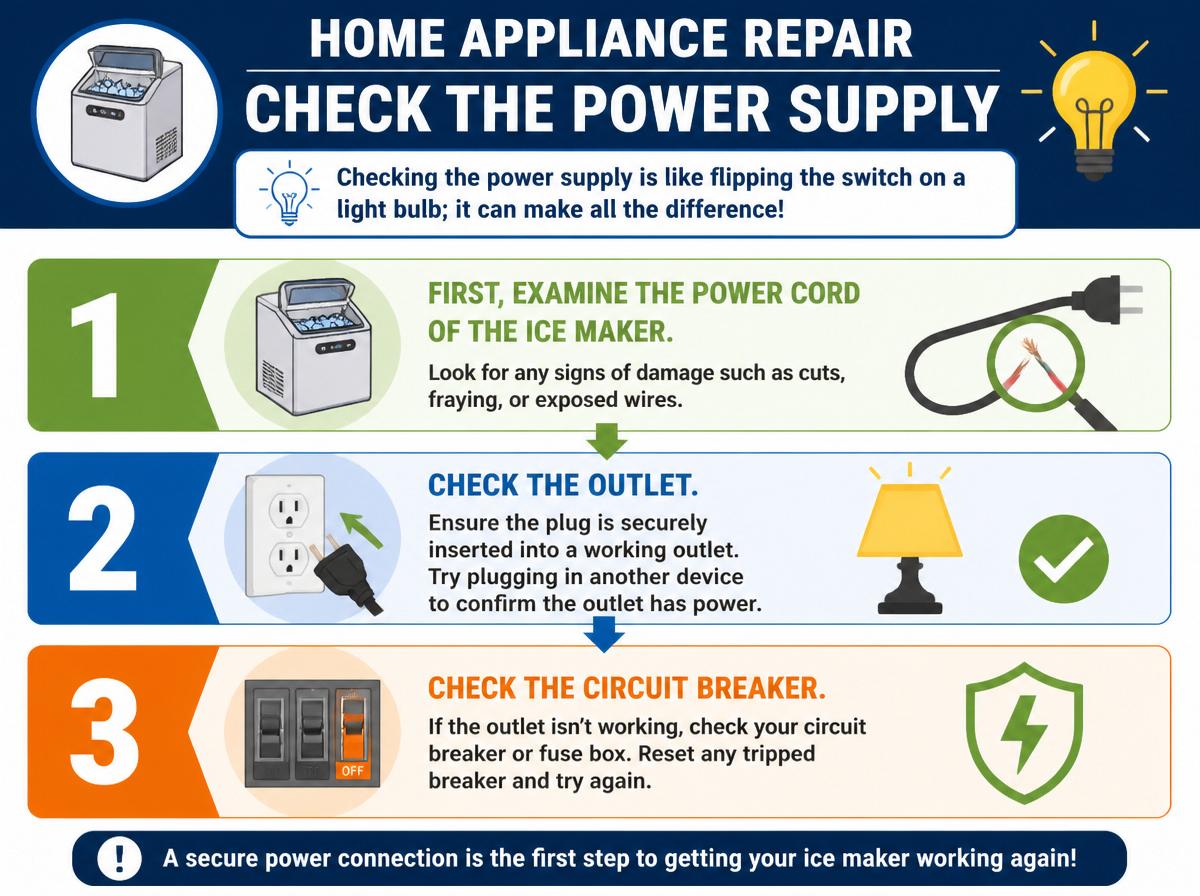
Checking the power supply is like flipping the switch on a light bulb; it can make all the difference! First, examine the power cord of the ice maker. Is it snugly plugged into the outlet? Treat it like a buddy—give it a gentle tug to verify it’s fully connected. If the cord looks frayed or damaged, consider replacing it; a healthy power cord is essential for a healthy ice maker!
Next, investigate the outlet itself. Are there any outlet issues, like burn marks or a loose fit? If it seems faulty, try plugging the ice maker into a different outlet. Sometimes, a quick switch can solve everything! Finally, if the ice maker is still not working, check if there’s a tripped circuit breaker or a blown fuse in your home. With these simple steps, you’ll feel like a DIY hero as you uncover the mystery behind your ice maker problems!
Inspect the Water Supply Line
After ensuring the power supply is in good shape, it’s time to turn attention to the water supply line. This vital part helps your ice maker churn out those icy cubes. A water supply inspection can prevent future headaches. Here’s what to check:
- Connection: Make sure the water line is securely connected to the ice maker.
- Kinks: Inspect the line for any twists or kinks that could cause a line blockage.
- Leaks: Look for any signs of water leakage along the line.
If any issues are spotted, it’s important to address them. Leaks and blockages can disrupt the flow of water, leading to a sad, cube-less ice maker. Remember, a little DIY inspection can save the day and your wallet! By taking these steps, users can feel empowered and capable, turning ice maker troubles into triumphs, one check at a time.
Look for Clogs or Obstructions
Troubleshooting an ice maker often leads to the exciting quest of uncovering clogs or obstructions! When ice makers don’t work, it’s time for obstruction identification. Start by checking for any clogged components like the water supply line or the ice bin. Sometimes, water gets stuck and doesn’t flow properly, which can spell trouble for ice production.
Next, look for ice build-up that could block the mechanism. Ice, much like a sneaky ninja, can sneak in and cause major hold-ups. If found, simply remove any unwanted ice and verify the area is clean.
Examine the Ice Maker Settings
When troubleshooting an ice maker, it’s essential to first examine the settings to guarantee everything is just right. Checking the temperature settings, adjusting the water supply, and inspecting the power connection can make a big difference in getting that ice flowing again. Think of it like making a perfect snowman: sometimes you just need to give it a little rearranging to get your frosty friend just right!
Check Temperature Settings
Finding the right temperature settings for an ice maker can be a bit of a mystery, but it’s a puzzle worth solving! The temperature must be just right to keep ice from melting or forming weird shapes. Temperature fluctuations can lead to issues, so checking the thermostat is essential. Here’s how to do it:
- Locate the Thermostat: It’s usually found inside or on the control panel.
- Check the Settings: Confirm it’s set to a proper freezing point, typically around 0°F.
- Adjust as Needed: If ice isn’t forming properly, consider a slight thermostat adjustment.
Taking these steps can help stabilize temperatures and confirm a smooth ice-making process. With a bit of patience, the ice maker can become as dependable as your favorite winter jacket!
Adjust Water Supply
Adjusting the water supply to an ice maker isn’t just a task—it’s an adventure that can lead to a steady stream of icy goodness! First, verify that the water pressure is adequate. Low pressure can result in tiny ice cubes, while high pressure might cause leaks. Checking the valve adjustment is also essential. It can make all the difference in the ice-making journey.
Here’s a quick reference table:
| Problem | Solution | Tips |
|---|---|---|
| Low water pressure | Increase pressure | Check for kinks in hose |
| High water pressure | Adjust valve | Test with a pressure gauge |
| Inconsistent ice creation | Verify steady supply | Monitor for blockages |
With these steps, anyone can become an ice maker hero!
Inspect Power Connection
A reliable power connection is essential for an ice maker to function properly, and inspecting it can be a breeze! First, check the power source to verify it’s plugged in securely. Loose electrical connections can lead to frustrating hiccups. Here’s a quick checklist to follow:
- Look for a plugged-in cord Make sure the ice maker is connected to the power outlet.
- Inspect the outlet Try plugging in another device to test if the outlet is working.
- Check for tripped breakers Look at your electrical panel to see if a breaker has been flipped.
Assess the Temperature Settings
When it comes to ice makers, the right temperature settings are essential for making perfect ice cubes. First, one should verify the temperature control settings to ascertain they are correctly set. Next, checking the freezer temperature consistency and evaluating the ice maker thermostat can help determine if everything is working just as it should, so you can enjoy chilly drinks in no time!
Verify Temperature Control Settings
To guarantee the ice maker operates effectively, it is crucial to verify the temperature control settings. This step is essential for making sure ice production runs smoothly. Here are three simple tips for making temperature adjustments:
- Check the Thermostat: Confirm the temperature is set between 0°F and 5°F for ideal ice making.
- Inspect Temperature Calibration: If the ice is too thin, consider recalibrating the thermometer to verify accurate readings.
- Make Necessary Setting Adjustments: If the setting exceeds recommended ranges, lower it carefully and monitor over the next few hours.
Being attentive to temperature settings can prevent frustrating malfunctions. Remember, a cold fridge leads to happy ice! Taking these steps promotes success and makes every ice-filled drink more enjoyable. Your ice maker will appreciate the attention!
Check Freezer Temperature Consistency
Checking the freezer temperature consistency is essential because it guarantees that ice is produced efficiently and effectively. If the temperature isn’t just right, it can lead to temperature fluctuations that hinder ice production. A well-insulated freezer helps maintain a steady environment, allowing the ice maker to function properly.
Here is a quick checklist to assess temperature consistency:
| Action | Importance |
|---|---|
| Check Thermostat | Guarantees accurate temperature |
| Inspect Insulation | Reduces temperature swings |
| Monitor Temperature | Keep track for stability |
| Adjust Settings | Fine-tune for best results |
A little attention to the freezer’s temperature can make a big difference. With the right steps, anyone can guarantee their ice maker runs smoothly. Keep it cool!
Assess Ice Maker Thermostat
Understanding the ice maker thermostat is key to producing perfect ice cubes. If your ice maker isn’t working, the thermostat might be the issue, so checking it is vital. Here’s how to assess it:
- Check the Temperature Settings: Verify the thermostat is set to the ideal freezing temperature, usually around 0°F (-18°C).
- Look for Malfunctions: A thermostat malfunction can prevent proper ice production. Listen for clicking sounds or feel for temperatures that aren’t correct.
- Calibrate if Necessary: If the temperature seems off, thermostat calibration might be needed.
Taking these steps can save time and help create invigorating ice. Remember, a little investigation can make a big difference—keep cool, and happy ice making!
Reset the Ice Maker
Resetting the ice maker can feel like magic when it breathes new life into a tired appliance! Sometimes, a simple ice maker reset is all it takes to resolve pesky issues, like ice not forming or clumps of ice stuck together. To get started, locate the reset button, which is usually found on the front or side of the ice maker. Press it and hold it for about five seconds. You might hear a little click, and that’s a good sign!
If your ice maker doesn’t have a button, unplug it for a minute, then plug it back in—this is another effective reset method. These troubleshooting techniques not only save time but can also save money. So, don’t hesitate to give it a try! With a few simple steps, the ice machine might be back to its icy glory, ready to create delightful cubes for your drinks!
Frequently Asked Questions
How Can I Tell if My Ice Maker Is Broken?
To determine if an ice maker is broken, observe ice production levels and inspect for unusual noises or leaks. Utilizing troubleshooting tips, one can identify issues before seeking professional assistance or repairs.
What Common Items Can Cause Blockages in the Ice Maker?
Common blockage causes in ice makers include ice buildup, food particles, and mineral deposits. Regular ice maker maintenance, such as cleaning and checking the water filter, can help prevent these issues and guarantee peak performance.
Is It Safe to Repair an Ice Maker Myself?
Repairing an ice maker oneself can be safe if proper safety precautions are observed. However, DIY repairs may lead to complications if individuals lack experience, emphasizing the importance of understanding risks and following guidelines meticulously.
How Often Should I Clean My Ice Maker?
Cleaning an ice maker is recommended every three to six months. Regular maintenance tips include inspecting for buildup, guaranteeing proper drainage, and wiping surfaces to guarantee peak performance and hygiene in ice production.
What Warranty Options Are Available for Ice Makers?
Warranty options for ice makers typically include standard warranty coverage for one to two years, along with extended repair plans that can provide additional protection against defects and malfunction, ensuring peace of mind for consumers.
Conclusion
To sum up, tackling ice maker issues can feel like solving a puzzle, where each piece helps reveal the bigger picture. By checking the power supply, inspecting water lines, and adjusting settings, anyone can take the lead in troubleshooting this frosty foe. Remember, it’s always okay to seek help if needed, but with these steps, you’re equipped to face the icy challenge head-on. So, grab your toolbox and get ready—your ice maker’s next adventure awaits!
Explore This Topic
- Back to ice maker repair
- Back to home appliance troubleshooting
Related guides in this cluster: