Complete Guide to Whirlpool Dryer Heating Element: What Is It and How Does It Work?
A Whirlpool dryer’s heating element turns electricity into warm air, drying clothes fast and evenly. It works by resistance—electric current meets resistance in the element, creating heat. If the element breaks or weakens, drying time drags, and bills spike. Alongside fans, vents, and sensors, it keeps your laundry smooth and efficient. Testing needs simple tools and safety, but small fixes can make a big difference. Curious about spotting problems or replacing parts? More helpful tips await inside.
Key Takeaways
- The Whirlpool dryer heating element converts electrical energy into heat via resistance to warm air for efficient, even drying.
- It uses materials and design to control resistance, minimize electromagnetic interference, and improve energy efficiency.
- The heating element works with airflow, moisture sensors, and exhaust vents to balance heat and remove moisture effectively.
- Faulty elements cause longer drying times, damp clothes, burnt smells, and increased energy use, signaling inspection or replacement needs.
- Testing requires a multimeter to check element continuity, with safety measures like unplugging and protective gear essential before repair.
Understanding the Role of the Heating Element in a Whirlpool Dryer
Imagine the heating element as the heart of a Whirlpool dryer, quietly working to warm the air that dries clothes fast and evenly. This vital piece turns electricity into heat, ensuring laundry dries properly without wasting time. When it functions well, the dryer uses energy efficiently, which means lower electric bills and a smaller environmental impact. In fact, a healthy heating element helps reduce energy waste by heating clothes quickly, so the dryer doesn’t run longer than needed. This saves natural resources and cuts down on greenhouse gases. If the heating element weakens or breaks, drying takes longer and energy consumption spikes, harming both wallets and the planet. Understanding this part’s role empowers users to spot issues early and fix them, keeping dryers running smoothly and eco-friendly. So, the heating element not only warms clothes—it warms the heart of responsible, energy-smart living.
Components That Work Alongside the Heating Element
Although the heating element is essential, it doesn’t work alone to dry clothes efficiently. Other parts team up to make sure your dryer runs smoothly and dries your laundry well. One key player is the exhaust vent, which pushes hot, moist air outside. Without it, damp air hangs around, making drying slow and mold more likely—nobody wants that! Another clever helper is the moisture sensor. This smart part checks the dampness of your clothes and tells the dryer when they’re dry enough. Thanks to the moisture sensor, the dryer won’t overwork or waste energy, saving time and money. Together, these components create a balanced system, where heat meets airflow and smart sensing to get your clothes fresh and dry. So, next time you use your dryer, remember it’s not just the heating element doing the job—it’s a team effort, all working to keep your laundry day hassle-free and efficient.
How the Heating Element Generates Heat
When electricity flows through the heating element, it faces resistance—kind of like when you try to run through water instead of air. This resistance causes the element to heat up, turning electrical energy into the warmth that dries clothes. It’s a clever trick of physics, making sure your laundry comes out nice and toasty every time.
Electrical Current Flow
Electricity travels quietly through the dryer’s heating element, turning power into warmth with a neat little trick. Inside the element, the electric current moves back and forth because of alternating polarity, which means the direction of the current changes regularly. This helps keep the energy flowing smoothly without overheating any part. The design also minimizes electromagnetic interference, so the dryer works without disturbing other devices around it. As electricity flows, the heating element’s material carefully channels energy, setting the stage to generate heat. This smooth passage of current feels invisible but powerful, like a well-practiced dance that warms your clothes gently. Understanding this flow makes it easier to appreciate just how clever the heating element really is, inspiring confidence for anyone facing dryer repairs.
Resistance Heat Generation
Flowing smoothly through the heating element like a friendly river, the electric current meets a tiny obstacle: resistance. This resistance slows the current and causes the element to heat up, much like how rubbing your hands together warms them. The heat generated is what dries clothes efficiently. The manufacturing process carefully designs this element to balance durability with ideal resistance, ensuring it doesn’t waste energy and minimizes environmental impact. Choosing materials and designing shapes that provide the right resistance helps save power while effectively drying clothes.
| Feature | Importance |
|---|---|
| Resistance Level | Controls heat generation |
| Material Quality | Affects durability and impact |
| Manufacturing Process | Influences energy efficiency |
Common Signs of a Faulty Heating Element
How can someone tell if a Whirlpool dryer’s heating element is acting up? One common sign is long drying times—when clothes seem to take forever to get warm and dry, the heating element may be failing. Another red flag is a strange burnt smell during or after a drying cycle. This odor often hints at the element overheating or wiring issues. Sometimes, clothes come out damp but warm, or the dryer runs without heat at all. These clues shouldn’t be ignored because they mean the dryer isn’t working efficiently and might soon stop drying altogether. Noticing these signs early can save time, money, and frustration down the road. While it might seem tricky, understanding these symptoms helps anyone tackle the problem confidently. So, if your dryer is acting weird, trust your senses and take action—it’s the first step toward a warm, cozy batch of laundry done right.
Tools Needed for Inspecting the Heating Element
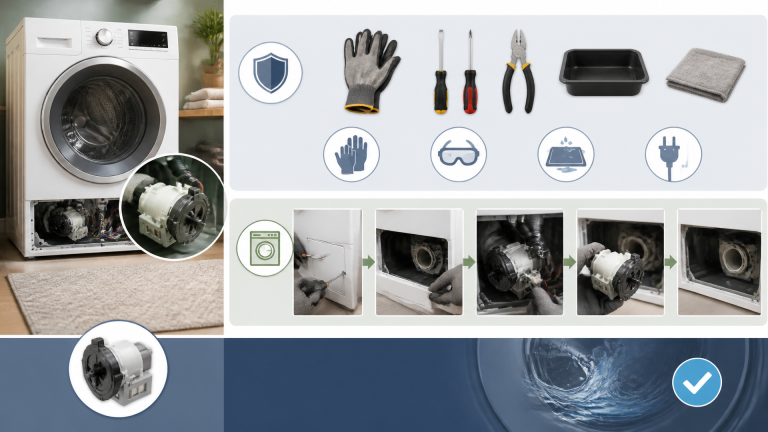
Inspecting a Whirlpool dryer’s heating element requires just a few essential tools, but having the right safety gear is key to staying worry-free. A simple multimeter, screwdrivers, and gloves can make the job much smoother—and safer—than expected. With some handy tips on how to use these tools properly, anyone can feel confident tackling this common repair.
Essential Inspection Tools
Before diving into the heart of the Whirlpool dryer’s heating element, having the right set of tools is like bringing a trusted sidekick along for an adventure. Essential inspection tools include a multimeter for checking electrical continuity, screwdrivers to open panels, and a flashlight to illuminate hidden spots. These tools help pinpoint faults without guessing. It’s smart to think about warranty considerations before unplugging parts—sometimes repairs are covered, so double-check. Also, keep disposal options in mind if the heating element needs replacement; some parts require special recycling to stay eco-friendly. With these trusty tools in hand, inspecting your dryer’s heating element becomes less intimidating, turning a tricky job into a manageable, even satisfying, DIY win—giving confidence and control right where they’re needed most.
Safety Equipment Requirements
Though working on a dryer’s heating element might sound like a job for superheroes, even everyday heroes can tackle it safely—with the right safety equipment in place. Protective eyewear is a must, shielding eyes from dust, sparks, or unexpected debris. It’s like giving your eyes a little superhero cape! Having a fire extinguisher nearby is also smart—just in case a tiny flame decides to join the party. Even though sparks are rare during inspection, being prepared never hurts. Wearing gloves for extra grip and safety adds another layer of protection. Remember, safety gear isn’t just about rules; it’s about making your DIY adventure safe and smooth. With this equipment, inspecting a Whirlpool dryer’s heating element becomes a confident and worry-free task.
Tool Usage Tips
Having the right safety gear is just the beginning of a smooth Whirlpool dryer heating element check-up. To confidently inspect and handle parts, certain tools and techniques come in handy. Keeping cords untangled and organized is vital to avoid accidents—good cord management helps prevent trips or damage to your equipment. For left-handed folks, adapting tool grips and using left-handed techniques provides better control and comfort during the job. Here are four essential tools and tips:
- Multimeter for testing electrical continuity safely
- Screwdrivers with comfortable grips for various screws
- Cord clips or ties to maintain neat cord management
- Use ambidextrous or left-handed tools, especially for better handling
These suggestions keep your work efficient, fun, and accident-free, making your Whirlpool dryer repair feel like a breeze!
Step-by-Step Guide to Testing the Heating Element
When the dryer stops heating, it might leave anyone wondering if the heating element is to blame, but testing it is easier than one might think. First, gather essentials for a Test Checklist: unplug the dryer, locate the heating element, and have a multimeter ready. Next, carefully remove the heating element to access its terminals. Set the multimeter to the resistance or continuity setting—this step is where the magic happens. Touch the probes to the terminals: a steady beep or a low resistance reading means the element is good; no sound or infinite resistance suggests it’s faulty. Remember, Result Logging is essential! Jot down your readings and observations—it helps when deciding if a replacement is needed, or when consulting repair guides or pros. Testing this part empowers anyone to feel like a home appliance hero, combining straightforward tools and simple steps to keep laundry day smooth and worry-free. Don’t let a broken dryer steal your clothes-drying thunder.
Safety Precautions When Handling the Heating Element
Testing the heating element is a great start, but working on it safely takes the whole effort to the next level. Handling a Whirlpool dryer heating element demands care to avoid accidents and damage. One important safety note: electrical parts can store a surprising zap, so preventing static discharge is key. Also, always maintain good workspace ventilation—dryer parts can get warm or dusty during repairs. A few simple precautions make a big difference:
- Unplug the dryer completely before touching any parts to avoid shocks.
- Use an anti-static wrist strap or touch a grounded metal object to clear static discharge.
- Work in a well-ventilated area to avoid dust buildup and let any heat escape.
- Keep your tools organized and dry, so nothing slips or causes sparking.
With these tips, handling the heating element becomes less tricky and safer, helping every DIYer feel confident and ready for the next step.
How to Replace a Whirlpool Dryer Heating Element
Replacing a Whirlpool dryer heating element can seem like a big job, but breaking it down into clear steps makes the task much less scary. First, unplug the dryer and access the heating element by removing the back panel. Before diving in, check warranty considerations—sometimes, repairs might void coverage or require authorized parts sourcing. Next, carefully disconnect the wires from the old element, noting their positions to avoid mix-ups. Remove the faulty element and swap it with a new, genuine Whirlpool part; using the right parts guarantees safety and performance. Reattach the wires, secure the panel, and plug the dryer back in. Test it by running a short cycle to confirm the element heats properly. Remember, this fix is doable, even for beginners, with patience and care. And if things feel tricky, calling a pro is always an option—no shame in expert help! The goal is to keep your dryer warm and your laundry days hassle-free.
Preventative Maintenance Tips to Extend Heating Element Life
Although a heating element may seem like an invisible hero inside a dryer, showing a bit of love through regular maintenance can keep it working smoothly for years. Taking a few simple steps helps prevent breakdowns and keeps clothes drying evenly and quickly.
To extend the heating element’s life, consider these helpful tips:
- Regular Vent Cleaning: Dust and lint block airflow, causing the element to overheat and fail sooner.
- Balanced Loads: Overstuffed or uneven loads strain the dryer, making the heating element work harder.
- Check and Replace Lint Screens: A clogged lint screen reduces airflow and increases drying time, stressing the element.
- Avoid Overdrying: Set proper drying cycles to prevent overheating, protecting the element from damage.
These small actions create a smoother, longer-lasting drying experience. With just a little care, that hardworking piece inside your Whirlpool dryer keeps running, saving money and headaches in the long run. Maintenance isn’t a choreit’s giving your dryer a thank-you hug!
Troubleshooting Other Dryer Heating Issues
Why does a dryer sometimes feel warm but not hot enough to dry clothes properly? One common reason might be poor room ventilation. If the laundry area is stuffy or cramped, the dryer struggles to release moisture, making it less effective. Also, the ambient temperature plays a big role—dryers work harder in cold rooms, causing them to heat less efficiently. Another sneaky culprit can be a partially clogged vent or lint trap; this restricts airflow and lowers heat, like trying to breathe through a straw! Checking these areas can quickly fix the problem. In addition, worn-out heating elements or faulty thermostats might also be at fault but are trickier to spot. Remember, don’t panic! Simple fixes like cleaning vents or improving room airflow often work wonders. Keep a friendly eye on these factors, and your Whirlpool dryer will soon bounce back to its full cozy, heat-pumping glory. Drying clothes should feel like a breeze, not a puzzle!
Frequently Asked Questions
What Is the Average Lifespan of a Whirlpool Dryer Heating Element?
The average lifespan of a Whirlpool dryer heating element typically ranges between 5 to 10 years, depending on usage frequency and material quality. Frequent use and lower-quality materials can reduce longevity, while careful maintenance extends its functional period.
Can a Heating Element Cause a Dryer to Overheat?
Flames flicker behind closed dryer doors when thermostat failure or a wiring short causes a heating element to malfunction. This overheating can warp fabrics, scorch the drum, and risk fire, demanding immediate inspection and repair.
Are Whirlpool Dryer Heating Elements Compatible With All Dryer Models?
Whirlpool dryer heating elements are not universally compatible with all dryer models. Model compatibility must be verified, and adapter requirements might be necessary to guarantee proper fit and function within different dryer configurations.
How Much Does It Typically Cost to Replace the Heating Element?
The cost to replace a Whirlpool dryer heating element typically ranges from $100 to $250, including part pricing and labor costs. Labor expenses vary, often constituting a significant portion of the total repair expense.
Can Lint Buildup Affect the Heating Element’s Performance?
Lint buildup can choke airflow restriction like a beast suffocating a cave, substantially impairing a heating element’s function. This causes insulation degradation, overheating risks, and diminished dryer efficiency, ultimately shortening the element’s lifespan.
Conclusion
Though some might think a dryer’s heating element lasts forever, reality shows it needs care and sometimes a gentle nudge—like a replacement—to keep going. Understanding its role, knowing the signs of trouble, and following safety tips make a big difference. With the right tools and a bit of patience, anyone can tackle this task confidently. After all, a warm, cozy load of laundry is worth the effort and a little DIY adventure!
Explore This Topic
- Back to Dryer
- Back to appliance repair
Related guides in this cluster: