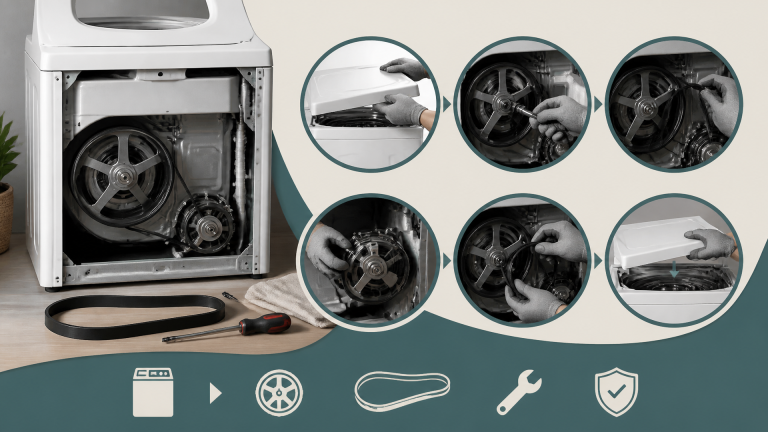
Whirlpool Washer Not Draining: Pump, Hose & Lid Switch Diagnosis
A Whirlpool washer that refuses to drain ranks among the most frustrating appliance failures a homeowner can face. The wash cycle finishes, the drum holds soapy water, and your laundry sits soaking with no obvious remedy. A whirlpool washer not draining fix typically narrows to three main suspects: the drain pump, the drain hose, or the lid switch. By understanding how these components interact and diagnosing them in a logical sequence, you can often resolve the issue in under an hour without calling a repair technician.
This guide takes an analyst’s approach to the problem. Instead of throwing random parts at the machine, we will examine the mechanism, weigh the probability of each failure, and provide a clear decision path. For a broader look at similar issues across brands, consult our washing machine not draining pump hose fix guide, but the steps below are tailored specifically to Whirlpool’s top-load and front-load designs.
Understanding the Drainage Mechanism in Whirlpool Washers
Before touching a single screw, it helps to understand what actually happens when your washer enters the drain phase. The machine’s control board sends a signal to the drain pump motor, which activates and creates suction. That suction pulls water from the tub, pushes it through the drain hose, and out into your home’s standpipe or laundry sink. Simultaneously, the lid switch (on top-loaders) or door lock (on front-loaders) must be engaged to tell the control board it is safe to spin and drain.
The failure of any single link in this chain breaks the entire process. If the pump motor is dead, no suction occurs. If the hose is kinked or clogged, the water has nowhere to go. If the lid switch fails, the control board refuses to power the pump at all. The challenge is that all three failures present the same symptom: standing water in the drum.
From a diagnostic perspective, approach this like a process of elimination. The cheapest and easiest checks come first, and the more invasive tests come later. This saves time and prevents unnecessary disassembly. According to appliance repair forums and service technician reports, drain pump failures account for roughly 40-50% of no-drain complaints, while clogged hoses and faulty lid switches split the remaining percentage almost evenly.
The economic logic matters as much as the mechanical logic. A lid switch replacement costs under $20 and takes 15 minutes. A drain pump replacement runs $40-$80 and takes about an hour. A control board replacement can cost $100-$200 and requires significant disassembly. By testing in order of cost and complexity, you minimize your financial exposure if you make a wrong diagnosis.
Step 1: The Quick Safety Check and Initial Observation
Your first move is not to grab a multimeter, but to observe. Unplug the washer from the wall outlet. Water and electricity do not mix, and you will be working near standing water. Once unplugged, put on rubber gloves and manually inspect the water in the drum. Is it clear, or does it contain debris like lint, coins, or fabric softener residue?
This observation is your first decision point. If you see visible debris floating in the water, the problem is likely a clogged pump filter or drain hose. If the water is perfectly clean, the issue is more likely electrical — either the pump motor, the lid switch, or the control board.
Next, check the drain hose where it connects to the standpipe behind the machine. Pull the hose out of the standpipe and lower it into a bucket. If water flows out freely by gravity, the tub-to-hose path is clear. If nothing comes out, the blockage is deeper inside the machine, either at the pump inlet or within the hose itself. This simple gravity test immediately narrows your search field and is a core part of any whirlpool washer not draining fix routine.
One detail many DIYers miss: the standpipe height matters. The drain hose should not extend more than 4-5 inches into the standpipe. If it goes too deep, it can create a siphoning effect that makes the pump work against a vacuum, dramatically reducing flow. This is not a component failure — it is an installation error that produces the same symptom as a clogged pump.
Diagnosing the Drain Hose and Pump Filter
The drain hose is the most accessible component, and it is also the most common location for simple clogs. On most Whirlpool top-loaders, the drain hose runs from the pump at the bottom of the machine up the back panel and into the standpipe. Over time, lint, hair, and small objects accumulate at the low points of this hose, gradually restricting flow until the pump can no longer push water through.
To inspect the hose properly, access the rear of the machine. Remove the back panel (usually held by four to six Phillips-head screws) and locate the hose connected to the pump. Disconnect the hose from the pump outlet and inspect the interior. You can often see a solid mass of lint blocking the path. Clear it with a long screwdriver or a stiff wire, then flush the hose with a garden hose before reconnecting.
For front-load Whirlpool washers, the pump filter is typically located behind a small access panel at the bottom front of the machine. Open the panel, place a shallow pan underneath to catch spillage, and slowly twist the filter cap counterclockwise. Be prepared for a sudden gush of water. Clean the filter thoroughly, removing any coins, buttons, or hair. This filter is designed to catch debris before it reaches the pump impeller, and a clogged filter is one of the most common reasons a front-loader stops draining.
Quick Drain Path Check
- Check the standpipe height: The drain hose should not extend more than 4-5 inches into the standpipe. If it goes too deep, it can create a siphoning effect that causes the pump to work against a vacuum.
- Inspect for kinks: A sharp bend in the hose behind the machine can completely stop water flow even if the pump is healthy.
- Look for a clog at the pump inlet: Remove the hose from the pump inlet side and check for debris stuck in the pump housing.
- Verify the hose is not crushed: If the washer is pushed tight against the wall, the hose can be pinched between the cabinet and the wall, restricting flow.
- Confirm the standpipe is not blocked: A clogged standpipe or laundry sink drain will cause water to back up into the washer, even with a perfectly healthy pump.
If the hose and filter are clear, you have eliminated the simplest causes. The next step is to test the pump itself.
Testing the Drain Pump Motor
The drain pump is a small electric motor with a plastic impeller that creates the suction needed to evacuate water. When it fails, it usually does so in one of two ways: the motor burns out completely, or the impeller jams on a foreign object.
Before testing the motor electrically, manually check the impeller. On most Whirlpool washers, you can access the pump by removing the front or back panel, depending on the model. Once you locate the pump, look for a small access port or remove the hose from the inlet side. Stick a finger inside and try to spin the impeller. If it does not spin freely, something is jammed. Remove the obstruction, and you may have just fixed the problem without spending a dime.
If the impeller spins freely, the issue is electrical. You will need a digital multimeter set to the ohms (resistance) setting. Disconnect the two wires from the pump motor terminals and place the multimeter probes on the terminals. A healthy pump motor typically reads between 2 and 10 ohms of resistance. If you get an infinite reading (OL on the display), the motor winding is open, and the pump is dead. If you get a reading of zero, the motor is shorted, which also means replacement.
According to Whirlpool service manuals, the drain pump is not a repairable component. If the motor fails electrically, you must replace the entire pump assembly. This is a straightforward DIY job on most models, requiring only a screwdriver and a pair of pliers to remove the hose clamps. Replacement pumps are widely available online, and the cost is typically between $40 and $80, which is far less than the $150-$250 you would pay a technician just for the service call.
Here is a trade-off worth considering: a new pump for an older machine is often a sound investment, but only if the rest of the washer is in decent shape. If the drum bearings are noisy, the transmission is slipping, or the cabinet is rusting, the pump replacement is a temporary fix on a dying appliance. The rational analyst weighs the repair cost against the machine’s remaining useful life, not just the immediate symptom.
The Lid Switch and Its Role in the Drain Cycle
Many DIYers overlook the lid switch, but it is a critical safety component. On top-load Whirlpool washers, the control board will not activate the drain pump or spin cycle unless the lid switch is closed. This is a deliberate safety feature to prevent the machine from spinning with the lid open. If the switch is broken, the washer will fill and agitate, but it will stop dead when it tries to drain.
The lid switch is typically located under the top panel, near the front edge of the washer. To access it, you must remove the top panel by prying off the front clips or removing screws at the rear. Once exposed, you will see a small plastic switch with a plunger that is depressed when the lid closes.
Testing the lid switch is simple. Unplug the washer, disconnect the wire harness from the switch, and set your multimeter to the continuity setting. With the switch in the open (lid up) position, there should be no continuity. Manually press the plunger to simulate the lid closing, and the meter should beep, indicating continuity. If the switch fails either test, it needs replacement.
A replacement lid switch, such as the 3355806 Washer Lid Switch WP3355806 Replacement for Whirlpool Kenmore Roper Estate, is an inexpensive part, usually under $20. The installation is a simple plug-and-play procedure: remove the old switch, snap in the new one, and reconnect the harness. For models that use the 8318084 part number, the Durable 8318084 Washer Lid Switch Replacement Part is a compatible option that includes the green grounding wire. This is one of the few repairs where you can go from diagnosis to completion in under 15 minutes.
If you need more detail on this specific component, our guide on how to fix whirlpool washing machine lid lock covers the lock mechanism and switch replacement in depth.
The decision criterion here is straightforward: if the switch fails the continuity test, replace it. There is no scenario where a faulty lid switch can be repaired with contact cleaner or bending the metal tab back into shape — these switches are sealed units, and attempting to repair them is a temporary fix at best. The part is cheap enough that replacement is always the rational choice.
When the Problem Is Not the Pump, Hose, or Switch
If you have verified that the pump motor is electrically sound, the impeller spins freely, the hose is clear, and the lid switch passes continuity testing, the problem becomes more complex. At this point, you are looking at either a faulty control board or a wiring harness issue.
The control board is the brain of the washer. It sends the signal to the pump motor when the cycle reaches the drain phase. If the board fails, the pump never receives power, even though the pump itself is functional. Testing the control board requires a multimeter and a wiring diagram, which you can usually find printed on the inside of the machine’s cabinet or in the service manual online.
Here is the decision criterion that changes your approach: If you have already spent more than two hours on diagnosis and the machine is more than seven years old, the economic trade-off shifts. A new control board costs between $100 and $200, and the labor to install it is significant. If your washer is older and has other worn components, the rational analyst’s choice is to compare the repair cost against the price of a new machine. This is not a defeatist attitude; it is a cost-benefit analysis based on the remaining lifespan of the appliance.
Before you give up, check the wiring harness between the control board and the pump. Look for chewed wires (rodents love the warmth of appliance cabinets), corroded connectors, or loose terminals. A simple reseating of a connector has fixed many “dead pump” issues without any parts purchase.
One additional check worth performing: measure for voltage at the pump terminals during a drain cycle. This requires running the washer with the top panel removed and the multimeter set to AC voltage. If the pump receives 120V but does not run, the pump is faulty despite passing the resistance test. If the pump receives no voltage, the problem is upstream — in the control board, the wiring, or the lid switch circuit. This test definitively separates the pump failure from the control failure, and it is the single most informative measurement you can take.
Verifying the Fix and Confirming Normal Operation
Once you have replaced the suspected component, the verification process is just as important as the diagnosis itself. A repair is only complete when the washer demonstrates normal behavior through a full drain cycle, not just a brief pump activation.
Reconnect the washer to power and select the drain-and-spin cycle (or run a short wash cycle if you prefer). Watch the machine through the entire drain phase. A healthy system should evacuate the tub within 2-3 minutes for a standard load. Listen for the pump motor — it should produce a steady, low hum without rattling or grinding. If you hear a high-pitched whine, the pump may be struggling against a partial clog that you missed. If the pump runs but the water level does not drop, you have a suction-side leak or a broken impeller that spins without gripping water.
After the drain cycle completes, open the lid and confirm the drum is empty. Then run a second complete cycle with a small load of laundry to verify the machine handles the full sequence: fill, wash, drain, and spin. This second cycle is your success check. If the washer completes it without leaving standing water, the repair is confirmed.
If the washer still fails to drain after your repairs, stop and reassess. Do not repeatedly run cycles with standing water — this can damage the pump motor or the control board through prolonged strain. Escalate to a professional technician if you have exhausted the three primary suspects and the voltage test points to the control board. At that stage, the cost of a service call is justified by the complexity of the remaining diagnosis.
Frequently Asked Questions
Why is my Whirlpool washer not draining but spinning?
If the washer spins but does not drain, the drain pump may be running but unable to push water out due to a clogged hose, or the pump impeller may be broken and spinning without creating suction. Check the drain hose for kinks and the pump filter for debris first. If those are clear, the pump motor may be weak and need replacement.
How much does it cost to fix a Whirlpool washer that won’t drain?
If you do the repair yourself, the cost is typically between $15 and $80, depending on whether you need a new lid switch or a drain pump. Hiring a professional will cost between $150 and $350, including the service call fee and parts markup.
Can a clogged drain hose cause the washer to stop mid-cycle?
Yes. If the pump cannot push water out, the control board may detect an overlong drain time and abort the cycle, leaving the washer full of water. This is a safety feature to prevent the pump motor from overheating.
Is it safe to run the washer with the lid open to check the drain cycle?
No. The lid switch is a safety mechanism. Bypassing it to force a drain cycle can cause the machine to spin with the lid open, which is dangerous. Always diagnose with the power disconnected and never defeat safety interlocks.
How do I know if my lid switch is bad without a multimeter?
You can listen for a click when you close the lid. A healthy switch produces an audible click as the plunger engages. If you hear nothing, the switch may be broken. However, a multimeter continuity test is the only reliable way to confirm the switch is functional.
Final Thoughts on Your Whirlpool Washer Not Draining Fix
The path to a working washer is a process of elimination. Start with the cheapest and simplest checks — the hose and the pump filter — then move to the electrical tests for the pump motor and lid switch. In the majority of cases, one of these three components is the culprit, and the repair is well within the reach of a careful DIYer.
If you have checked all three and the problem persists, step back and evaluate the machine’s overall condition. The decision to repair or replace should be based on the washer’s age, the cost of the replacement part, and your confidence in performing the installation. For many homeowners, the whirlpool washer not draining fix is a satisfying afternoon project that saves a significant amount of money. If you run into a similar issue with a different brand, the diagnostic logic transfers directly — check the kenmore washing machine not draining fix guide or the lg washing machine not draining fix guide for brand-specific details.
Take your time, work methodically, and always prioritize safety by unplugging the machine before any inspection. Your washer is a mechanical system with predictable failure modes, and with the right approach, you can diagnose and fix it with confidence.