
Common Problems With Samsung Appliances and Solutions
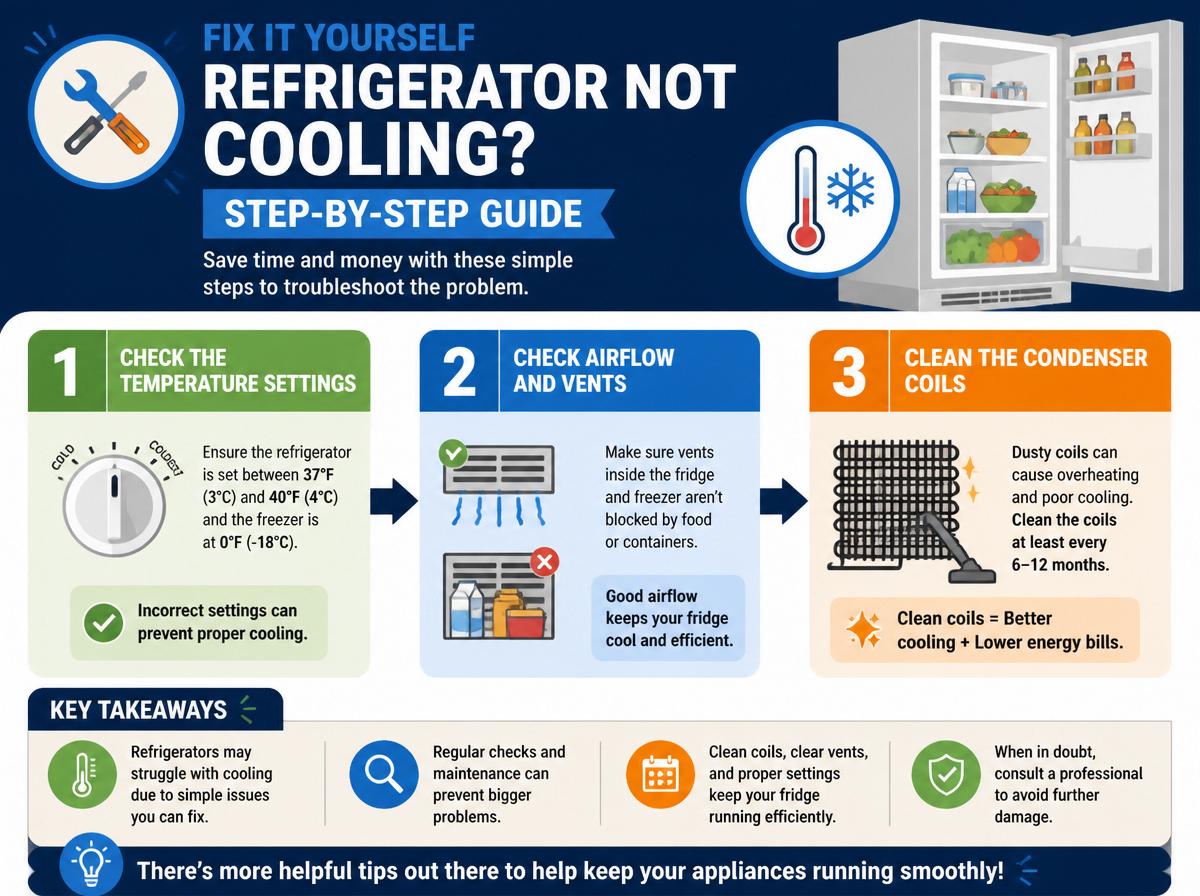
Samsung appliances can run into common problems, but don’t worry; many are easy to fix. If your refrigerator isn’t cooling, check the door seal or make sure airflow isn’t blocked. For washers, clear any clogs in the drain hose. Is your dryer refusing to heat? A clogged vent or faulty heating element might be to blame. If your dishwasher leaves residue, try using rinse aid. There’s more helpful tips out there to help keep your appliances running smoothly!
Key Takeaways
- Refrigerators may struggle with cooling due to door gasket issues or airflow obstruction; routine checks and cleaning can help maintain efficiency.
- Washers may fail to spin or drain effectively due to clogged hoses, unbalanced loads, or faulty lid switches; inspect these components for effective operation.
- Dryers not heating can stem from faulty heating elements or clogged vents; regular vent cleaning and heating element checks are essential for proper function.
- Dishwashers often face residue issues due to detergent and loading practices; using rinse aid and proper loading methods can enhance cleaning performance.
- Water leaks from appliances demand immediate attention; inspect hoses on washers and refrigerators or door seals on dishwashers to prevent costly damage.
Refrigerator Not Cooling Properly
Have you ever opened your refrigerator, only to find that it feels more like a warm oven? This frustrating situation can often happen due to a few common issues. One major culprit might be the door gasket. If it’s damaged or not sealing properly, warm air sneaks in, making your fridge work much harder. Check the gasket for any cracks or dirt; cleaning it can often restore that seal.
Another common problem involves airflow obstruction. If there are too many food items crammed inside, air can’t move freely. Imagine trying to run a race while carrying a backpack full of rocks! Remove any unnecessary items and allow space for proper airflow.
Washer Not Spinning or Draining
When a Samsung washer refuses to spin or drain, it can be quite frustrating for anyone doing laundry. Fortunately, many common causes can be easily identified, leading to simple solutions. With a few troubleshooting steps and helpful maintenance tips, anyone can get their washer back in action and keep those clothes spinning!
Common Causes Identified
A washer that refuses to spin or drain can feel like a troublesome puzzle, leaving many frustrated. Understanding common causes is the first step towards resolution. Here are three major reasons to keep in mind:
- Clogged Drain Hose: If the hose is blocked or kinked, water can’t flow properly, causing the washer to halt.
- Unbalanced Load: Overloading or uneven loads can prevent the washer from spinning effectively.
- Faulty Lid Switch: If the lid switch is damaged, the washer may think the lid is open, stopping it from functioning.
Additionally, inadequate documentation and warranty gaps can lead to missed details about product usage, making it tougher for owners to troubleshoot. Recognizing these issues empowers users to take action, alleviating frustration!
Troubleshooting Steps Explained
While it can be super frustrating when a washer suddenly stops spinning or draining, there are some helpful steps to get it back in action. Start by checking the power supply and making sure the door is securely closed. Using diagnostic flowcharts can guide users through potential issues. If error documentation indicates a specific fault, addressing that issue can solve the problem swiftly. Below is a simple table that outlines essential steps:
| Step | Action | Notes |
|---|---|---|
| Check Power | Verify it’s plugged in | Look for tripped breakers |
| Inspect Door Latch | Confirm it’s closed tightly | Listen for clicks |
| Clear Drain Hose | Remove kinks or blockages | Check for foreign objects |
| Examine Filter | Clean or replace if dirty | Routine cleaning helps |
| Run a Diagnostic Test | Follow prompts on display | Refer to manual |
Maintenance Tips Provided
Regular maintenance can make a big difference in keeping a washer running smoothly, especially when it’s not spinning or draining properly. Performing simple Preventive Inspections can help catch issues before they grow. Here are three Tool Essentials for consideration for proper upkeep:
- Lint Filter Cleaning: Regularly check and clean the lint filter. A clogged filter can stop water from draining, leading to big troubles!
- Hose Inspection: Examine hoses for leaks or cracks. If they look ill, it might be time for a replacement to avoid water damage.
- Balance Check: Make certain the washer is level; an unbalanced washer can cause spinning issues. Adjust the feet as needed for a stable setup.
Dryer Not Heating
When the dryer refuses to heat, it can turn laundry day into a frustrating experience for anyone. Diagnosing this issue promptly is essential, especially for homeowners concerned about warranty coverage and energy efficiency. Several common causes could be behind a dryer that isn’t heating.
| Potential Issue | Solution |
|---|---|
| Faulty Heating Element | Replace the heating element. |
| Clogged Vent | Clean the dryer vent. |
| Thermostat Problems | Check and replace the thermostat. |
| Blown Fuse | Replace the blown fuse. |
| Power Supply Issues | Verify power supply is stable. |
Dishwasher Leaving Residue on Dishes
Have you ever opened your dishwasher only to find a layer of residue clinging stubbornly to your dishes? It can be frustrating and puzzling! Fortunately, there are simple fixes to help resolve this issue. Here are three common causes for consideration:
- Detergent choice: Using the wrong detergent might cause residue. Make sure to choose a high-quality dishwasher detergent suitable for your machine.
- Rinse aid: Rinse aids help water slide off dishes easier, reducing spots and residues. If you’re not using one, consider adding a rinse aid to your wash routine.
- Loading dishes: If dishes are stacked too closely, they may not get clean. Make sure to load your dishes with enough space for water to reach every surface.
Oven Not Heating or Cooking Evenly
When an oven refuses to heat or cooks food unevenly, it can be incredibly frustrating for anyone trying to whip up a delicious meal. Often, this issue can be traced to problems like a faulty heating element, temperature sensor glitches, or even the need for proper oven calibration. With a bit of patience and some straightforward steps, anyone can troubleshoot these challenges and get back to cooking in no time!
Element Replacement Needed
Steam rises excitedly from a busy kitchen, but when the oven doesn’t heat properly or cooks unevenly, that enthusiasm can quickly fizzle out. If the oven is misbehaving, it might be time for an element replacement.
Here’s what to check:
- Element Compatibility: Make sure the new element works with your specific Samsung model.
- Replacement Safety: Always unplug the oven before starting, as safety comes first.
- Inspect for Damage: Look for signs of burning or wear on the old element, which could confirm it’s time for a change.
With a little patience and a few tools, replacing the oven element can restore kitchen joy. You’ve got this—baking better meals is just a step away!
Temperature Sensor Issues
Ovens can be tricky, and it’s frustrating when they don’t heat properly or cook food evenly. One common reason might be temperature sensor issues. These sensors come in different types, like thermocouples and thermistors, each playing a vital role in maintaining the right temperature. If there’s signal interference, it can cause the oven to misread the heat levels, leading to uneven cooking. Imagine baking a cake that’s burnt on one side—that’s a bummer! To tackle this, users can check connections and confirm that sensors are clear of debris. A little maintenance can go a long way. Remember, you’ve got this! With some effort, those delicious, evenly cooked meals are just around the corner.
Oven Calibration Steps
Sometimes, an oven that isn’t heating properly or cooking food evenly can leave anyone feeling baffled. Fortunately, there are simple steps for oven calibration that can solve the issue. Here’s what to do:
- Control Reset: Start by resetting the oven’s control panel. Unplug it for a minute, then plug it back in. This can refresh its settings.
- Manual Verification: Use an oven thermometer to check the actual temperature while preheating. This devours the guessing game!
- Adjust Settings: Based on the thermometer’s reading, refer to your oven’s manual for calibration instructions.
Try these steps, and you’ll be back to baking with confidence and precision in no time. Remember, everyone makes mistakes, but learning how to fix them is part of the fun!
Microwave Not Responding to Commands
What should someone do when their Samsung microwave is ignoring every button press? First, check if the Control Lock feature is turned on. This handy option locks the keypad, and sometimes users accidentally activate it. To fix this, press and hold the “Stopor “Cancelbutton for a few seconds. If that doesn’t help, there might be a touchpad failure. Here’s where you can feel the frustration, but don’t worry! Unplugging the microwave for a few minutes can reset the system, similar to giving it a nap. Once re-plugged, try pressing the buttons again. If it still won’t cooperate, check for dirt or debris on the touchpad. A quick wipe can work wonders! Don’t lose hope; many owners have faced the same hiccups. With some patience and these simple steps, the microwave could be back to happily heating meals again!
Ice Maker Not Producing Ice
When the ice maker suddenly decides to take a vacation, it can be quite a chilly surprise! An ice maker’s main job is to provide fun, crispy cubes for drinks, but sometimes it fails and leaves us with empty trays. To troubleshoot, here are three points to ponder:
- Check the water supply. Confirm the valve is open; a blocked line can halt ice production.
- Inspect the temperature settings. Make sure your fridge is at 0°F (-18°C) to keep that ideal ice texture.
- Look for clogs. Ice can build up inside, disrupting the aesthetic design of the appliance. Clearing any obstruction could resolve the issue.
If none of these steps work, it’s wise to contact a professional. Remember, a little patience and care can bring back the invigorating chill of ice for those sunny days! Don’t worry; your ice maker can be up and running soon!
Stove Burners Not Igniting
When stove burners won’t ignite, it can be frustrating, leaving home cooks feeling a bit lost. One helpful first step is to check the ignition components and make sure everything is clean and in place. Sometimes, a little cleaning on the burner heads is all it takes to get the flames roaring again—just think of it as giving your stove a mini spa day!
Check Ignition Components
Taking these steps can help restore your stove’s function, turning cooking times back into joyous moments. Remember, every problem has a solution, and with a bit of patience, you can conquer the kitchen challenges that arise!
Clean Burner Heads
Cleaning the burner heads can feel like a breeze, and it’s an important step when stove burners refuse to ignite. Regular cleaning frequency is key; with a quick wipe each week, they stay clear of grease and food debris. When it’s time to clean, safety precautions should always come first. Make sure the stove is off and cool before starting. Remove the burner heads gently, avoiding any damage. Use warm, soapy water for a thorough clean. A soft brush can help reach tricky spots. Once everything is clean and dry, reassemble the parts carefully. With a little effort, your stove burners will be ready to light up, making cooking a fun adventure again! Keep at it, and you’ll be a pro in no time!
Smart Appliance Connectivity Issues
Although many people love their smart appliances for the convenience they bring, connectivity issues can sometimes put a damper on that excitement. It’s frustrating when your fridge won’t talk to your phone! Here are some common issues and their solutions:
- Firmware Updates: Sometimes, appliances need a little TLC. Check for updates regularly, as they can fix bugs and improve connectivity.
- Network Security: Make sure your home Wi-Fi is secure! A weak signal or an open network can leave your appliances vulnerable to disconnection.
- Router Placement: Position your router in a central spot in your home. Obstacles like walls can be like annoying little gremlins, affecting signals.
Water Leaks From Appliances
When appliances start to leak water, it can feel like a mini disaster in the kitchen or laundry room. Water leaks can cause damage, and nobody wants to deal with the stress of cleaning up a mess. Understanding moisture detection can help identify problems early.
If water escapes, it’s essential to address it quickly to avoid costly insurance claims. Here’s a simple guide to possible leak sources:
| Appliance | Common Leak Causes | Solution |
|---|---|---|
| Washing Machine | Damaged hoses | Replace hoses |
| Refrigerator | Clogged defrost drain | Clear the drain |
| Dishwasher | Faulty door seal | Replace the door seal |
Stay proactive! Regular checks can save time and hassle later. If problems persist, consulting a technician may be the best step. Remember, addressing leaks early helps keep kitchens and laundry rooms dry and safe!
Frequently Asked Questions
How Can I Maintain My Samsung Appliances for Longevity?
To maintain Samsung appliances for longevity, individuals should focus on preventive maintenance and provide proper ventilation. Regularly cleaning filters and inspecting seals can also help prolong the lifespan of these appliances, promoting efficient performance.
What Warranty Options Are Available for Samsung Appliances?
When it comes to warranty options, Samsung appliances typically come with a manufacturer warranty covering defects, while extended protection plans offer additional coverage for repairs beyond the standard term, ensuring peace of mind for users.
How Do I Reset My Samsung Appliance?
To reset a Samsung appliance, one typically holds the power button for a few seconds. However, understanding reset consequences is essential, as reset alternatives like selecting specific settings may address issues without complete resets.
Where Can I Find Replacement Parts for Samsung Appliances?
In a world reminiscent of a bustling marketplace, one can find replacement parts for Samsung appliances through Certified Resellers and reputable aftermarket vendors, ensuring quality components for repairs and replacements in everyday tasks.
Are There Common Troubleshooting Steps for All Samsung Appliances?
Yes, common troubleshooting steps for all Samsung appliances include checking error codes, resetting the appliance, ensuring proper connections, and observing safety precautions. These practices help diagnose issues and maintain peak functionality across different appliance models.
Conclusion
In the world of Samsung appliances, common problems can feel like storm clouds, but with a little patience and know-how, sunshine is always on the horizon. By understanding these issues—from a fridge that won’t chill to a dryer that’s gone cold—you can take charge and turn setbacks into small victories. Remember, even the mightiest appliances need a helping hand sometimes! So gear up, grab your toolkit, and let your DIY spirit shine bright, because every challenge is a chance for improvement!
Explore This Topic
- Back to home appliance repair
- Back to appliance troubleshooting
Related guides in this cluster: