
7 Simple Steps to Remove Your Washing Machine Drain Hose
Removing your washing machine drain hose doesn’t have to be a headache. With the right tools and a bit of patience, anyone can tackle this task. It’s kind of like unwrapping a gift, only this one helps your washer work better. Imagine avoiding messy spills while keeping everything clean! Ready to jump in? Let’s take a closer look at how you can get that hose off without a hitch.
Key Takeaways
- Gather necessary tools such as pliers, a bucket, and towels before starting the process.
- Unplug the washing machine and wear protective gloves for safety during removal.
- Locate the drain hose at the back of the machine and identify any mounting clips or clamps.
- Carefully loosen and slide off the hose clamps to detach the drain hose without causing leaks.
- Ensure the connection is secure when reattaching the hose and test for leaks during a wash cycle.
Gather Your Tools and Materials
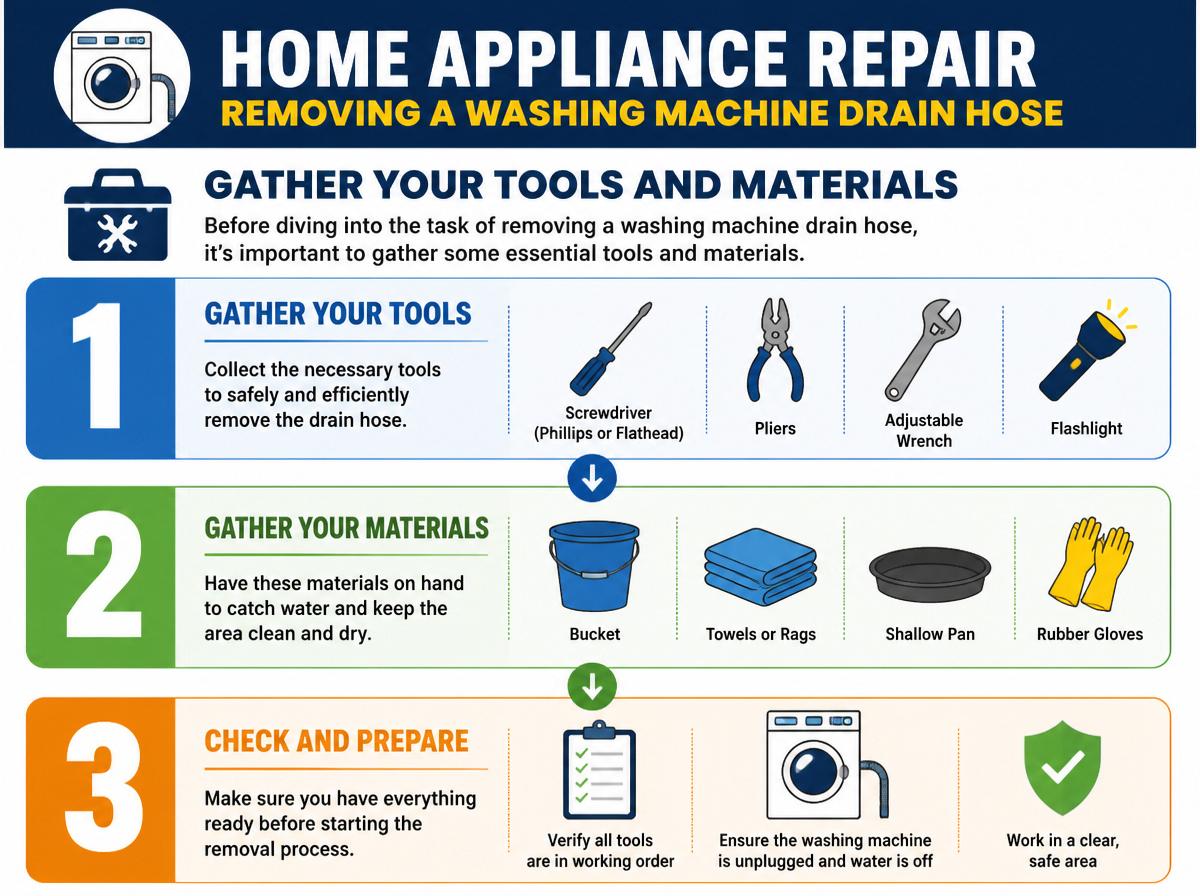
Before diving into the task of removing a washing machine drain hose, it’s important to gather some essential tools and materials. A handy tools checklist should include pliers, a bucket, and a towel to catch any water. Also, having a flashlight can help illuminate hidden spaces where hoses might be tucked away. Necessary materials like a replacement hose or hose clamps may also be needed if something is broken. It may seem a little overwhelming at first, but with the right gear at your side, it becomes so much simpler! Think of it as gathering supplies for a treasure hunt, where the treasure is a successfully removed drain hose. With a smile on your face, let’s get started on this adventure!
Unplug the Washing Machine
Before anyone starts working on the washing machine, safety is key! Unplugging the machine not only guarantees that it won’t accidentally turn on, but it also protects against potential electrical hazards. Finding the power source is typically easy—look for a nearby outlet or extension cord, and make sure to give it a gentle tug to confirm it’s completely disconnected.
Safety First
It’s important to remember that safety comes first, especially when dealing with appliances like a washing machine. By taking proper safety precautions, one can avoid potential hazards that could lead to accidents or damage. Here are three key steps to follow:
- Unplug the Machine: Disconnect the power source to guarantee that electricity is not flowing while you work.
- Wear Protective Gear: Use gloves to protect your hands from sharp objects or dirty water.
- Clear the Area: Make sure the space around the washing machine is tidy to prevent tripping hazards.
Power Source Location
Finding the power source for a washing machine can feel like a little treasure hunt, especially if it’s tucked away in a corner. Most homes have different power source types, like wall outlets or dedicated circuits. To stay safe, it’s essential to follow a few safety precautions before unplugging. First, inspect the area for frayed cords or damage; a little check can prevent mishaps. Next, locate the plug and pull it straight out, avoiding any yank or twist. Once unplugged, the washing machine becomes safe for the next step: removing the drain hose. By ensuring the power is off, not only do individuals protect themselves, but they also set the stage for a smooth and safe DIY experience.
Locate the Drain Hose
A significant step in removing the washing machine drain hose is locating it first. This simple task sets the stage for a smoother process. Here are three key tips to help find the drain hose:
- Check the Back of the Machine: Most washing machines have the drain hose attached at the back, often connected to a standpipe or a drain.
- Identify Hose Materials: Look for a flexible, usually plastic or rubber, tube. Different materials show how the washer was installed—important for understanding how to detach it.
- Follow Hose Installation Tips: Look for any mounting clips or brackets that might hold it in place. Remember, knowing how it’s secured will make removal easier.
Following these steps can save time and effort!
Disconnect the Drain Hose From the Drain
Before disconnecting the drain hose, it’s important to put safety first by turning off the power to the washing machine. With the machine powered down, the next step is to carefully locate the drain connection, where the hose attaches to the drainage system. Make sure to remove the hose clamps gently, as this will help prevent any unexpected spills—nobody wants a surprise water feature in their laundry room!
Safety First: Power Off
Ensuring safety is the first step when it comes to disconnecting the washing machine drain hose. Before diving into this task, it’s important to follow essential safety precautions to avoid any accidents. Here are three simple steps to remember:
- Unplug the Washer: Always unplug the washing machine from the electrical outlet. This eliminates the risk of electric shock during the process.
- Shut Off Water Supply: Locate and turn off the water supply valves to prevent leaks and spills.
- Have Emergency Procedures Ready: Keep a towel or bucket handy in case of unexpected water flow, ensuring a quick response if needed.
Locate the Drain Connection
Finding the drain connection is the next vital step in removing the washing machine drain hose. Typically, the connection is located at the back of the washing machine. It may be attached to a standpipe or laundry tub, depending on the drain options used in your home. Checking the hose materials is essential too, as different types may vary in how they connect. Carefully inspecting the design will help determine whether you need additional tools or not. Don’t worry if it looks a bit tricky; with patience and a keen eye, it can become a fun puzzle! Remember, you’re one step closer to your goal, and every little accomplishment counts. So grab your tools, and let’s keep going!
Remove the Hose Clamps
With a gentle tug, the time has come to remove the hose clamps that hold the washing machine drain hose in place. It’s crucial to handle this step correctly for effective hose maintenance. There are various clamp types, and recognizing them helps to avoid any mishaps. Here’s a simple approach:
- Identify the Clamp Type: Some clamps are screw-type, while others are spring-loaded. Know your friend!
- Loosen Carefully: Use a screwdriver or pliers to gently loosen the screws or pull back the spring. This guarantees minimal strain on the hose.
- Slide Off the Clamp: Once loosened, slide the clamp away from the hose. Your effort will pay off when that drain is all clear and functional!
Happy washing!
Remove the Hose From the Washing Machine
Gently pulling the drain hose from the back of the washing machine can be a satisfying first step in the process of removing it. With a little bit of tugging, the hose should easily detach. This is the perfect moment to appreciate how smooth the cleanup will be after following essential drain maintenance tips. Each small step leads to greater efficiency. If the hose shows signs of damage or wear, hose replacement techniques can be applied here. Remember, it’s normal to feel a little nervous, but taking it slow guarantees success. Keeping everything organized during this process makes it easier to put things back together. Celebrate this little victory, and take pride in improving your washing machine’s performance!
Clean or Inspect the Drain Hose
While many people overlook the drain hose during regular washing machine maintenance, taking the time to clean or inspect it can lead to a smoother laundry experience. A little effort here helps in troubleshooting leaks and avoiding bigger issues later. Here’s how to approach drain hose maintenance effectively:
- Check for Blockages: Look for lint or debris that may have accumulated inside the hose.
- Inspect the Hose for Damage: Look closely for cracks or holes that could cause leaks.
- Clean the Hose: Use warm soapy water to gently clean the hose, rinsing it thoroughly afterward.
Taking these simple steps will guarantee your washing machine runs better and can save you from sudsy surprises. A clean hose means less worry—and that’s always a win!
Reattach the Drain Hose and Test
Reattaching the drain hose is a key step in completing the washing machine maintenance process and can feel rewarding. First, align the hose with the drain outlet and push it in firmly. Secure it using the clamps or brackets that were removed earlier. Remember these hose reattachment tips: make sure it’s snug and elevated slightly to prevent clogs. Once connected, it’s time for testing drainage effectiveness. Run a short wash cycle and observe. Check for leaks or unusual sounds. If everything seems normal, congratulations—your washing machine is ready for action! If there are issues, don’t worry. Troubleshooting is part of the fun. With this simple task completed, the reward of clean clothes awaits. Celebrate your victory!
Frequently Asked Questions
Can I Remove the Drain Hose Without Unplugging the Machine?
Removing the drain hose without unplugging the washing machine is possible, but it poses risks. Drain safety may be compromised, potentially leading to hose damage and water leaks, which could ultimately require more extensive repairs.
What Tools Do I Need for This Process?
Equipped like a mechanic, she gathered the tools required: a screwdriver, pliers, and a bucket. These maintenance tips guarantee a smooth process, allowing for a swift removal of the washing machine drain hose without hassle.
How Often Should I Clean the Drain Hose?
Cleaning frequency for the drain hose should occur every six months to prevent clogs and guarantee efficient drainage. Regular hose maintenance can prolong the lifespan of the washing machine and optimize its performance.
Is It Safe to Use a Hose Longer Than the Original?
Using a longer drain hose can compromise washing machine safety, as it may lead to improper drainage and increased likelihood of clogs. It is essential to maintain appropriate drain hose length for best performance and safety.
What Signs Indicate a Clogged Drain Hose?
To detect clogged symptoms, one might see slow drainage, water pooling, or a surprisingly enthusiastic gurgle from the drain hose. These drain hose indicators are nature’s way of signaling that all is not well.
Conclusion
Now that you’ve successfully removed and cleaned your washing machine drain hose, you’re one step closer to keeping your laundry routine smooth! Did you know that the average household does about 300 loads of laundry each year? That’s a lot of washing! So, by taking good care of your equipment, you make sure it runs well for all those clothes. Remember, a little maintenance goes a long way, and you’ve got this! Happy laundering!
Explore This Topic
- Back to home maintenance
- Back to drain hose
Related guides in this cluster: