
10 Simple Steps to Check Your Dryer Thermistor
To check your dryer thermistor, start by gathering your tools like a multimeter and screwdriver. Unplug the dryer first—safety first! Next, locate the thermistor, often found near the heating element or in the blower housing. Give it a good look for any damage. Then, measure the resistance with the multimeter, comparing it to the expected values. Clean the area gently, reinstall the thermistor, plug the dryer back in, and run a test cycle. Stick around for more tips!
Key Takeaways
- Unplug the dryer and turn off the circuit breaker to ensure safety before starting the inspection.
- Locate the thermistor, typically near the heating element or inside the blower housing.
- Use a multimeter to measure the thermistor’s resistance, comparing readings to manufacturer specifications.
- Clean the thermistor area with a soft brush and mild agents to enhance temperature-sensing accuracy.
- Reinstall the thermistor securely, then plug in the dryer and run a test cycle to check functionality.
Gather the Necessary Tools
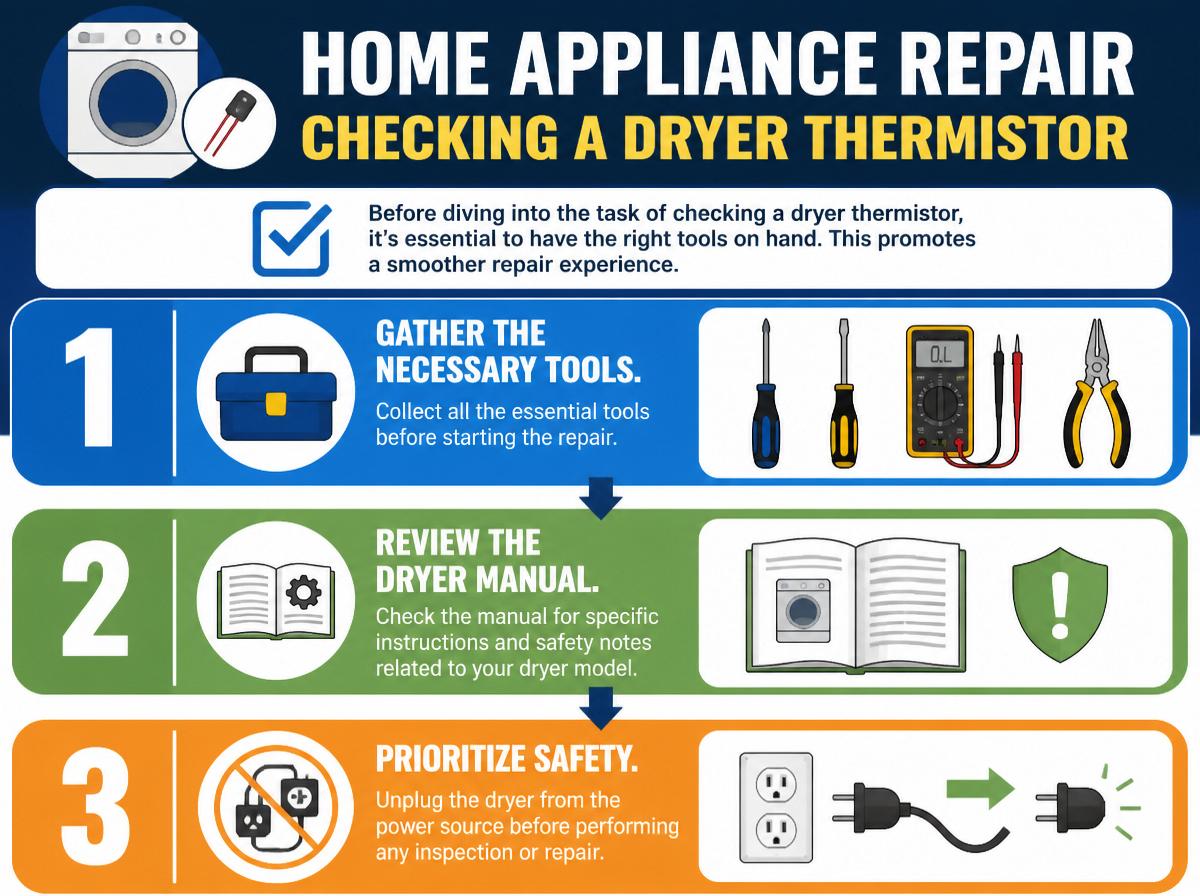
Before diving into the task of checking a dryer thermistor, it’s essential to have the right tools on hand. This promotes a smoother repair experience! A multimeter is key for measuring resistance and voltage. Additionally, having a screwdriver set can help you access the thermistor quickly. Buying tips suggest looking for tool brands like Craftsman or Stanley, known for their durability and reliability.
Online reviews can help you find the best options, so don’t be shy to read what others say. Having gloves handy is also a smart choice; they keep your hands safe from sharp edges. Remember, gathering tools is half the battle won! Feeling a bit nervous? Don’t worry! With the right tools, you’ll feel empowered to tackle this task like a pro. Just take a deep breath, check your list, and you’ll be on your way to a successful dryer repair!
Unplug the Dryer
Before starting any work on the dryer, it is essential to unplug the appliance to guarantee safety first. Finding the power source may seem simple, but being careful while disconnecting it is vital. Once unplugged, the dryer is ready for a thorough check; safety should always come first!
Ensure Safety First
When tackling the task of checking a dryer thermistor, one essential step can’t be overlooked: unplugging the dryer. This vital action protects the user from potential electrical hazards. Safety should always come first!
Here are three important safety tips to remember:
- Unplug the dryer – Verify no power flows to the unit.
- Wear gloves – Protect hands from sharp edges or debris while working.
- Use eye protection – Safeguard eyes from dust or small particles that may escape during the process.
Locate Power Source
To locate the power source for the dryer, it’s important to remember that electricity can be sneaky, so taking the right steps guarantees everything goes smoothly and safely. First, grab your breaker mapping, which shows where each circuit connects. Check this to find the breaker linked to the dryer. Once you identify the right breaker, turn it off—this is essential! Next, locate the outlet where the dryer plugs in; this is your last stop before unplugging. Gently pull the dryer away from the wall to access the power cord. To finish, safely unplug the dryer from the outlet. With these simple steps, anyone can confirm they are ready to check their dryer thermistor without worry. Happy troubleshooting!
Disconnect Properly
Unplugging the dryer may seem like a simple task, but it is an essential step that guarantees safety while working on electrical appliances. Before diving into the inspection, it’s important to disconnect the power. Here are some friendly reminders to make the process smooth:
- Safety First: Always unplug the dryer from the wall outlet to prevent any electrical shocks.
- Wire Labeling: If you need to disconnect any wires, label them carefully. This will help you remember where everything goes when you reconnect.
- Strain Relief: Check the strain relief on the power cord. It should be secure and intact to avoid any future issues.
With these steps, anyone can safely disconnect their dryer and feel confident tackling the task ahead!
Locate the Thermistor
To locate the thermistor in a dryer, one must first know where it’s usually placed. The thermistor is often found near the heating element or attached to the exhaust system, so accessing those components is key. With a bit of patience and care, anyone can uncover this tiny but important part, ensuring their dryer runs smoothly again!
Identify Thermistor Placement
Have you ever wondered where the thermistor is hiding in your dryer? Finding it is easier than you might think! This important part plays a key role in keeping your dryer safe and efficient. Historically, dryers have been designed with the thermistor in mind to monitor temperature effectively, which makes understanding its placement essential.
Here are three common locations where you might find it:
- Near the heating element: This is where it can accurately gauge the temperature.
- Inside the blower housing: It’s often positioned to help manage airflow.
- On the exhaust duct: This prevents the dryer from overheating.
Once you know these spots, you’re one step closer to making sure your dryer runs smoothly. Keep up the great work!
Access Dryer Components
Getting ready to locate the thermistor in a dryer can feel like setting out on a treasure hunt! First, take a careful look at the housing overview of the dryer. The thermistor is usually nestled near the blower housing or ducts, so keep an eye out! You may need to remove panels to reveal the inner workings, leading you to the secret pathways of the vent.
As you check the vent pathways, remember that tools like a screwdriver can be handy! With patience and curiosity, you’ll uncover the thermistor and gain insight into your dryer’s performance. So take a deep breath, get started, and know that you’ve got what it takes to tackle this exciting task! Happy hunting!
Inspect for Visible Damage
Although checking for visible damage might seem like a small step, it can make a big difference when troubleshooting a dryer thermistor. A quick inspection can reveal issues that may be causing your dryer to misbehave.
Here are three key things to look for:
- Surface Corrosion: Check for any rust or corrosion on the thermistor wires or connectors. This can prevent good electrical contact.
- Cosmetic Cracks: Look closely for small cracks or breaks on the thermistor itself. Even a tiny crack can affect its performance.
- Loose Connections: Make sure that all wires and connectors are securely attached. A loose connection can lead to malfunctions.
Taking a few moments to inspect these areas can help you identify problems before they worsen. Remember, every little step counts, and you’re well on your way to becoming a DIY dryer detective!
Test Resistance With a Multimeter
Before testing the thermistor’s resistance, be sure to set up the multimeter correctly. Carefully measuring the resistance values can reveal if the thermistor is functioning properly, so don’t rush—patience is key! Finally, interpreting those test results will help you understand if your dryer is ready to get back to work or needs a little more help.
Multimeter Setup Instructions
To begin testing the resistance of a dryer thermistor, setting up the multimeter correctly is essential. A properly calibrated multimeter provides accurate readings. Here’s how to prepare:
- Select Resistance Mode: Turn the multimeter’s dial to the resistance measurement mode, often indicated by the symbol “Ω.”
- Check Probe Polarity: Insert the black probe into the “COM” port and the red probe into the “VΩ” port. It’s important the probes are connected properly for accurate results.
- Perform Calibration Procedure: Before testing, touch the probes together; the multimeter should read zero. This step confirms the setup is accurate.
Following these steps makes sure the multimeter is ready to help identify any issues with the dryer thermistor, lending a hand in the troubleshooting process.
Measuring Resistance Values
With the multimeter all set up, it’s time to measure the resistance of the dryer thermistor. This process can highlight hidden issues and gives insight into how your dryer is functioning. The goal is to get an accurate reading while considering measurement uncertainty, which simply means acknowledging that our tools can make small mistakes.
Here’s a quick reference table for common resistance values of a dryer thermistor:
| Temperature (°F) | Resistance (Ohms) | Expected Range (Ohms) |
|---|---|---|
| 32 | 20,000 | 18,000 – 22,000 |
| 68 | 10,000 | 9,000 – 11,000 |
| 104 | 5,000 | 4,000 – 6,000 |
| 140 | 2,000 | 1,800 – 2,200 |
| 176 | 1,000 | 900 – 1,100 |
Using statistical analysis, readers can better understand their readings.
Interpreting Test Results
How can one make sense of the numbers displayed on the multimeter after testing the dryer thermistor? Understanding these readings is key for error interpretation. Ideally, thermistors will have resistance values that fit specific ranges. Here are three things to keep in mind:
- Normal Range: Most thermistors have resistance between 5,000 and 15,000 ohms at room temperature. If the reading falls outside this range, it might be faulty.
- Temperature Trends: As temperature changes, resistance will vary. Tracking these trends can reveal if the thermistor is functioning correctly.
- Consistent Results: If multiple tests yield similar results, it’s likely you’ve identified a correct reading. Inconsistent values may signal a problem, requiring further inspection.
Compare Readings to Specifications
When comparing readings from a dryer thermistor to the manufacturer’s specifications, it’s important to know what those numbers mean. These specifications tell you the ideal temperature range for the thermistor, which is crucial for your dryer’s efficiency. If your readings are far from these numbers, it may indicate a problem.
Understanding replacement thresholds can save you from future headaches. If the thermistor is out of whack, you might need to swap it out to keep your dryer running smoothly. Always remember, if your dryer is still under warranty, incorrect readings leading to unnecessary replacements could affect your warranty implications.
Clean the Thermistor Area
Cleaning the thermistor area can make a big difference in your dryer’s performance! A clean thermistor helps it sense temperature accurately, helping your clothes dry efficiently. Here’s how to do it with a friendly approach:
- Gather Supplies: Get mild cleaning agents and a soft brush ready. Avoid harsh chemicals that could damage the dryer!
- Brushing Technique: Using the soft brush, gently sweep away dust and lint around the thermistor. Be careful—too much pressure could harm delicate components.
- Check Connections: After cleaning, give a look to the connections. Make sure they aren’t loose or dirty, as this can affect readings.
Reinstall the Thermistor
Reinstalling the thermistor can feel like putting the final piece of a puzzle in place, bringing your dryer back to life! First, the user should carefully position the thermistor in its designated slot. It is essential to pay attention to the mounting orientation, ensuring it is set up just like before it was removed. A hasty installation may lead to future issues. Next, align the connector carefully; this will make sure it clicks into place securely. If the alignment is off, it could cause problems like inaccurate temperature readings. Once everything is properly aligned and snug, give it a gentle tug to confirm it’s secure. Don’t worry if it takes a couple of tries; everyone makes mistakes! With patience, the task will become easier. Remember, each step you take gets you closer to a fully functioning dryer, and that’s something to smile about!
Plug the Dryer Back In
Before bringing the dryer back to life, it’s important to reenergize the appliance by plugging it back in. This simple step is essential for that everything operates smoothly. However, a few things should be checked to avoid any mishaps.
- Inspect the socket condition: Verify the outlet is in good shape and free from damage. A faulty socket can lead to issues.
- Watch out for power surges: It’s wise to plug your dryer into a surge protector. This can save your appliance from unexpected power spikes.
- Double-check connections: Make sure the cord is securely plugged in, fitting snugly into the socket.
Once everything looks good, take a deep breath! Plugging in the dryer not only signifies progress but also brings your appliance one step closer to functioning perfectly again. Remember, every step counts in your DIY journey!
Run a Test Cycle
Starting a test cycle is an exciting moment! It’s the time to see if the dryer is working correctly. First, choose the right cycle selection based on the fabrics. Most dryers offer options to protect delicate items, ensuring they don’t get damaged during drying. This is all about fabric protection! After picking the cycle, close the dryer door securely. Then, press the start button and listen carefully. Is the dryer humming along nicely, or is it making strange noises? If it runs smoothly, that’s a great sign! However, if it doesn’t feel warm or the clothes remain damp, something might still be off. Don’t worry; this is just part of the troubleshooting dance! Remember, each step helps you understand your dryer better. So go ahead, check those little details! The dryer might just need a little love and attention to get back to its efficient self.
Frequently Asked Questions
What Is a Dryer Thermistor and Its Function?
A dryer thermistor is a temperature sensing device made from semiconductor materials. It detects and regulates the dryer’s internal temperature, ensuring peak performance and preventing overheating by providing accurate readings to the control system.
How Often Should I Check My Dryer Thermistor?
“An ounce of prevention is worth a pound of cure.Regular inspections, ideally during seasonal checks and based on usage, make sure a dryer thermistor functions efficiently, preventing potential issues and prolonging the appliance’s lifespan.
Can a Faulty Thermistor Affect Drying Performance?
A faulty thermistor can substantially affect drying performance, leading to increased energy consumption and potential fabric damage. Inconsistent temperatures may cause clothes to remain damp or over-dry, resulting in inefficient operation and harm to fabrics.
Is It Safe to Test the Thermistor Myself?
Testing the thermistor presents a delicate balance; the potential for insightful discovery juxtaposes warranty concerns and liability risks. Ultimately, individuals should weigh their technical expertise against these factors before proceeding with self-testing.
What Should I Do if I Find No Visible Damage?
If no visible damage is found, the next step involves cleaning contacts and inspecting for moisture intrusion. Regular maintenance can prevent future issues and guarantee peak dryer performance, allowing for efficient energy usage and drying cycles.
Conclusion
By following these ten simple steps, anyone can confidently check their dryer thermistor with ease. Imagine standing proudly in front of your machine, knowing you’ve done it yourself! As you plug in the dryer and hear it hum back to life, a wave of satisfaction washes over you. Remember, it’s okay to ask for help if you get stuck—every expert was once a beginner. So, roll up your sleeves, and give your dryer the care it deserves!
Explore This Topic
- Back to Dryer
- Back to appliance diagnostics
Related guides in this cluster: