How to Replace Frigidaire Gallery Water Filter
If you’re like me, you appreciate having fresh, clean water right from your refrigerator. However, it’s important to replace the water filter regularly to ensure the quality of the water. In this guide, I’ll show you how to replace Frigidaire Gallery water filter without any hassle. I’ll walk you through each step, from identifying the correct filter to testing the water flow after installation. Let’s dive in and make sure your refrigerator is running at its best!
Key Takeaways
Ensure proper identification of the water filter by checking model numbers and specifications before replacement.
Prepare the refrigerator by clearing space, unplugging it, and gathering necessary tools for a smooth installation process.
Carefully remove the old filter by twisting it counterclockwise and inspect the compartment for debris before installing the new one.
Test water quality after installation by checking for unusual tastes or odors, and monitor for leaks regularly to maintain filter effectiveness.
Steps to Identify the Correct Water Filter
When I’m looking for the right water filter, I always start by checking the model number of my appliance. After that, I review the filter specifications to ensure a proper fit. Finally, I consult the user manual and look for compatibility markings to confirm my choice.
Check Model Number
I usually find the model number on the inside of the fridge door. It helps me identify which water filter I need. I often take a picture of it for reference. Sometimes, I double-check the model number online for accuracy. This step’s crucial for making sure I get the right filter.
Review Filter Specifications
When I review the filter specifications, I make sure to note the dimensions and the type of filter needed. I often find it helpful to compare the old filter with the new one to spot any differences. I also look for the filtration capabilities to ensure it meets my needs. Checking the certification labels gives me peace of mind about its effectiveness. After that, I always consult the user manual for additional guidance.
Consult User Manual
I always grab my user manual when I need to confirm the water filter information. It helps me find the exact model I should be using. I often highlight the relevant sections for quick reference in the future. Sometimes, I even take notes on compatibility features. I know it saves me time and hassle down the line.
Identify Compatibility Markings
I often look for compatibility markings on the filter packaging. It helps me confirm that I’m choosing the right one for my Frigidaire Gallery. Sometimes, I find these markings on the product itself or in the user manual. I makes it easier to narrow down my options. Once I see those markings, I feel more confident in my selection.
Preparing Your Refrigerator for Replacement
Before I can replace my Frigidaire Gallery water filter, I need to make sure my refrigerator is ready for the task. I’ll start by clearing out some space inside the fridge to make it easier to access everything. Once that’s done, I’ll locate the water filter access to get started.
Clear Refrigerator Space
I’ve got to clear out some space in my refrigerator first. It’s a bit cluttered in there, and I need easy access to everything. I’ll take out any old food and items I don’t need anymore. Once I’ve got a clean slate, it’ll be much simpler to work on the water filter. Now, I can focus on locating the water filter access to get this process started.
Locate Water Filter Access
I’ve got to find the water filter access next. It’s usually located at the base of the refrigerator or inside the fridge itself. I’ll check the owner’s manual if I can’t spot it right away. Once I find it, I’ll be ready to move on. Now, it’s time to focus on removing the old water filter.
Removing the Old Water Filter
Now that I’ve got my refrigerator prepped, it’s time to tackle the old water filter. I’ll need to focus on a few key steps to ensure I do it right. Let’s get started with preparing for removal.
Preparing for Removal
I’ve unplugged the refrigerator to make sure everything’s safe. I’m gathering my tools, just in case I need them. I’ve checked the model number to confirm I’ve got the right filter. I’m also laying down some towels to catch any spills. I’m feeling ready to get this old filter out.
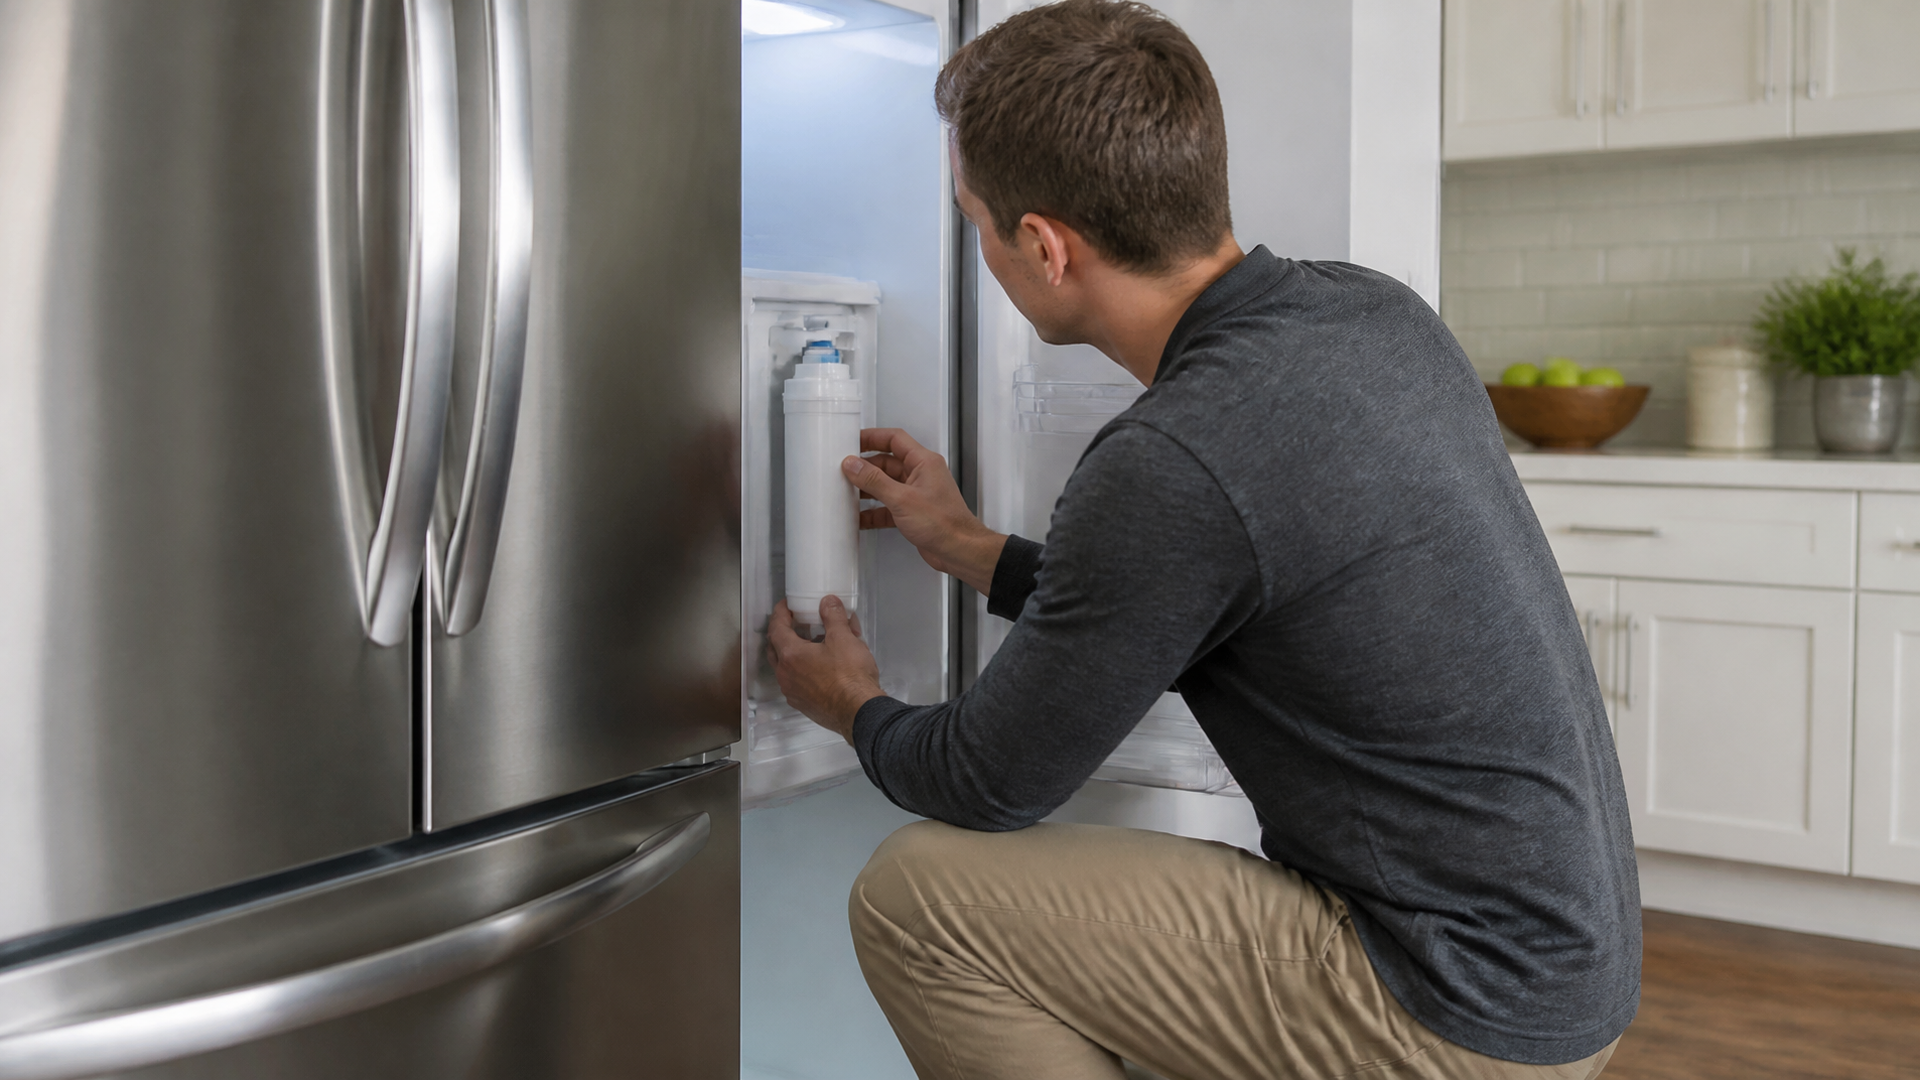
Locating the Filter
I’ve got to locate the water filter before I can remove it. Usually, it’s tucked away in the upper right corner of the fridge interior. I’ve noticed that some models have a cover that needs to be slid open. It’s important to check the manual if I’m unsure where to find it. Once I’ve pinpointed its location, I can move on to disengaging the filter.
Disengaging the Filter
I’ve found the filter compartment, and now it’s time to disengage the old filter. I’ll twist it counterclockwise until I feel it loosen. Once it’s free, I gently pull it out without spilling any water. I’m careful to avoid any drips on the floor as I handle it. Now that the old filter is out, I need to think about disposing of it properly.
Disposing of the Old Filter
I’ve got to make sure I dispose of the old filter properly. I’ll place it in a plastic bag to avoid any mess. Then, I’ll check if my local recycling program accepts it. If not, I’ll just throw it in the trash. It feels good to know I’m keeping things clean and safe.
Installing the New Water Filter
Now that I’ve removed the old water filter, it’s time to install the new one. I’ll need to ensure I’ve got the right filter and prepare the appliance properly before diving into the installation process. Once everything’s set up, I can test the water quality to make sure it’s working perfectly.
Selecting the Right Filter
I’ve gotta make sure I’m picking the right filter for my Frigidaire Gallery. I usually check the model number to match it with the correct replacement. Sometimes, I’ll read reviews to see which filters are most effective. I often rely on trusted brands to avoid any issues down the line. Once I’ve found the right one, I feel confident about the installation process ahead.
Preparing the Appliance
I’m clearing out the area around the refrigerator to give myself some space. I’ll unplug the appliance to ensure safety while I work. I’ve got to check for any water leaks before starting the installation. I’m also wiping down the filter compartment to remove any debris. Once everything’s tidy, I can move on to installing the new filter.
Installing the Replacement
I’ll start by taking the new water filter out of the packaging. Next, I’m gonna align it with the slot in the appliance, making sure it fits snugly. Once it’s in place, I’ll turn it clockwise until I hear a click, signaling it’s secure. After that, I’ll run some water through the system to clear any air bubbles. Now that the installation’s complete, it’s time to test the water quality to ensure everything’s functioning as it should.
Testing Water Quality
I’ve turned on the water supply and filled a glass with water. I’m looking for any unusual tastes or odors that might indicate a problem. It’s important to run the water for a few minutes to clear out any air bubbles. I’ll also check if the water flows smoothly without any leaks. Finally, I’m feeling pretty confident that the new filter is working as it should.
Testing the Water Flow After Replacement
Now that I’ve installed the new water filter, it’s time to test the water flow to ensure everything’s working properly. I’ll need to check the water pressure levels, assess the flow rate quality, and monitor for any leaks. This step’s crucial to confirm that the replacement was successful.
Check Water Pressure Levels
I’ll start by turning on the water dispenser to see how it flows. I’m paying close attention to the pressure; it should be steady and strong. If it’s too weak, I’ll know something’s off with the filter installation. I’ve got my measuring cup ready to check the flow rate too. Once I’m satisfied with the water pressure, I can move on to the next step.
Assess Flow Rate Quality
I’m watching the water flow closely to assess the quality. It’s important for me to notice if the stream is steady and consistent. I can’t help but feel relieved when the water flows smoothly without any interruptions. If anything seems off, I’ll need to address it right away. This part of the process gives me peace of mind that the filter’s doing its job.
Monitor for Any Leaks
I’m keeping a close eye on the area around the water filter. I’ve got a towel ready to catch any potential drips. It’s important that I check both the connections and the filter itself. I’ll look for any signs of moisture or pooling water. If I spot anything unusual, I’ll need to address it right away.
Conclusion
Replacing the water filter in my Frigidaire Gallery has been a straightforward process that I can now confidently tackle. By taking the time to identify the correct filter and prepare my fridge, I ensured a smooth replacement experience. After installing the new filter, I appreciated the importance of testing the water quality to guarantee everything was working properly. Regular maintenance, like monitoring for leaks and keeping track of replacement dates, helps keep my water fresh and clean. Overall, staying proactive in this task not only enhances the taste of my water but also contributes to the longevity of my appliance.
If you’re looking to enhance your refrigerator maintenance skills, I highly recommend checking out this informative guide on how to clean the water dispenser on an LG refrigerator. Proper cleaning not only ensures better tasting water but also extends the life of your appliance. You can find the detailed steps by visiting how to clean water dispenser on lg refrigerator.
Explore This Topic
- Back to Repair & Replacement
- Back to Repair & Replacement
Related guides in this cluster: