
How to Fix a Leaking Primo Water Dispenser
A leaking Primo water dispenser is a common problem, but most issues can be resolved with straightforward troubleshooting. This guide provides practical steps to identify the leak’s source and perform necessary fixes.
Initial Checks for a Leaking Dispenser
Begin by inspecting the most frequent leak points. This methodical approach often resolves the issue quickly without complex disassembly.
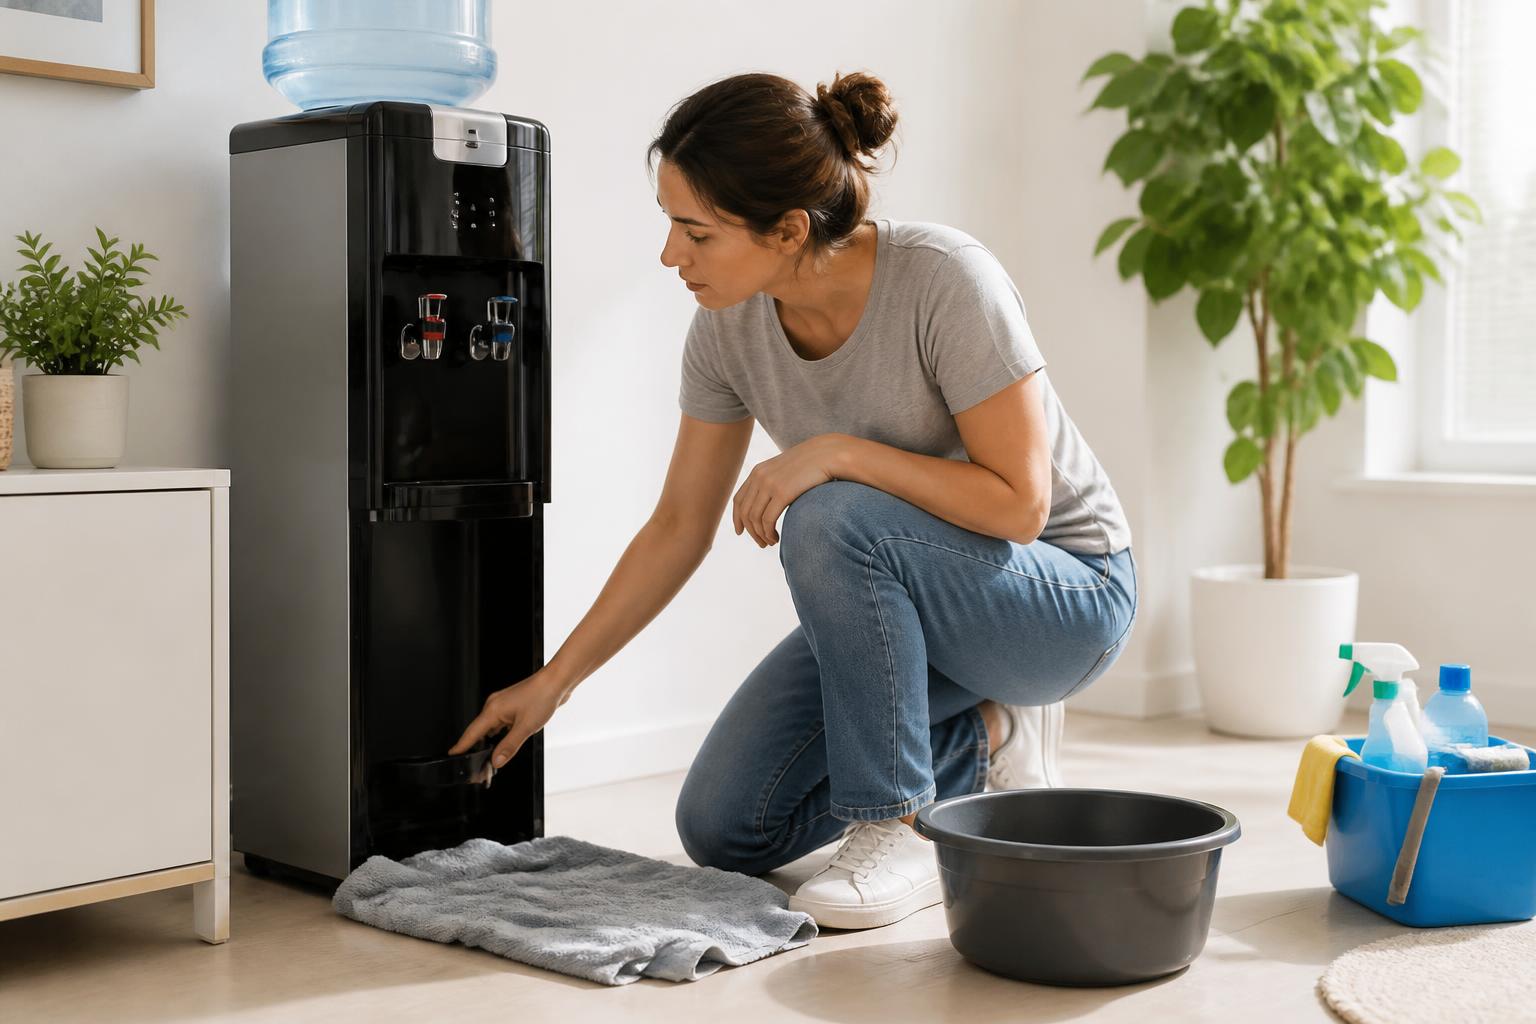
Dispenser Leaking from the Spout Area
- Bottle Seal: Examine the rubber seal on the water bottle’s neck. A missing, damaged, or improperly seated seal allows air in, forcing water out around the bottle opening and causing drips near the spout.
- Drip Tray: An overflowing or clogged drip tray can appear as a spout leak. Empty and clean the drip tray thoroughly.
- Spigot: Gently check if the spigot is loose. Hand-tighten it if needed. A worn internal seal within the spigot is a frequent cause of persistent dripping.
Dispenser Leaking from the Bottom
- Drip Tray: As noted, an overflowing drip tray is the most common reason for water pooling at the dispenser’s base.
- Bottle Seating: Ensure the water bottle is correctly positioned in its cradle. An improperly aligned bottle can cause leaks around its opening.

- Internal Tubing: If safely accessible, look for any visible cracks, loose clamps, or disconnected hoses in the dispenser’s internal plumbing.
Troubleshooting Internal Component Issues

If external checks don’t reveal the leak’s origin, investigate potential problems with internal parts.
Leaks Originating from the Bottom Base
Leaks appearing at the very bottom of the dispenser, often near the heating or cooling components, can signal issues with internal reservoir seals or plumbing connections.
- Disconnect Power: Always unplug the water dispenser from the electrical outlet before any internal inspection or repair.
- Inspect Reservoir Seals: The internal reservoirs for hot and cold water have seals that can degrade over time. If you can access the base, carefully look for any signs of water seeping from the reservoir’s connections.
- Check Drain Valve: Some models have a small drain valve at the bottom. Confirm this valve is fully closed and not leaking.
- Examine Internal Hoses: Inspect all visible internal hoses and their connection points for loose clamps or damage.
Leaking from the Water Valve Assembly
The water valve assembly, which controls water flow to the spigot, is a common culprit for consistent dripping, even when the dispenser isn’t in use.
- Tighten Valve Assembly: The entire valve assembly can sometimes loosen from the main dispenser body. Try gently tightening it by hand.
- Inspect Valve Seal: Internal seals within the valve are prone to wear. If hand-tightening doesn’t stop the leak, the valve assembly may need replacement. This is a common part that fails. For detailed instructions on this specific repair, consult a guide on how to replace water dispenser valve in primo water dispenser.
Quick Guide to Leak Resolution
Use this quick guide to help determine your next steps when troubleshooting a leak.
- Leak appears only when dispensing water? This points to a spigot issue or a loose bottle seal.

- Leak is constant, even when no water is being dispensed? This could indicate a faulty valve seal or an internal reservoir leak.
- Water is pooling under the entire unit? Check the drip tray and inspect internal plumbing connections for leaks.
- Noticeable dripping from the spout when the dispenser is idle? Suspect a worn valve seal within the spigot.
- Water seeping from around the bottle neck? Focus your attention on the bottle seal or ensuring the bottle is seated correctly.
Cleaning and Maintenance to Prevent Leaks
Regular cleaning and preventative maintenance are crucial for avoiding leaks and ensuring your dispenser operates reliably.
Routine Cleaning Schedule
- Drip Tray: Empty and wash the drip tray daily or every other day to prevent overflow.
- Exterior Surfaces: Wipe down the dispenser’s exterior with a damp cloth regularly.
- Bottle Seating Area: Clean the area where the water bottle sits to prevent buildup that could interfere with seals.
Descaling and Sanitizing Procedures
Mineral deposits and bacteria can accumulate inside your dispenser, potentially affecting seals and valves. Following a guide on how to clean your primo water dispenser is essential for preventing internal issues that lead to leaks.
- Unplug Dispenser.
- Remove Water Bottle.
- Drain Reservoirs: Use the hot and cold spigots to drain any remaining water.
- Sanitize: Follow your manufacturer’s instructions for sanitizing, typically involving a cleaning solution or a vinegar-water mixture. Ensure all cleaning solution is thoroughly flushed out afterward.
- Flush Thoroughly: Run several pitchers of clean water through both the hot and cold spigots to remove any residual cleaning solution. You may need to repeat this flushing process multiple times.
FUNCTION flush_dispenser(num_flushes):
 // This pseudo-code outlines a process for flushing a water dispenser after cleaning.
 FOR i FROM 1 TO num_flushes:
 dispense_water("cold", 1_liter) // Dispense 1 liter of cold water.
 dispense_water("hot", 1_liter) // Dispense 1 liter of hot water.
 log("Flush cycle " + i + " complete.") // Log the completion of each flush cycle.
 END FOR
END FUNCTION

flush_dispenser(5) // Example: Execute the flush process with 5 cycles.
When to Seek Professional Help
If the leak persists after attempting the troubleshooting steps above, or if you are uncomfortable performing internal checks, it’s time to seek professional assistance. This is especially true if the leak is significant or seems to originate from a component you cannot easily access or identify. For persistent issues or when dealing with electrical components, consult a qualified appliance repair technician or contact Primo customer support. Reviewing common issues with primo water dispensers can help identify more complex faults.
Frequently Asked Questions
Why is my Primo water dispenser leaking from the spout?
This is often caused by a worn or damaged seal within the spigot assembly, or a loose connection where the spigot attaches to the dispenser body. Ensure the bottle seal is also intact and properly seated.
Why is my dispenser leaking water from the bottom?
Leaks from the bottom typically indicate an issue with the internal reservoir seals, a loose connection in the internal plumbing, or an overflowing drip tray. Always check the drip tray first, then inspect for any visible signs of leakage from the base of the unit.
How do I stop my water dispenser from dripping?
To stop dripping, first ensure the spigot is fully closed. If it continues to drip, the internal valve seal is likely worn and needs replacement. If the drip is minor and intermittent, try a thorough cleaning and descaling; sometimes debris can interfere with the seal.