
Common Problems and Solutions for Testing Dryer Heating Elements
Testing a dryer’s heating element can reveal common problems hindering its efficiency. If clothes come out damp or drying takes forever, it may be time to check the element. Look for strange noises or error codes too. Always remember to unplug the dryer first for safety! Use a multimeter to check for continuity, and watch out for burnt terminals. With a little patience and care, anyone can tackle this task. Discover more helpful tips for successful testing ahead!
Key Takeaways
- Use a multimeter to check for continuity in the heating element; a lack of continuity indicates a failure.
- Look for burnt terminals or signs of short circuits, which can contribute to inadequate heating.
- Ensure the dryer vent is not blocked, as this can hinder hot-air escape and drying efficiency.
- Regularly inspect the lint filter and clean it after every use to maintain airflow and efficiency.
- Assess the dryer’s age and repair history to decide whether to repair the heating element or replace the unit.
Understanding the Role of the Heating Element
The heating element is like the heart of a dryer, pumping warmth into the drum to dry clothes efficiently. This essential component is usually made of materials that allow for excellent thermal conductivity, meaning they easily transfer heat. Materials like nichrome, a nickel-chromium alloy, are often chosen because they can withstand high temperatures without breaking down.
When the dryer runs, the heating element warms up and sends that heat into the drum. It’s a bit like a cozy, sunny day for your wet clothes! This warmth helps evaporate moisture quickly.
Signs Your Heating Element Is Failing
When a dryer starts to show signs of trouble, it might be the heating element waving a little white flag. Inadequate drying, strange noises that make it sound like the dryer is telling a joke, or pesky error codes flashing often can all point to a failing heating element. Understanding these signs can help anyone take action before laundry day becomes a guessing game!
Inadequate Drying Performance
Noticing that clothes seem to take forever to dry can be really frustrating, especially when laundry piles up like a mountain. One common reason for this issue is vent blockage. If the dryer vent is clogged with lint or debris, hot air can’t escape properly, leaving clothes damp and sad. Another factor is load size; overloading the dryer can lead to inadequate drying. When too many items are stuffed inside, warm air cannot circulate freely, making the drying process longer. Keeping an eye on both the vent condition and the size of each load can help make sure that clothes come out fresh and dry. So, check those vents and avoid monster-sized loads for happier laundry days ahead!
Unusual Noises During Operation
Could it be that strange sounds from a dryer signal trouble? When a dryer makes noises like a belt squeal, it could mean the heating element is not functioning properly. This sound often indicates that the belt is slipping due to tension issues or misalignment. Moreover, roller wear can contribute to unusual operations, causing the drum to wobble or make rattling noises. These signs shouldn’t be ignored, as they can lead to bigger problems down the road. Keeping your dryer maintained is key! A little inspection and tightening can often fix the squealing or rattling sounds. So, if you hear those odd noises, don’t panic! Instead, check it out, and help your dryer get back on track.
Error Codes Displayed Often
Odd noises from a dryer can sometimes hint at deeper issues, particularly involving the heating element. One common sign that the heating element may be failing is the appearance of error codes. These codes, displayed by the Control Board, can help identify specific problems. If you notice an error code, consider the following:
- Check for burned-out heating elements.
- Look for faulty wiring or connections.
- Make sure the dryer has the latest Firmware Updates.
- Consult the user manual for specific error code meaning.
Safety Precautions Before Starting
Before starting any work on a dryer, safety should be the top priority. First, be sure to turn off the power to avoid any shocking surprises, and wearing protective gear can help keep everyone safe and sound. With these simple steps, anyone can feel confident while testing their dryer’s heating elements, making the process smoother and more enjoyable!
Turn Off Power
Turning off the power to a dryer is an essential step that should never be skipped. Safety first! Before diving into any testing, follow these important steps:
- Unplug the Dryer: Always unplug your dryer from the wall socket to eliminate any risk of electric shock.
- Check for Scheduled Outages: Review local utility notifications to confirm that there are no scheduled outages that might affect the power source.
- Switch Off Circuit Breaker: Locate the circuit breaker and switch it off for extra safety.
- Use a Voltage Tester: After unplugging, use a voltage tester to double-check that no electricity is flowing.
Taking these precautions will help guarantee a safe environment, allowing for a positive and worry-free testing experience!
Wear Protective Gear
After ensuring the dryer is safely powered off, the next important step involves taking personal safety seriously by wearing the right protective gear. A good pair of safety gloves and goggles should be the first on the list. They guard against sharp edges and any flying debris, ensuring the DIY experience is safe and enjoyable. Some readers might want to think about gear made from sustainable materials, making choices that are good for the planet too! When shopping for protective equipment, a quick brand comparison can reveal quality options that fit a budget, balancing safety and affordability. Remember, taking these precautions not only keeps you safe but adds to the fun of the task, making you feel like a true DIY hero!
Tools Needed for Testing the Heating Element
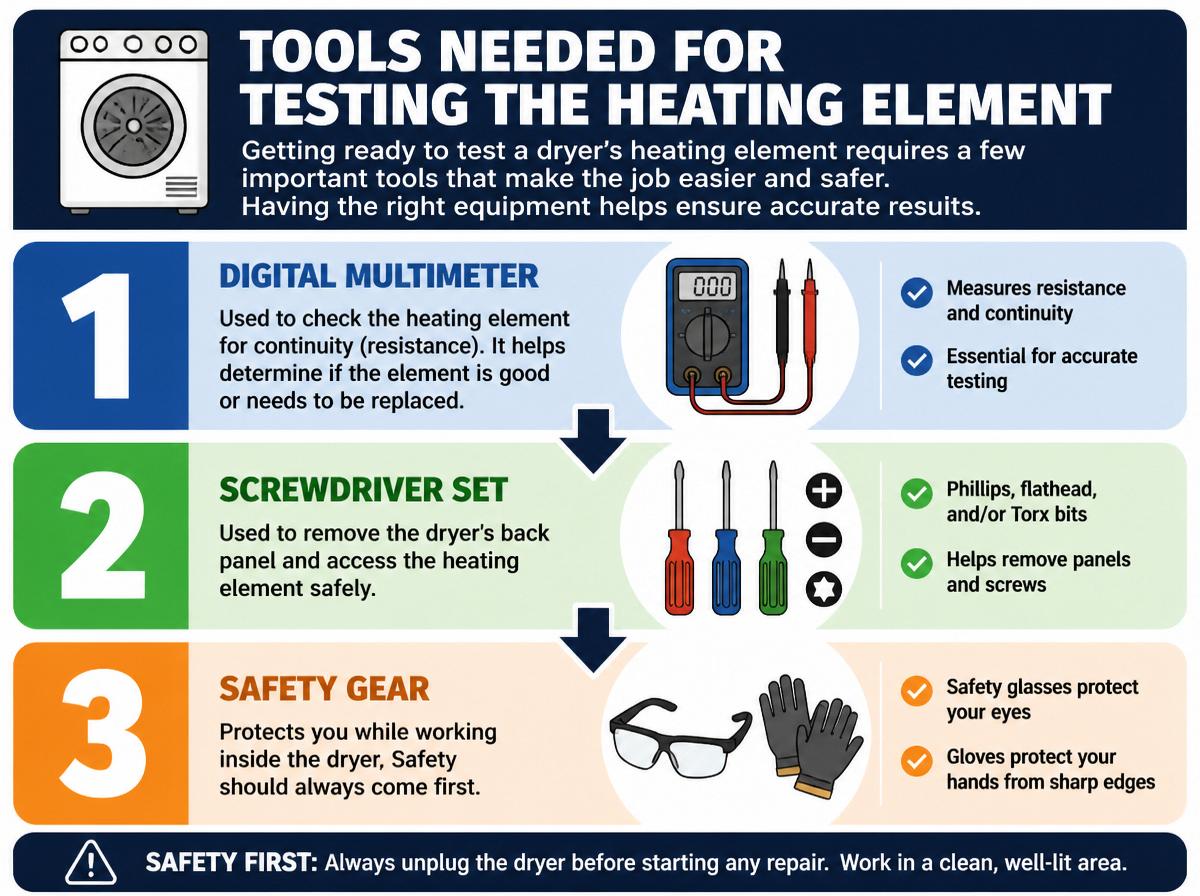
Getting ready to test a dryer’s heating element requires a few important tools that make the job easier and safer. Having the right equipment helps to guarantee accurate results and can prevent unnecessary mishaps. Here’s a handy list of tools needed for the task:
- Multimeter Selection: This device measures electrical current and resistance, allowing users to check the heating element’s functionality.
- Thermal Imager: This nifty tool visually identifies hot spots in the dryer, helping to pinpoint any issues with the heating element.
- Screwdriver Set: A basic set will help open the dryer’s access panel to reach the heating element.
- Insulated Gloves: Protecting hands is essential when working with electrical components, making insulated gloves a must-have.
With these tools in hand, anyone can confidently test their dryer heating element and keep their appliance running smoothly. Happy fixing!
Step-by-Step Guide to Testing the Heating Element
While it may seem tricky at first, testing a dryer’s heating element can be straightforward and rewarding. Begin by unplugging the dryer for safety. Next, refer to a diagnostic flowchart, which helps identify the steps needed to isolate the heating element. With a multimeter in hand, check for continuity by setting it to the ohm setting. A zero reading means the element is good; a higher reading suggests it may need replacing.
For those who want to take it a step further, using thermal imaging can highlight hot spots during operation, indicating where issues may lie. If you spot any irregularities, don’t fret! This is all part of the process. Remember, troubleshooting is like a scavenger hunt—each clue leads to the big prize: a fully functioning dryer. Stay patient and enjoy the journey of DIY repair!
Common Issues Detected During Testing
Often, the most common issues detected during testing a dryer’s heating element can be surprising. Many homeowners expect to simply find the heating element functioning well, but that’s not always the case. Here are four issues that may come up:
- Intermittent continuity – The heating element might work sometimes but not others, making it tricky to diagnose.
- Burnt terminals – Damaged connections can cause a poor electrical flow, leading to heating problems.
- Short circuits – A failure in the element could lead to electrical shorts, posing safety risks.
- Low resistance – The element should have specific resistance; if it’s too low, it may not heat properly.
These challenges can be frustrating, but identifying them is the first step towards a solution. With patience and attention, anyone can tackle these problems and get their dryer back to working order. Remember, every appliance can have its quirks!
Repair or Replace: Making the Right Choice
Deciding whether to repair or replace a dryer can feel like standing at a crossroads, with each path offering its own challenges. When considering a repair, one must weigh the cost comparison of fixing the heating element against the price of a new appliance. Sometimes, a simple repair costs less and gets the job done. However, if the dryer is old and repairs are frequent, replacing it might save money in the long run.
Warranty considerations also play a critical role. A newly purchased dryer may come with a warranty that covers certain repairs, making a quick fix more appealing. Yet, if the warranty has expired, homeowners may feel the pinch of repair costs. Ultimately, weighing these factors can help in making the right choice. A thoughtful decision guarantees dryers either serve faithfully or make space for newer, more efficient models, proving that the best path is often the most informed one.
Maintenance Tips for Longevity of Your Dryer
Regular maintenance can substantially extend the lifespan of a dryer, making it an essential task for any homeowner. Keeping a dryer in good shape doesn’t have to be intimidating. Here are four simple steps to guarantee peak performance:
- Vent Cleaning: Regularly check and clean the dryer vent. Clogged vents can cause overheating and even a fire, so guarantee airflow is clear.
- Bearing Lubrication: Every few months, apply lubricant to the dryer’s bearings. This reduces friction and helps avoid annoying squeaks while promoting smooth operation.
- Lint Filter Maintenance: Clean the lint filter after every use. A clean filter improves efficiency and reduces drying times.
- Regular Inspections: Check for any signs of wear or damage. Early detection can save a lot of grief down the road.
Frequently Asked Questions
How Long Does a Heating Element Typically Last?
A heating element typically lasts around 5 to 15 years, depending on expected lifespan and usage factors. Regular maintenance and usage intensity can greatly influence how long the element remains functional before replacement is necessary.
Can a Faulty Heating Element Cause Dryer Fires?
A faulty heating element can indeed cause dryer fires. Isn’t it alarming that electrical arcing from damaged components can ignite lint? Regular maintenance can help prevent potential hazards associated with lint buildup and overheating.
What Are the Signs of a Burnt-Out Heating Element?
Signs of a burnt-out heating element include no heat during the drying cycle and the presence of a burning smell. These indicators can suggest that the element is no longer functioning effectively and requires inspection or replacement.
Are There Specific Brands Known for Heating Element Reliability?
Certain brands, like Whirlpool and LG, boast warranties exceeding ten years. Customer reviews frequently highlight their heating element reliability, often noting fewer malfunctions. This reinforces confidence in their performance, making them preferred choices for consumers.
How Can I Prevent My Heating Element From Failing?
To prevent heating element failure, one should make sure proper ventilation and regularly perform lint removal. This maintenance minimizes overheating and blockages, promoting efficient dryer operation and extending the lifespan of the heating element.
Conclusion
To sum up, taking care of your dryer’s heating element can save you time and money. Did you know that 80% of dryer problems are related to this key part? By following the steps in this guide, you can confidently test and repair your dryer. Remember, a little maintenance goes a long way! So roll up your sleeves, and don’t worry—you’ve got this! Happy drying, and may your clothes always come out toasty!
Explore This Topic
- Back to Dryer
- Back to appliance maintenance
Related guides in this cluster: