
Check Your Dryer Motor in 7 Easy Steps
To check your dryer motor in seven easy steps, start by gathering your tools and ensuring safety by disconnecting the power. Next, access the motor by carefully removing panels. Inspect it for any visible damage like burn marks. Use a multimeter to test motor functionality, checking resistance and the capacitor. Reassemble your dryer, double-checking connections. Once everything is back in place, power it on. Listen closely for any odd sounds. The joy of a smooth-running dryer awaits! Want to keep learning?
Key Takeaways
- Gather necessary tools such as a multimeter, screwdriver, and pliers, ensuring a clutter-free workspace for efficiency.
- Disconnect power by turning off the circuit breaker and verifying with a multimeter to ensure safety during checks.
- Carefully disassemble the dryer by removing screws and panels without damaging clips, while observing model-specific differences.
- Inspect the motor and wiring for any visible damage like burn marks, ensuring all connections are secure and properly seated.
- Test the motor using a multimeter to measure resistance and capacitance, troubleshooting any issues and performing necessary maintenance checks.
Gather the Necessary Tools
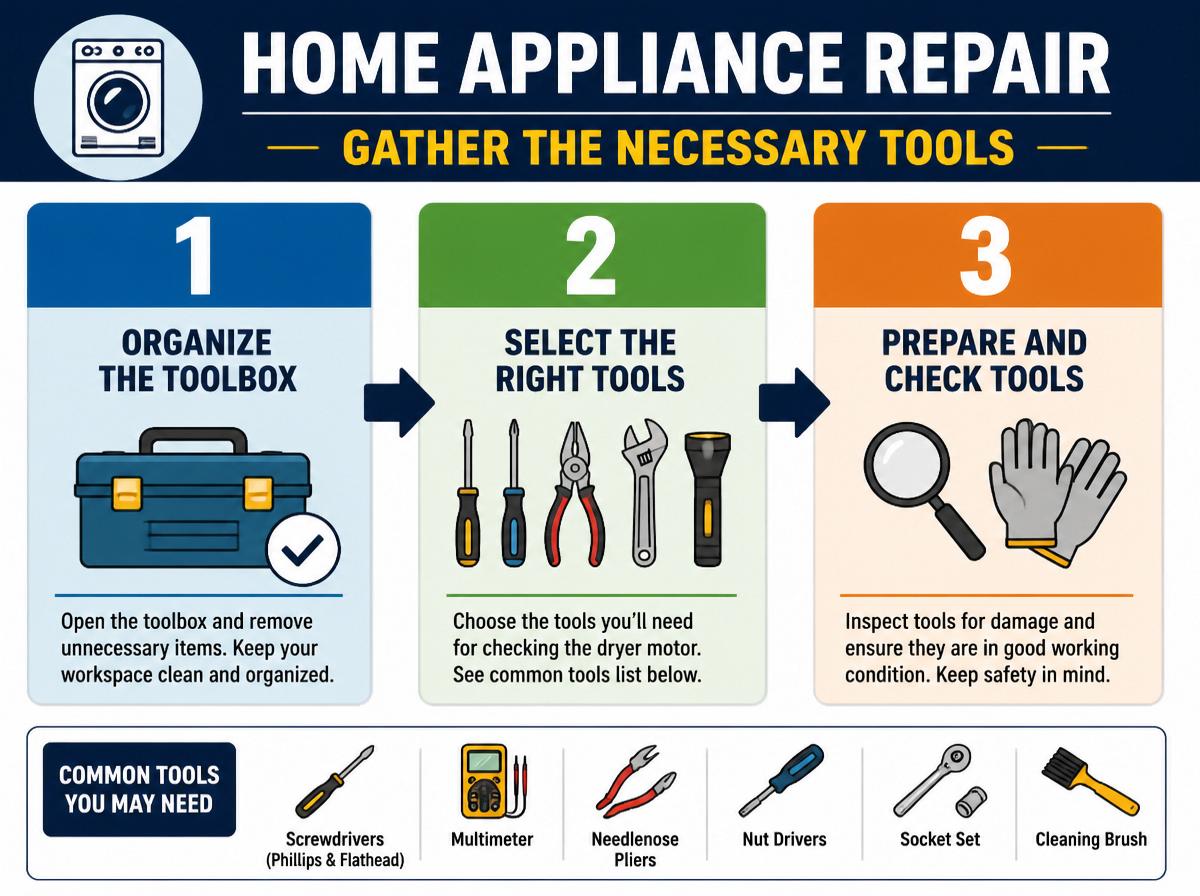
Before diving into the task of checking the dryer motor, it’s important to gather the necessary tools. First, he should organize the toolbox. A clutter-free space makes any job easier and more enjoyable. Look for a screwdriver, a multimeter, and a pair of pliers—these are usually essential for checking a dryer motor. If any tools are missing, it’s time to buy consumables so you don’t end up with a half-finished job.
He should also take a moment to check for gloves or safety glasses—protection is always a good idea! Once everything is in order, he’ll feel more confident to tackle the task. Remember, taking these small steps can turn a scary project into a fun challenge. So, breathe, smile, and get ready to begin. After all, fixing things brings a satisfying sense of accomplishment!
Safety First: Disconnect the Power
When working on a dryer motor, it’s not just important to have the right tools, but also to prioritize safety by disconnecting the power. Before diving into repairs, it’s essential to follow lockout procedures. This means turning off the circuit breaker and making sure that no power can accidentally come back on. Using electrical PPE, like gloves and goggles, can further protect against unexpected shocks.
Here’s a simple way to remember steps:
| Step | Action |
|---|---|
| 1. Locate the breaker | Find the correct circuit breaker |
| 2. Turn it off | Switch it to the ‘off’ position |
| 3. Verify power | Use a multimeter to make sure it’s off |
| 4. Gear up | Put on electrical PPE, like gloves |
Access the Dryer Motor
To access the dryer motor, one must first navigate through the dryer’s outer shell, which is like peeling away the layers of an onion. This task requires a bit of patience, but it’s absolutely doable! Here are the steps to guide the way:
- Unplug the dryer to guarantee safety while working.
- Remove the cabinet by locating the screws. Some models may differ in the screw location, so it’s essential to check your model’s manual.
- Carefully detach the front panel or top panel, depending on your model. Be gentle to avoid damaging any clips.
- Set aside all removed parts in a safe place to make reassembly easier.
Each dryer may have model differences, so stay observant. With these steps, accessing the motor becomes a breeze! Remember, you’ve got this.
Inspect the Motor for Visible Damage
When checking the dryer motor, it’s important to look for any visible damage that might cause problems. Start by checking for burn marks, which can signal overheating. Also, don’t forget to inspect the wiring connections; loose or frayed wires can lead your motor to misbehave, much like a grumpy cat refusing to come inside!
Check for Burn Marks
Before diving into any repairs, it’s important to look closely at the dryer motor for signs of trouble, especially burn marks. Burn marks signify serious issues that could lead to more damage or safety hazards. Checking for these marks can help prevent these situations. Here are a few tips to guide the inspection:
- Look for discoloration on the motor casing.
- Examine the motor’s windings for charred areas or melting.
- Review maintenance records for past issues related to overheating.
- Consider insurance claims if burn marks are found, as they may help cover repairs.
Taking these steps not only guarantees a safer appliance but also keeps it running well for years to come!
Inspect Wiring Connections
After checking for burn marks, it’s time to look closely at the wiring connections of the dryer motor. This step is essential because loose or damaged wires can cause big problems. Start by examining the wires for any signs of wear and tear. Make sure to note any wire labeling, which can help reassemble things correctly later. Different connector types may be present, so take care when disconnecting them—don’t force anything! It’s like a puzzle, and you want to verify all pieces fit just right. If any wires look frayed or broken, consider replacing them. Remember, understanding these connections can save your dryer and give you a sense of accomplishment. Keep going; you’ve got this!
Test the Motor With a Multimeter
Testing the dryer motor with a multimeter can seem tricky, but it’s a helpful skill that anyone can learn. First, it’s important to understand how to use the multimeter, which measures electricity in different ways. Then, by checking the motor’s resistance, one can troubleshoot common issues and make sure the dryer runs smoothly, sparing the user from laundry disasters!
Understanding Multimeter Usage
Grabbing a multimeter can feel like setting out on a little adventure, especially when it comes to checking a dryer motor. This handy tool helps in measuring voltage and reading resistance, making it essential for diagnosing problems. Here’s how to get started:
- Turn on the multimeter: Make sure it’s set to the right function for your test.
- Measure the voltage: Check for any inconsistencies that could indicate a failed motor.
- Read the resistance: This will help determine if there are any problems within the motor’s windings.
- Take notes: Document your findings to keep track of any issues for future reference.
With practice and patience, anyone can master multimeter usage and keep their dryer running smoothly!
Motor Resistance Testing
How can one be sure the dryer motor is in good shape? Testing the motor’s resistance with a multimeter is a great way! First, set the multimeter to measure ohms, and connect the probes to the motor terminals. The expected tolerances for the motor should be found in the dryer manual. If the reading falls within this range, it’s likely that the motor is fine. However, if there’s a temperature drift and the reading is way off, it could signal a problem. Remember, too much drift may mean the motor is struggling! Always take safety precautions, and don’t hesitate to ask for help if needed. With a little patience, one can keep that dryer running smoothly!
Troubleshooting Common Issues
Could there be a simple fix for a dryer that won’t start? Sometimes, the issues stem from common problems, making a multimeter test essential. Here are four steps to troubleshoot effectively:
- Check for vent blockage: Make sure the vent is clear to allow air to flow.
- Inspect the power supply: Verify the dryer is plugged in and the circuit breaker is not tripped.
- Test the door switch: If the door doesn’t latch, it might not start; this often requires replacement.
- Look for belt replacement needs: A worn-out belt can prevent the drum from turning, leading to dryer issues.
Check the Motor Capacitor
Checking the motor capacitor can be an essential step in solving dryer issues. This small component plays a big role in helping the motor start smoothly. Over time, the capacitor’s lifespan can shorten, leading to possible overheating or failure. To check the capacitor, one must first verify the dryer is unplugged, keeping safety front and center. Next, using a multimeter, the user can measure the capacitance. Proper capacitance sizing is vital; if the readings are lower than the specified range, it’s a sign the capacitor may need replacement. A faulty capacitor can turn a simple dryer problem into a big headache. By keeping an eye on this tiny device, users can save time and trouble down the road. If everything looks good, they can feel confident moving forward. Remember, even small steps lead to big rewards in dryer repair!
Reassemble and Test Your Dryer
Now that everything is carefully checked and ready, it’s time to reassemble and test the dryer. This is an exciting step, and with a bit of care, it’ll be smooth sailing! Here’s what to do:
- Carefully reattach all panels and screws.
- Make sure all electrical connections are secure; this is essential for proper function.
- Conduct a Noise Assessment when the dryer is powered on. Listen for any unusual sounds that could indicate problems.
- Perform Lint Prevention by cleaning the lint filter and exhaust duct before testing.
After completing these steps, power on the dryer and watch it go! If it runs smoothly and quietly, congratulations! You’ve done a fantastic job. If not, don’t worry—take another look at the connections. Remember, every expert was once a beginner, so keep up the great work and enjoy your freshly repaired dryer!
Frequently Asked Questions
How Often Should I Check My Dryer Motor?
It is advisable to check the dryer motor annually, especially if usage thresholds exceed standard levels. Regular inspection helps identify potential issues early, ensuring efficient operation and extending the appliance’s lifespan while preventing costly repairs.
Can I Run the Dryer With a Faulty Motor?
Running a dryer with a faulty motor is akin to sailing a boat with a fractured mast. It poses significant safety risks, and while some might seek temporary solutions, it’s unwise to ignore potential hazards.
What Should I Do if My Dryer Won’T Start?
If the dryer won’t start, the individual should first check the power supply to confirm it’s connected. Next, they must inspect the door switch to verify it’s functioning properly, as either issue could prevent operation.
Is It Worth Replacing the Dryer Motor?
Replacing the dryer motor may prove prudent, particularly with promising warranty options and potential for eco-friendly recycling disposal. Weighing costs against benefits is essential, ensuring decisions align with long-term laundry logistics and sustainability standards.
How Can I Prevent Dryer Motor Issues in the Future?
To prevent dryer motor issues in the future, proper ventilation should be maintained and regular lint management practiced. These steps help maintain efficient airflow, reducing strain on the motor and prolonging its lifespan.
Conclusion
In just seven simple steps, you’ve transformed into a dryer detective, uncovering the mysteries of your appliance! With tools in hand and a spirit of adventure, you bravely checked for damage, tested the motor with a multimeter, and tackled that wily capacitor. Now, as you reassemble your dryer like a pro, imagine the triumphant twirl of fresh laundry drying perfectly. You’ve got this! Remember, every dryer fix is a heroic story waiting to unfold in your home.
Explore This Topic
- Back to Dryer
- Back to appliance repair
Related guides in this cluster: