Quick Fix to Reset Whirlpool Refrigerator Control Board in 10 Steps
To quickly reset a Whirlpool refrigerator’s control board, start by gathering your tools like a screwdriver and pliers. Unplug the fridge from the wall and locate the back panel where the control board is. Remove the panel and find the small reset button. Press and hold it for about ten seconds. Then, reassemble everything, plug the refrigerator back in, and watch for signs of life! It’s easier than it sounds, and there’s more to explore if you need help.
Key Takeaways
- Gather essential tools like a screwdriver, pliers, and a multimeter for efficient preparation before resetting the control board.
- Unplug the refrigerator for at least 15 minutes to allow the control board to fully reset and refresh settings.
- Locate and remove the control board from the back panel for inspection, checking for loose connections or any burnt spots.
- Press and hold the reset button on the control board for approximately 10 seconds to initiate the reset process.
- Reassemble the control board securely, ensuring all connections are in place, and then plug the refrigerator back in for monitoring.
Gather Necessary Tools and Materials
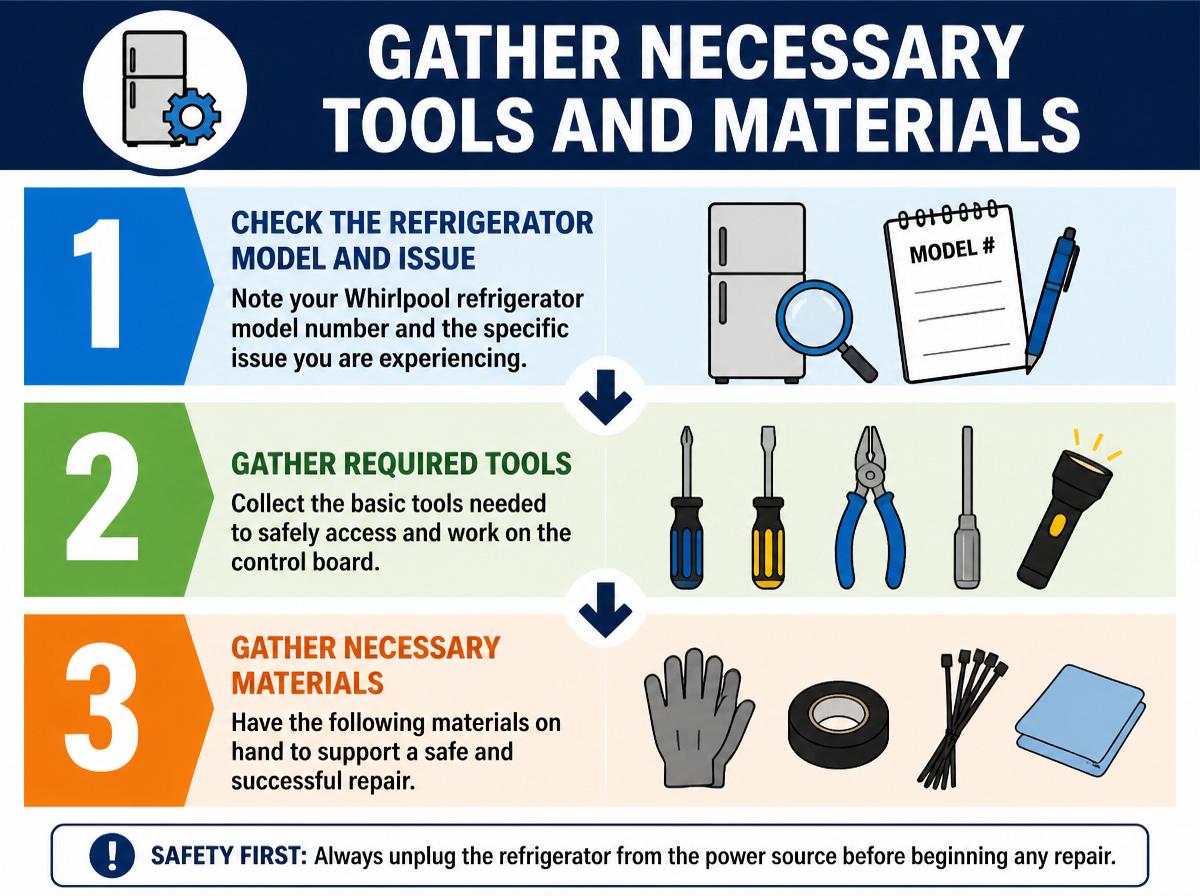
Before diving into the process of resetting a Whirlpool refrigerator control board, it’s important for one to gather the right tools and materials. A well-prepared tools checklist can make this task smoother. Essential items might include a screwdriver, pliers, and a multimeter. Don’t worry if some tools sound fancy; they’re just little helpers for the job!
Next, a materials inventory is vital. This could involve spare fuses or replacement components that might come in handy later. Remember, having everything ready before starting means fewer trips to the toolbox and more time to focus on the task. Think of it as packing snacks before a road trip—everything goes more smoothly when you’re prepared! With the right tools and materials on hand, one can tackle the reset with confidence, turning a potential headache into a manageable challenge. Let’s get those refrigerators humming again!
Unplug Your Refrigerator
To jumpstart the resetting process, the first step is to unplug the refrigerator, which might seem a bit intimidating, but it’s actually quite simple. First, verify that your hands are dry, which is important for refrigerator safety. Then, confidently locate the power cord and gently pull it from the wall outlet. This action will create a power interruption, giving the control board a chance to reset.
While you wait a few minutes, take a deep breath and relax—this is all part of the process! Unplugging your refrigerator not only helps refresh its settings but also prevents potential errors from lingering power. Once the time is up, plug it back in, and watch the magic happen. You got this! Taking these steps can feel empowering, making you more familiar with your appliance, and contributing positively to its performance. Happy fixing!
Locate the Control Board
To locate the control board in a Whirlpool refrigerator, one must start by finding the back panel, which usually hides a few surprises. It’s important to safely disconnect the power source first, ensuring nobody ends up with a shocking surprise instead of a frozen treat! Once that’s done, getting to the control board will make resetting it much easier, so readers can feel like a refrigerator superhero.
Identify Control Board Location
Finding the control board in a Whirlpool refrigerator is like starting a small treasure hunt inside your kitchen. This essential component can be cleverly hidden, so following a few straightforward steps can help locate it quickly. Here are some helpful tips:
- Check the Back Panel: Most control board types are often found along the back wall of the refrigerator or freezer.
- Look Under a Cover Plate: Sometimes, a cover plate may need removing, revealing the hidden treasure.
- Follow Wiring: Tracing wires from the compressor may lead to the control board’s location.
- Consult the Manual: A refrigerator manual typically contains troubleshooting tips to simplify your search.
With patience and a little effort, finding the control board can be a rewarding adventure!
Access Refrigerator Back Panel
After pinpointing the location of the control board, the next step involves accessing the back panel of the refrigerator. To do this, one should grab a screwdriver and gently remove the screws holding the back panel in place. Don’t forget to keep those screws safe; they’re tiny, and easier to lose than a sock in a dryer! Once the back panel is free, carefully take it off to perform a thorough back panel inspection. This is an essential part of refrigerator maintenance, as it allows access to important components. Be patient and don’t rush. You’re doing great! Just remember: every small step brings you closer to a fully functioning refrigerator. Soon, you’ll be celebrating your triumph over appliance trouble!
Disconnect Power Source Safely
Before diving into the actual work, ensuring safety is absolutely essential. Disconnecting the power source will protect against power surge accidents while working on the Whirlpool refrigerator control board. Here are some crucial safety precautions to follow:
- Unplug the refrigerator from the wall socket.
- Check the power cord for any damages or frays.
- Turn off circuit breakers related to the refrigerator for extra safety.
- Use rubber-soled shoes to prevent electrical shock.
Remove the Control Board Panel
Gently lifting off the control board panel brings one step closer to understanding the inner workings of a Whirlpool refrigerator. This action reveals different control board types, allowing enthusiasts to appreciate the engineering behind their appliances. With a little patience, users find that removing the panel is quite straightforward. A few screws may need to be unscrewed, and careful lifting will do the trick.
As the panel comes off, it’s a golden opportunity to look for any signs of trouble. Using troubleshooting tips can be incredibly helpful here! Make sure to examine for any loose connections or burnt spots, as these can signal issues. Remember, this process isn’t just about fixing; it’s about learning. Each step brings confidence and a sense of accomplishment. So, embrace the journey, and keep smiling—DIY projects can be an adventure filled with knowledge!
Identify the Reset Button
When someone starts on the journey to reset a Whirlpool refrigerator, identifying the reset button is an essential step. This small yet powerful button can help fix common issues like temperature inconsistencies and error codes. Here’s how to identify the reset button:
- Location: The reset button is usually found on the control board, often behind the panel.
- Size: It’s typically a small, round button—less than a dime—making it easy to overlook.
- Color: Look for a bright color, often red or yellow, which helps it stand out.
- Labeling: Some buttons may be labeled, indicating their specific reset button functions.
Finding this button can make the difference between a properly functioning fridge and a frustrating experience. So, take a deep breath, and engage with your refrigerator reset. You’ve got this!
Press and Hold the Reset Button
With determination, the next step is to press and hold the reset button. This tiny button plays an important role in restoring your refrigerator’s normal functions. It helps clear any control board issues, bringing everything back to life. While holding the button, think of it as giving your fridge a much-needed hug, helping it feel better!
Here’s a quick guide to reset button functionality:
| Step | Action | Outcome |
|---|---|---|
| Locate the reset button | Find the small button on the control panel | Ready for reset |
| Press and hold | Hold the button for about 10 seconds | Control board resets |
| Release and wait | Let go of the button and observe | Fridge returns to normal |
Wait for the Control Board to Reset
After pressing and holding the reset button, it’s time to wait for the control board to reset. Patience is key here; this process usually takes just a few minutes. Keep an eye out for signs that indicate success, such as lights turning on or beeping sounds, which means your refrigerator is ready to go!
Time Required for Reset
How long does it really take for a Whirlpool refrigerator’s control board to reset? Typically, the reset timeframes can vary but often range from a few minutes to about 15 minutes. It’s important to be patient during this process, as rushing can complicate troubleshooting tips. Here’s a quick list to help understand the reset duration:
- Immediate Power Off: Disconnect power for 5 minutes.
- Short Wait: Allow 2-3 minutes after reconnecting power.
- Full Cycle: Wait 10-15 minutes for the board to fully reset.
- Check: Observe the refrigerator’s behavior after 15 minutes.
Keep in mind, sometimes the best things take a little time! Patience is key, and soon the refrigerator should be ready to go.
Signs of Successful Reset
Once the power is back on and the clock has ticked away those precious minutes, it’s time to check for signs that the control board has reset successfully. A few successful indicators show that the reset effectiveness is on track. First, the refrigerator lights should illuminate, signaling that it’s getting power. Next, listen for sounds—like the compressor or fan running—confirming that everything is working hard to keep food cool. Additionally, check the display panel; temperatures should appear correctly, as expected. If the ice maker is producing cubes, that’s another great sign. Remember, patience is key during this process. Celebrate these small victories and know that this simple reset can make a big difference in a fridge’s performance!
Reassemble the Control Board Panel
As the moment to reassemble the control board panel arrives, it can feel a bit like piecing together a puzzle. With the right steps, anyone can master this panel assembly. The control board design may seem tricky, but it’s quite manageable with a little patience. Here’s how to get it done smoothly:
- Align the Components: Place the control board back in its designated spot, making sure it fits snugly.
- Secure the Fasteners: Use screws or clips to hold the board in place, ensuring everything is tight.
- Reconnect Wires: Carefully plug in the wires, matching them to their original positions.
- Test Everything: Before sealing it up, double-check that everything is connected properly.
Taking a moment to follow these steps can make the reassembly task easier and enjoyable. Soon enough, the control panel will be ready to go, and you’ll feel a great sense of accomplishment!
Plug in the Refrigerator
With the control board panel successfully reassembled, it’s time for the big moment: plugging in the refrigerator. This is where the excitement builds! Carefully find the electrical outlet and connect the refrigerator. It’s important to verify that all refrigerator components are securely in place before doing this. After all, nothing ruins a good moment like an unexpected spark or hum during electrical troubleshooting!
Once everything is plugged in, take a step back and observe. Pay attention to any sounds that may arise—those are often signs that things are working as they should. The lights inside should flicker on, signaling that the refrigerator is ready to serve its purpose again. Remember, if anything feels off, it’s okay to unplug it and double-check connections and components. You’re doing great! Taking these steps reinforces a smoother process and a well-functioning appliance for your home.
Monitor Performance for Stability
Now that the refrigerator is plugged in and ready to roll, it’s time to keep an eye on how well everything is working. Monitoring performance can help guarantee the fridge runs smoothly while you stay cool. It’s essential to look for several performance metrics and stability indicators that give clues about its health. Here are four things to check:
- Temperature Control: Make sure the inside temperature stays consistent. Fluctuations could mean trouble.
- Noise Levels: Listen for uncharacteristic sounds. A loud hum or clinking might indicate an issue.
- Energy Use: If the energy bill spikes, it may signal inefficiency in your fridge.
- Condensation: Excessive moisture inside could point to a sealing problem or a faulty component.
Monitoring these factors will help identify any rising concerns early. Stay attentive and don’t hesitate to seek help if something seems off!
Frequently Asked Questions
How Do I Know if My Control Board Needs Resetting?
Indicators that the control board may need resetting include inconsistent temperature regulation, unexplained shutdowns, or error codes. Frequent reset occurrences could signal underlying issues; monitoring these control board symptoms helps determine when a reset is necessary.
What if Pressing the Reset Button Doesn’t Work?
If pressing the reset button fails, it may indicate deeper issues; studies show 20% of appliance faults stem from electrical problems. Exploring alternative troubleshooting methods can address common issues, ensuring a thorough assessment of the refrigerator’s condition.
Is This Process Safe for All Whirlpool Models?
The process is generally safe for most Whirlpool models; however, users should always consult the specific model’s manual to guarantee compatibility and prevent potential issues regarding control board safety during any reset procedures.
Can I Reset the Control Board Without Unplugging the Fridge?
The control board can often be reset without unplugging the refrigerator, utilizing various reset methods specific to the model. It is advisable to consult the user manual for detailed instructions on the appropriate procedure.
How Often Should I Reset the Control Board?
Reset frequency for a refrigerator’s control board typically varies based on usage and issues encountered. Regular board maintenance is recommended, allowing resets only when necessary to maintain efficient operation and avoid potential complications.
Conclusion
Resetting your Whirlpool refrigerator’s control board can feel like a puzzle, and with each step, a small piece falls into place. Just like a gardener patiently tending to their plants, you’ve nurtured your appliance back to health. Now that you’ve plugged it in and are watching for smooth operation, remember that sometimes machines, like us, just need a little time to breathe. Keep an eye on your fridge, and celebrate this little victory in your DIY journey!
Explore This Topic
- Back to Refrigerator
- Back to appliance troubleshooting
Related guides in this cluster: