
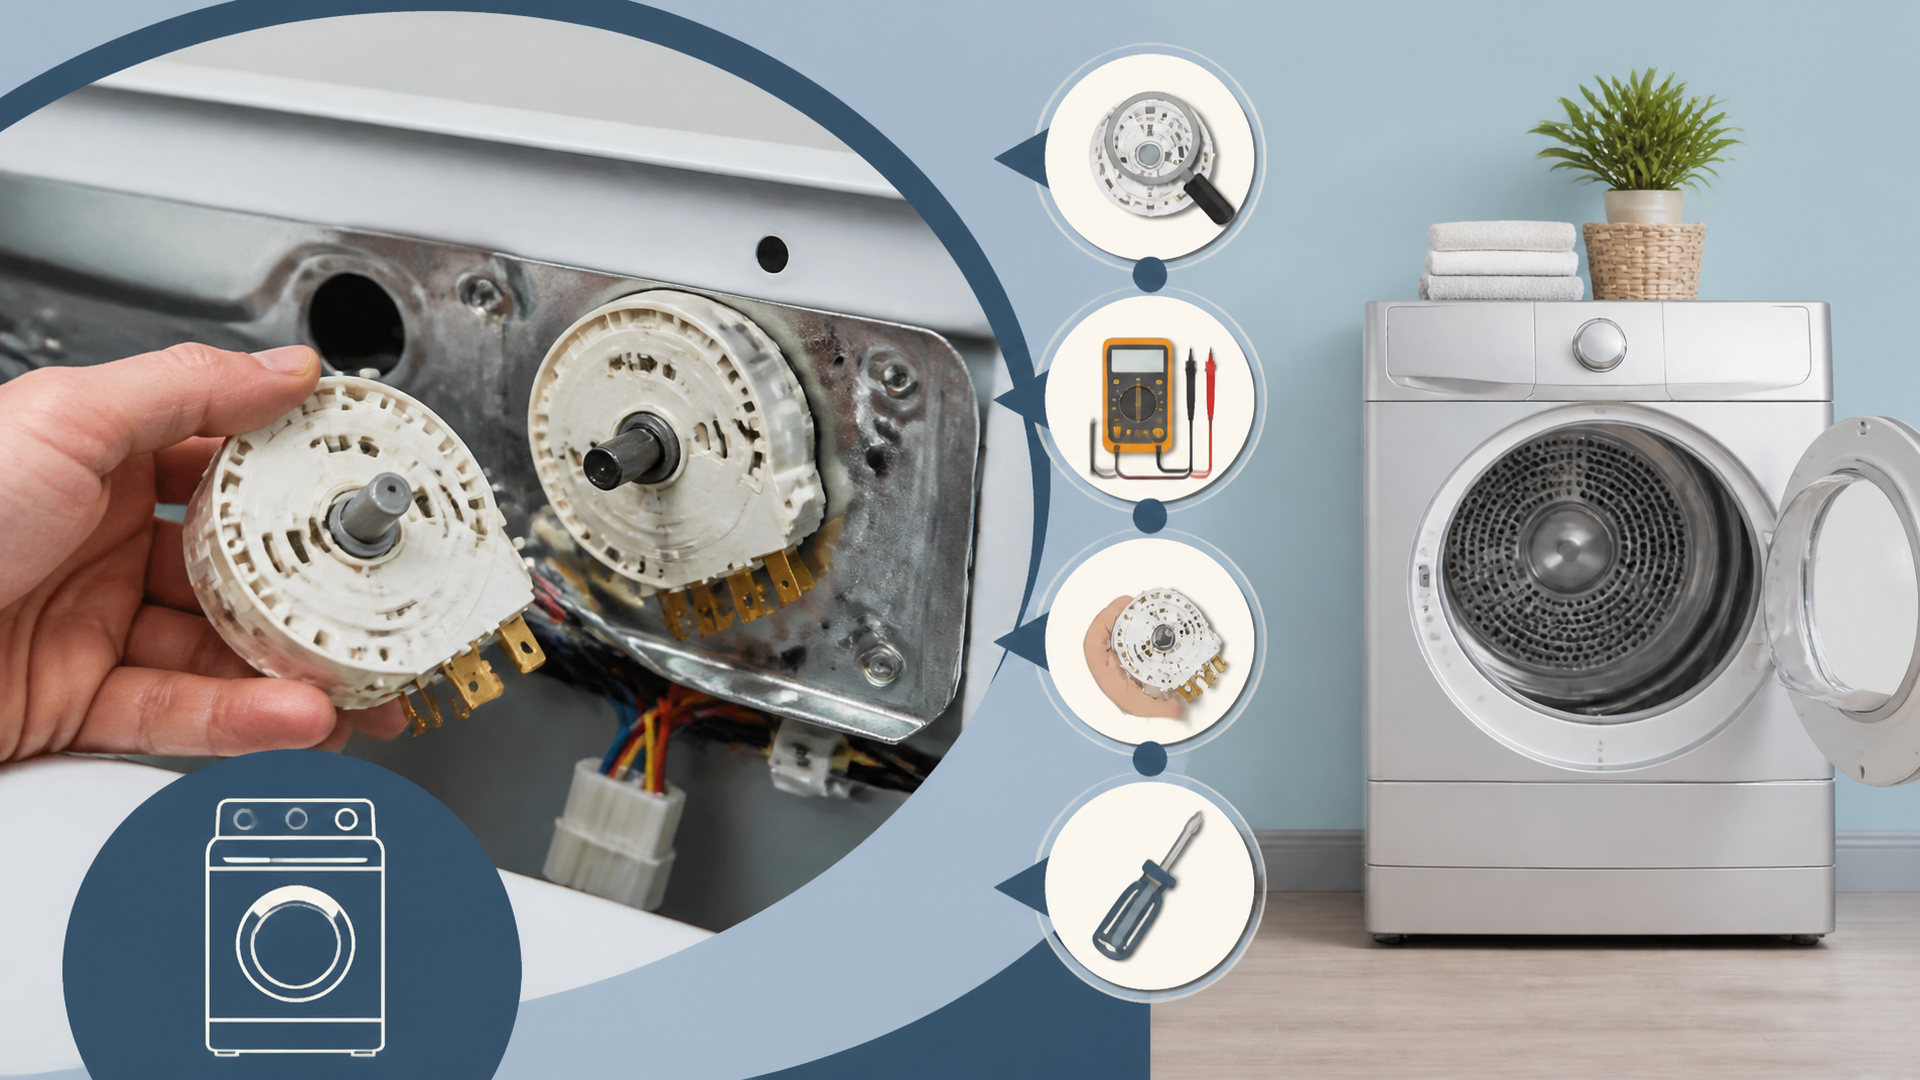
Troubleshooting Common Dryer Timer Problems: A Step-by-Step Guide to Testing
Troubleshooting common dryer timer problems can be simple and rewarding. First, check for signs like clothes that take ages to dry or a timer that won’t advance. Always prioritize safety; unplug your dryer before starting. Inspect it carefully and look for any visible damage. Using a multimeter, test for continuity in the timer and wires. If issues persist despite your efforts, replacement might be necessary. With each step, you’re getting closer to mastering your dryer, so let’s keep going.
Key Takeaways
- Check for common signs of timer malfunction such as inconsistent drying times and the timer failing to advance.
- Perform a visual inspection of the timer for physical damage, burn marks, or corrosion.
- Use a multimeter to test the timer’s continuity, ensuring low resistance indicates proper functionality.
- Inspect wiring connections for wear and ensure all connections are secure before testing again.
- If issues persist, consider resetting the timer by unplugging the dryer for 5 minutes or replacing it if faulty.
Understanding the Dryer Timer Function
The dryer timer is like the conductor of a symphony, orchestrating the entire drying process. Its job is essential for activating the correct timer settings and ensuring the dryer cycles run smoothly. When you select a setting, the timer takes charge, directing the machine to perform its tasks. Each turn of the dial or press of a button sends signals that control how long laundry will spin and tumble.
Understanding the timer is like having a secret weapon in laundry day battles. If clothes are too damp after a cycle, it’s worth checking if the right settings were chosen. Maybe the timer got a little too ambitious or just needed an extra nudge. With a little patience, everyone can master their dryer’s rhythm, turning out perfectly dried clothes each time. So, next time you do laundry, appreciate that little timer and its role in your laundry symphony!
Common Signs of a Malfunctioning Timer
When clothes come out of the dryer still damp, it can be frustrating, leaving anyone wondering if something might be wrong with the timer. Common signs of a malfunctioning timer include inconsistent drying times. If clothes take considerably longer than usual, it may signal a timer issue. Another red flag is a timer that doesn’t advance; if it sticks, clothes might end up damp. Observing timer performance patterns can provide helpful insights. For example, if the timer skips cycles or suddenly resets, it’s time for some timer troubleshooting tips. Unplugging the dryer for a bit can sometimes help reset the timer. Additionally, regularly checking lint traps and vents guarantees proper drying, reducing strain on the timer. Remember, troubleshooting is a journey, and each step brings you closer to a solution. With patience and a little know-how, anyone can get their dryer back on track!
Safety Precautions Before Starting
Before diving into dryer timer troubleshooting, it’s wise to take a few simple safety precautions that can keep anyone out of harm’s way. First, always wear appropriate safety gear, like gloves and goggles, to protect against sharp edges or electrical hazards. Accidents can happen, even to the best of us! Next, it’s essential to unplug the dryer before starting any repairs. This helps prevent any unexpected shocks, and we definitely don’t want that!
Make sure the workspace is tidy and free from clutter; a clean area helps avoid tripping hazards and makes it easier to focus on the task. Finally, if at any point the task feels too overwhelming, it’s perfectly okay to ask for help. Remember, safety comes first, and it’s important to know your limits. With these precautions in mind, one can confidently approach dryer timer issues without worry!
Tools You Will Need for Testing
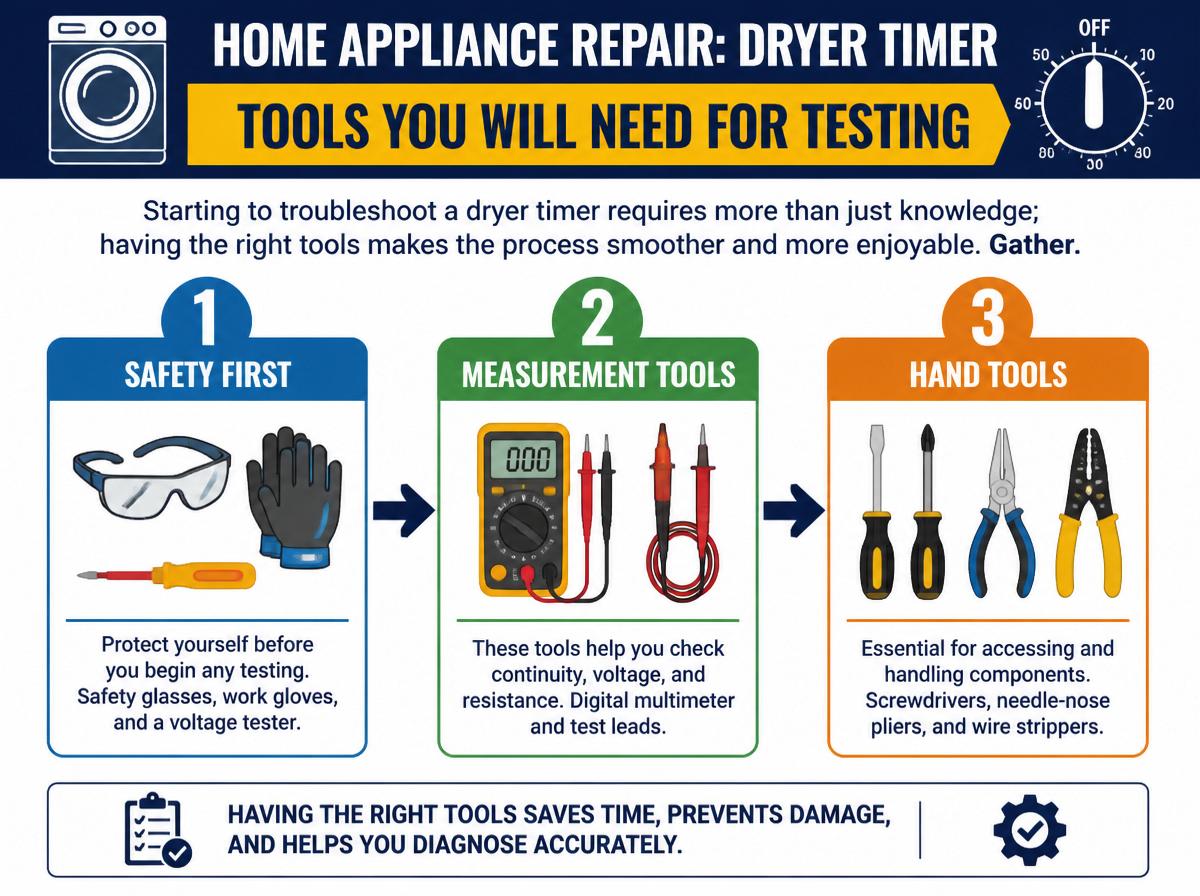
Starting to troubleshoot a dryer timer requires more than just knowledge; having the right tools makes the process smoother and more enjoyable. Gathering essential dryer maintenance tools will help guarantee success and safety. One vital tool is a multimeter, which comes in different types. It measures voltage and continuity, helping identify timer issues effectively.
Here’s a handy table outlining some essential tools for testing:
| Tool | Purpose | Importance |
|---|---|---|
| Types of Multimeters | Measure voltage and continuity | Essential for identifying problems |
| Screwdrivers | Open dryer panels | Needed for accessing inner parts |
| Wrench | Remove fasteners | Helps with disassembly |
| Electrical Tape | Secure connections | Prevents accidental shorts |
| Safety Goggles | Protect eyes during testing | Enhances personal safety |
With the right tools, anyone can tackle dryer timer issues with confidence. Happy fixing!
Visual Inspection of the Timer
When troubleshooting a dryer timer, a visual inspection is a great first step. It involves checking for any physical damage, inspecting electrical connections, and making sure the timer dial works smoothly. By taking a careful look, anyone can often spot issues that might be causing problems, turning what seems like a challenging task into a manageable one!
Check for Physical Damage
Although many might overlook it, checking for physical damage on the dryer timer is a crucial step in troubleshooting issues. This careful inspection can help identify timer damage causes, preventing further malfunction. Here are some useful physical inspection tips:
| Damage Type | Possible Causes | What to Look For |
|---|---|---|
| Cracks in Housing | Dropping or hitting | Visible cracks or breaks |
| Burn Marks | Electrical issues | Discoloration or burns |
| Loose Knobs or Dials | Wear and tear | Wobbly or detached parts |
| Rust or Corrosion | Moisture exposure | Rusting on metal components |
| Sticking Mechanism | Dirt or debris | Sticky or jammed parts |
Inspect Electrical Connections
Inspecting the electrical connections of the dryer timer can feel a bit like solving a mystery. It requires careful attention, combining timer maintenance and electrical troubleshooting skills. Here are four key steps to guide the inspection:
- Safety First: Always unplug the dryer before checking connections to avoid electric shock.
- Visual Check: Look for any frayed wires or loose connections. They can be easily overlooked but are essential.
- Tighten Connectors: If any connections seem loose, tighten them gently. Secure connections guarantee proper electrical flow.
- Check for Corrosion: Inspect for any rust or corrosion on the terminals, as this can hinder performance.
Examine Timer Dial Function
To ascertain the dryer timer is functioning properly, one of the first things to do is examine the timer dial itself. Investigating the timer dial calibration is essential; an improper calibration can lead to incorrect drying times. Look closely at the timer knob functionality, ensuring it rotates smoothly without sticking or feeling loose. If the knob feels wobbly, it might not engage the timer properly. A good rule of thumb is to check that the dial clicks into its settings, confirming it’s connected accurately inside. If things seem off, don’t worry! This is just one step in your troubleshooting journey, and with a little patience, you can get your dryer back on track. Keep up the good work!
Testing Timer Continuity With a Multimeter
When it comes to testing a dryer timer’s continuity, having the right tools makes all the difference. A multimeter will help measure whether electricity flows through the timer, ensuring it’s working properly. With a clear step-by-step approach and straightforward tips, anyone can tackle this task and feel like a DIY superstar!
Essential Tools Needed
A trusty multimeter is like a superhero tool for anyone tackling dryer timer problems. It helps guarantee proper dryer maintenance and can save time and money before considering timer replacement. Here are four essential tools needed for the job:
- Multimeter: For testing timer continuity and checking electrical connections.
- Screwdriver: To open your dryer and access the timer easily.
- Socket Wrench: Helpful for removing bolts that may be securing panels in place.
- Safety Gear: Always wear gloves and safety glasses to protect yourself.
Together, these tools transform a challenging task into an achievable project. With the right equipment, anyone can feel confident in fixing their dryer timer, making laundry day a little less of a chore!
Step-by-Step Testing
With the right tools in hand, it’s time to tackle the dryer timer testing process. First, set your multimeter to the continuity setting; this will help you identify any broken connections. Next, remove the timer from the dryer to prepare for testing. Follow these steps:
| Step Number | Action | Result |
|---|---|---|
| 1 | Disconnect the timer | Safe to test |
| 2 | Touch probes to terminals | Check for continuity |
| 3 | Listen for beeps | Indicates good timer |
| 4 | Apply timer adjustment techniques | Improve accuracy |
| 5 | Reassemble the timer | Ready for use |
Interpreting Multimeter Readings
Interpreting multimeter readings can seem tricky, but it’s much simpler than it sounds! Understanding multimeter basics is key to testing your dryer timer effectively. Here’s how to interpret those readings and check for continuity:
- Set the multimeter to the “ohms setting for continuity testing.
- Connect the probes to the timer terminals—you’ll see a change in the reading if there’s continuity.
- Look for a low resistance value, which indicates that electricity can flow through.
- If the reading is infinite or zero, the timer may need replacement.
A proper reading voltage guarantees your dryer timer functions smoothly. With a little patience, anyone can master this skill and tackle dryer issues like a pro—time to embrace those DIY adventures!
Checking the Wiring Connections
Wiring connections play an essential role in guaranteeing a dryer’s timer operates successfully. If the wiring lacks integrity or stability, the timer may not function correctly, leading to frustrating laundry days. To start, the reader should unplug the dryer, keeping safety in mind. Next, they can inspect all visible wires connected to the timer and other components. Looking for any signs of wear, fraying, or disconnection is vital. A secure connection guarantees reliable operation!
Using a multimeter can also help test each connection. Checking for continuity within wires will confirm their working condition. If loose connections or damaged wires are found, they should be repaired or replaced. Remember, a bit of patience goes a long way, and tackling these wiring issues can breathe new life into the dryer! With a little effort and determination, anyone can troubleshoot and keep their laundry routine on track.
Resetting the Timer
Sometimes, even after checking the wiring connections, a dryer’s timer might still act up. Resetting the timer could be the solution to make it work properly again. Here are some simple timer reset methods you can try:
- Unplug the Dryer: Disconnect it from the power source for about 5 minutes.
- Plug it Back In: Reconnect it and see if the timer resets itself.
- Check the Cycle Selector: Turn the cycle selector knob to the ‘off’ position, then back to the desired setting.
- Press Reset Button: If available, locate and press the reset button on your model.
Replacing a Faulty Timer
When a dryer timer starts to act funny, it could mean trouble is brewing. Recognizing the signs of timer failure is the first step; things like irregular ticking sounds or cycles that don’t end can be clear warnings. Once the culprit is identified, understanding the installation process for a new timer can turn a frustrating laundry day into a triumphant DIY victory!
Signs of Timer Failure
A dryer timer is like the conductor of an orchestra, making sure everything runs smoothly and on time. When the timer starts to fail, there are clear signs of malfunction that anyone can recognize. Spotting these signs early can save time and headaches later on. Here are some common indicators of timer issues:
- The dryer won’t start or respond.
- The timer does not advance or gets stuck.
- Clothes are still damp after the cycle.
- Odd noises or a burning smell when in use.
Understanding timer malfunction causes can help in identifying these signs. It’s important for users to stay alert to these issues, turning possible frustration into confident actions. Being aware empowers everyone to tackle their dryer problems!
Installation Process Overview
Replacing a faulty dryer timer can feel intimidating, but with a little patience and focus, it becomes a manageable task. First, unplug the dryer to guarantee safety during this dryer installation process. Then, carefully remove the back panel to access the timer. Recording the current timer setup can help avoid confusion later. Next, detach the old timer, noting how it connects to the wires. It’s like unwrapping a present—take your time! After that, connect the new timer exactly as the old one was. Secure everything back in place, reattach the panel, and plug the dryer back in. With these steps, anyone can tackle this project. Remember, if they can do it, so can you!
Preventative Maintenance Tips for Your Dryer Timer
Caring for a dryer timer can bring peace of mind, knowing that it will work smoothly when laundry day arrives. Implementing simple routine maintenance practices can extend the life of the timer. Here are four helpful tips:
- Regular Dusting: Clean around the timer area to prevent dust buildup, which can cause malfunctions.
- Check Connections: Periodically inspect the electrical connections to ascertain they are secure and free from corrosion.
- Timer Calibration Methods: Consider recalibrating the timer at least once a year to guarantee it functions accurately.
- Test Functions: Regularly test the timer settings to confirm that they respond as expected.
Frequently Asked Questions
How Long Does a Dryer Timer Typically Last?
A dryer timer typically lasts around 10 to 15 years, depending on the dryer lifespan and proper timer maintenance. Regular checks can help prolong its functionality and prevent premature issues related to wear and tear.
Can a Faulty Timer Damage Other Dryer Components?
A faulty timer can wreak havoc in a dryer, disrupting component relationships. Timer malfunctions may lead to overheating or other failures that compromise the efficiency of the motor and heating elements, causing extensive damage over time.
What Common Brands Experience Timer Issues?
Whirlpool dryers and Maytag appliances often experience timer issues. These brands may encounter difficulties with their timers due to various factors, including wear and tear, electrical problems, or manufacturing defects, leading to malfunctioning drying cycles.
Is It Worth Repairing a Dryer Timer?
Determining whether to repair a dryer timer often depends on repair cost and the individual’s ability for DIY troubleshooting. If expenses exceed a significant portion of a new unit, replacement may be more practical.
Are There Alternative Drying Methods if the Timer Fails?
Like leaves fluttering in the wind, clothes can gracefully dry outdoors. If a dryer timer fails, alternatives include air drying garments on a drying rack or clothing line, providing effective and energy-efficient solutions for drying laundry.
Conclusion
In wrapping up this dryer timer adventure, remember that each step you take is a step toward successful laundry days. With patience and the right tools, you can gracefully coax your timer back to life, ensuring those socks don’t stay damp forever! If all else fails, don’t hesitate to call in a pro—sometimes a little extra help is just what the dryer needs. Happy troubleshooting, and may your future laundry days be smooth sailing!
Explore This Topic
- Back to Maintenance & Repair Procedures
- Back to dryer maintenance
Related guides in this cluster: