How to Test a Dryer Thermal Fuse: Diagnose and Replace
A dryer that runs but produces no heat, or stops mid-cycle and won’t restart, often points to a blown thermal fuse. The quickest way to confirm is a continuity test with a multimeter — if the fuse reads infinite resistance (OL), it’s open and needs replacement. Here’s exactly how to test it step by step, what else to check while you’re in there, and how to avoid the mistake that causes the new fuse to blow again.
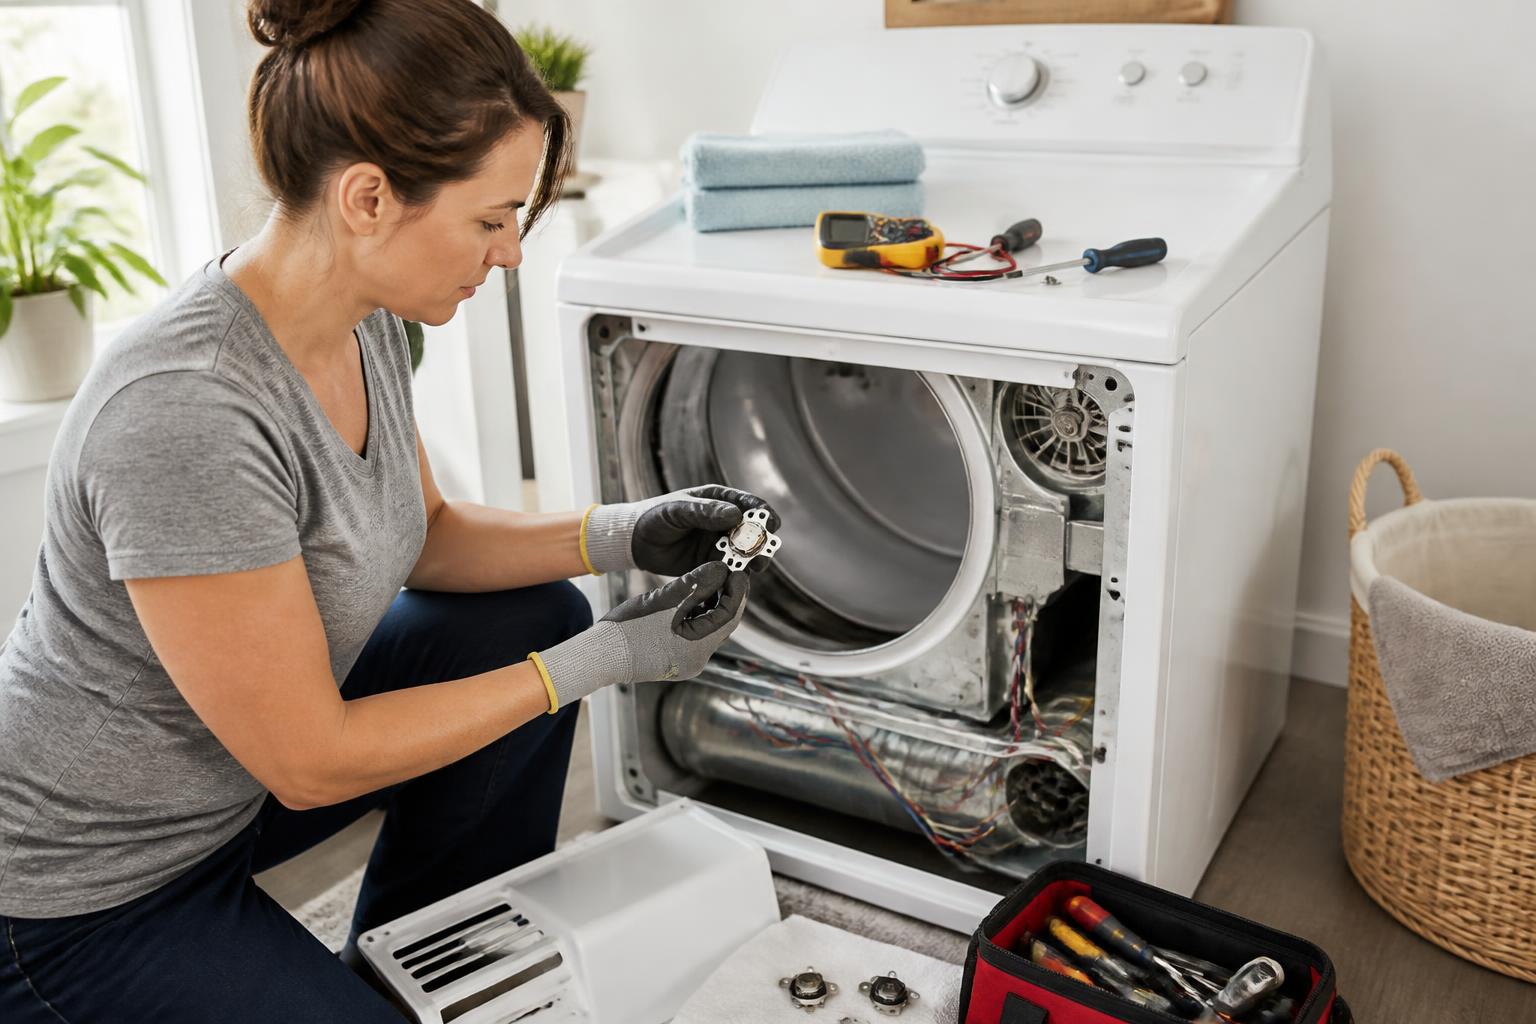
Tools, Safety, and Part Numbers
Shut off the dryer’s power at the breaker panel — not just the knob — before removing any panels. Gas dryers also need the gas supply turned off if you’re pulling the unit away from the wall.
Tools you’ll need:
– Multimeter set to continuity or resistance (Ω)
– Screwdriver set (typically Phillips #2 and a ¼-inch nut driver)
– Needle-nose pliers (for stubborn wire connectors)
– Vacuum with crevice tool and lint brush
– Safety gloves
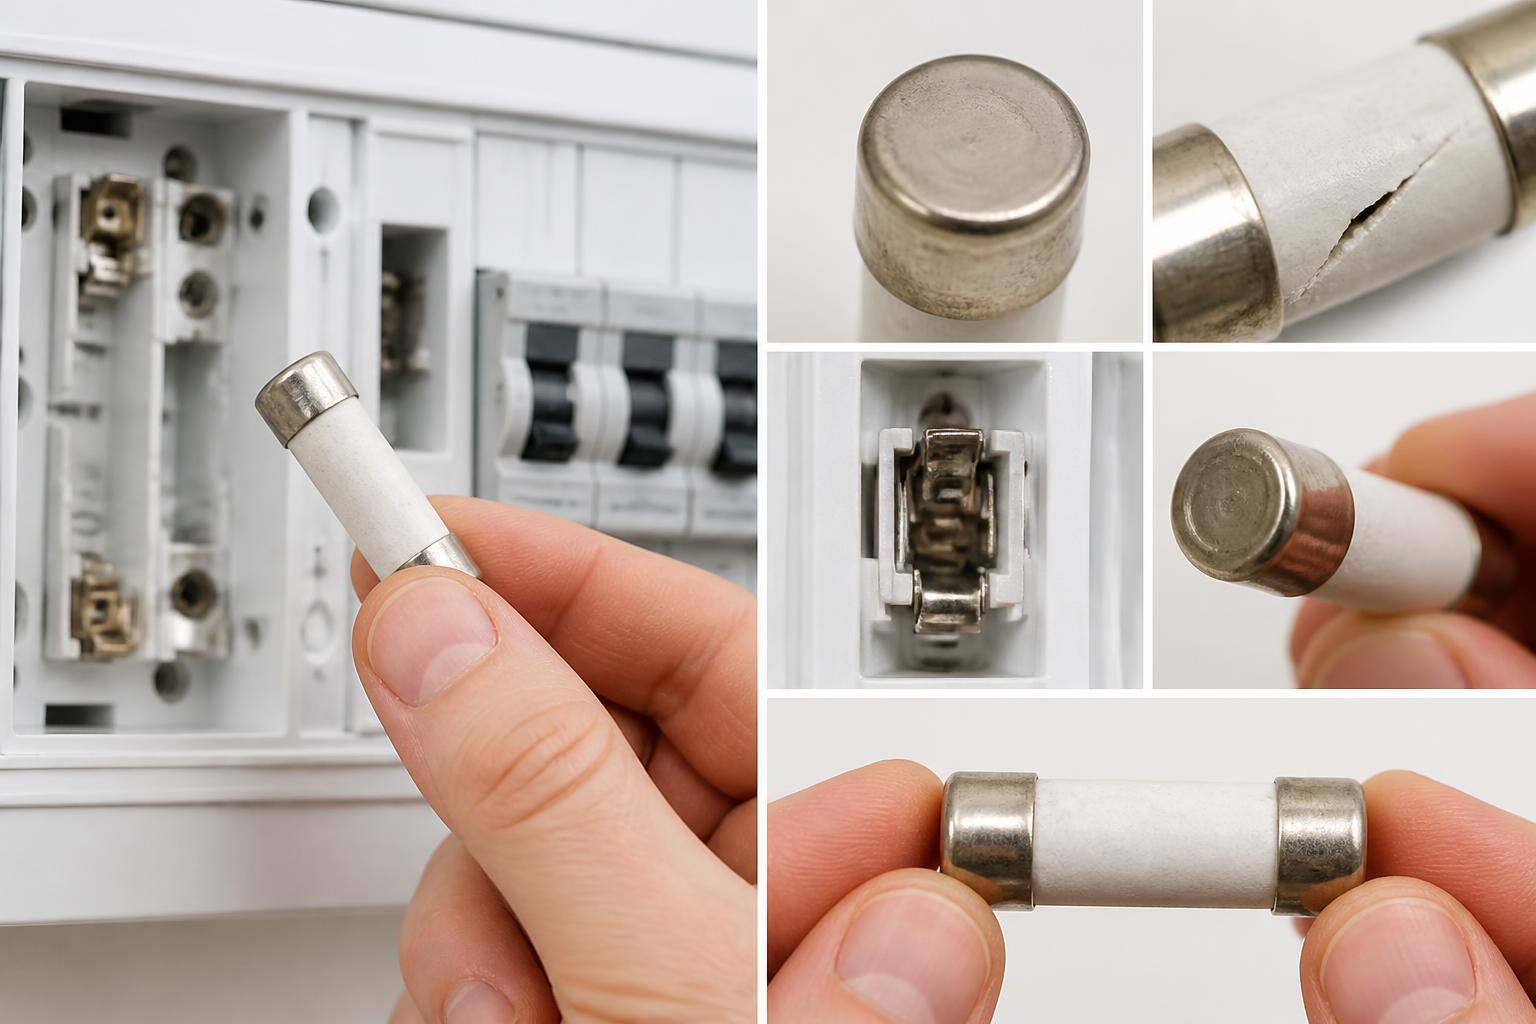
Locate the correct part number before ordering a replacement. The thermal fuse is usually a small white plastic rectangle with two wires connected to it, mounted on the blower housing or exhaust duct inside the dryer. Look for the part number stamped on the fuse body — common ones include 3392519 (Whirlpool/Kenmore), DC47-00016A (Samsung), and 279816 (LG). Order the exact OEM or equivalent aftermarket match. A kit like BlueStars [LIFETIME WARRANTY] 3387134 Cycling Thermostat 3392519 Dryer Thermal Fuse 3977393 Thermal Cut-off Switch 3977767 High-limit Thermostat Kit is a solid option for Whirlpool-family dryers since it includes the fuse plus the cycling thermostat and high-limit thermostat — parts that commonly fail together.
Step-by-Step Testing Procedure
Testing a thermal fuse takes about 10 minutes once you have the panel off. Follow this sequence exactly to avoid false readings.
Access the Fuse
Remove the dryer’s rear access panel or the lower front panel depending on your model. On most Whirlpool, Kenmore, and Maytag dryers, the thermal fuse sits on the blower housing inside the rear panel. On Samsung and LG dryers, it’s usually behind the lower front kickplate or inside the rear panel near the exhaust. Review these dryer thermal fuse inspection tips to confirm the exact location for your model — some brands hide the fuse behind a plastic cover clipped to the blower housing.
Once you can see the fuse, disconnect both wire connectors using needle-nose pliers — pull straight off, don’t twist.
Set Your Multimeter
Turn the dial to continuity (the symbol that looks like a sound wave) or the lowest resistance setting (200 Ω). Touch the two probes together — you should hear a beep (continuity) or see 0.0–0.5 Ω (resistance). If not, replace your meter batteries or probes before proceeding.
Test the Fuse
Touch one probe to each metal terminal on the fuse. Hold steady contact.
What the reading means:
– 0.0–0.5 Ω (beep): Fuse is good — continuity passes.
– OL (open line) or infinite resistance: Fuse is blown — no continuity.
A blown thermal fuse cannot be reset. It must be replaced.
Verify the Diagnosis
If the fuse tests good but the dryer still has no heat, move on to check:
– Cycling thermostat (should show continuity at room temperature)
– High-limit thermostat
– Heating element (measure resistance across its terminals — typically 8–15 Ω for electric dryers)
– Thermal cut-off (a separate safety device on some models)
For a structured walkthrough that includes testing all these components together, follow the simple steps to check dryer thermal fuse guide.
Common Thermal Fuse Failure Scenarios
Different failure patterns point to different root causes. Use this table to match what your dryer is doing to the likely problem:
| Symptom | Likely Cause | Action Needed |
|---|---|---|
| Dryer runs but no heat, then stops mid-cycle | Blown thermal fuse caused by overheating | Replace fuse and clean lint from cabinet, duct, and vent |
| Dryer works for 10–15 minutes then shuts off | Cycling thermostat or high-limit thermostat failed open | Test and replace thermostat; clean vent system |
| Dryer won’t start at all (no drum movement, no heat) | Blown thermal fuse in motor circuit | Replace fuse; check for restricted airflow |
| Dryer heats but takes 2+ cycles to dry clothes | Restricted exhaust causing gradual overheating | Clean vent run; replace fuse only if it tests open |
Each row shares a common thread: the thermal fuse is a symptom of a larger problem — restricted airflow — not the root cause. Replacing the fuse without cleaning the vent guarantees a repeat failure.
Five Checks Before You Install the New Fuse
Run through these checks before you put the replacement in. If any fail, fix it now — or you’ll be pulling the panel off again in a few weeks.
- Vent hose isn’t kinked or crushed — Push the dryer back into place and check the hose behind it. A pinch point where the hose meets the wall or floor is the #1 cause of repeated blowouts.
- Lint screen is free of fabric softener buildup — Remove the screen and hold it up to light. If it looks translucent or feels waxy, scrub it with hot water and a brush.
- Cabinet interior is clean — Vacuum all lint accumulation inside the dryer, especially around the blower wheel and the thermal fuse mounting area.
- Exhaust duct is clear end-to-end — Disconnect the duct from the dryer and the wall, then run a vent brush through the entire run. A 4-inch diameter duct clogged with more than ¼ inch of lint significantly restricts airflow.
- Outdoor vent flap opens freely — Go outside and confirm the flap moves without resistance. Blocked or frozen flaps are common in colder climates.
The U.S. Fire Administration reports that an estimated 2,900 home clothes dryer fires occur each year, with failure to clean lint being the leading contributing factor. Routine cleaning of the lint screen after every load and the full vent system at least once per year is the most effective prevention.
Confirm the Fix Worked Before Reassembly
After installing the new fuse and reconnecting all panels, run a quick verification cycle to make sure the repair actually holds.
- Set the dryer to high heat (cotton / heavy duty) and start it empty.
- Let it run for 15 minutes. During that time, check for:
- Airflow: Hold your hand a few inches from the outdoor vent flap — you should feel a steady stream of warm air.
- Exhaust temperature: After 10 minutes, the air coming out should be noticeably hot, not just warm. If it stays cool, the heating element or thermostat is still not working.
- No premature shutdown: If the dryer stops before the 15 minutes are up, the new thermal fuse may have blown already, which means you missed a major airflow restriction.
- Open the door and feel the drum interior — it should be hot to the touch from the heat but not scorching.
If the dryer passes these checks, the repair is successful. If the exhaust air is weak or the dryer shuts off early, the vent system is still restricted. Recheck hose connections, clean deeper, and rerun the test.
When to Stop DIY and Call a Pro
You can safely handle the fuse replacement and vent cleaning yourself. But stop and call an appliance technician if:
– You test the heating element and get an open reading (OL) or a reading far outside its spec range (e.g., under 5 Ω or over 20 Ω for electric models) — replacing a heating element involves handling high-voltage wiring and often requires disassembling the drum. – You’ve replaced the thermal fuse and thoroughly cleaned the entire vent path (inside cabinet, hose, duct, and outdoor flap), yet the new fuse blows again within a week.
This points to a failing cycling thermostat, stuck high-limit thermostat, or a partial duct blockage you couldn’t reach. – Your multimeter reads 120 V at the terminal block but the dryer still won’t heat — you may have a failed control board or relay, which is best left to someone with a wiring schematic.
If any of these apply, book a service call. The cost of a technician visit ($100–$200) is cheap compared to a fire caused by bypassing a safety device or a misdiagnosed electrical fault.
Frequently Asked Questions
Can a dryer thermal fuse be reset?
No. A thermal fuse is a one-time safety device. If it blows, you must replace it. Do not bypass or jump it — that removes a critical protection against fire.
Why does my new thermal fuse blow again after a few days?
The replacement blows because the real problem — restricted airflow — wasn’t fixed. Clean the full vent path (duct, hose, outdoor flap) and vacuum the dryer cabinet before installing a new fuse.
How much does it cost to replace a dryer thermal fuse?
The fuse itself typically costs $5 to $15 for most brands. A multimeter if you don’t own one can be found for $15–$30. The repair is DIY in about 30 minutes.
Can I test the thermal fuse without a multimeter?
Visually, a blown fuse may have a swollen or discolored surface, but there’s no reliable way to confirm without a continuity test. A multimeter is the only accurate method.