
10 Simple Steps to Change the Water Filter in Your Samsung Refrigerator
Changing the water filter in a Samsung refrigerator is easier than it sounds. With just a few tools and steps, anyone can do it! First, gather a new filter and a towel. Then, find and remove the old one. Cleaning the filter housing is important, too. By following these simple actions, fresh water is just around the corner. Curious about the exact steps to make this happen? Let’s explore the process together!
Key Takeaways
- Gather necessary tools like a new water filter, gloves, towel, and screwdriver before starting the replacement process.
- Locate the water filter compartment, typically found in the upper right corner or bottom grill of the refrigerator.
- Remove the old filter by turning it counterclockwise and gently pulling it out while wiping away any residual water.
- Clean the filter housing using warm, soapy water before installing the new filter to ensure freshness.
- Install the new filter by aligning it in the compartment, twisting if necessary, and then resetting the filter indicator light.
Gather the Necessary Tools and Materials
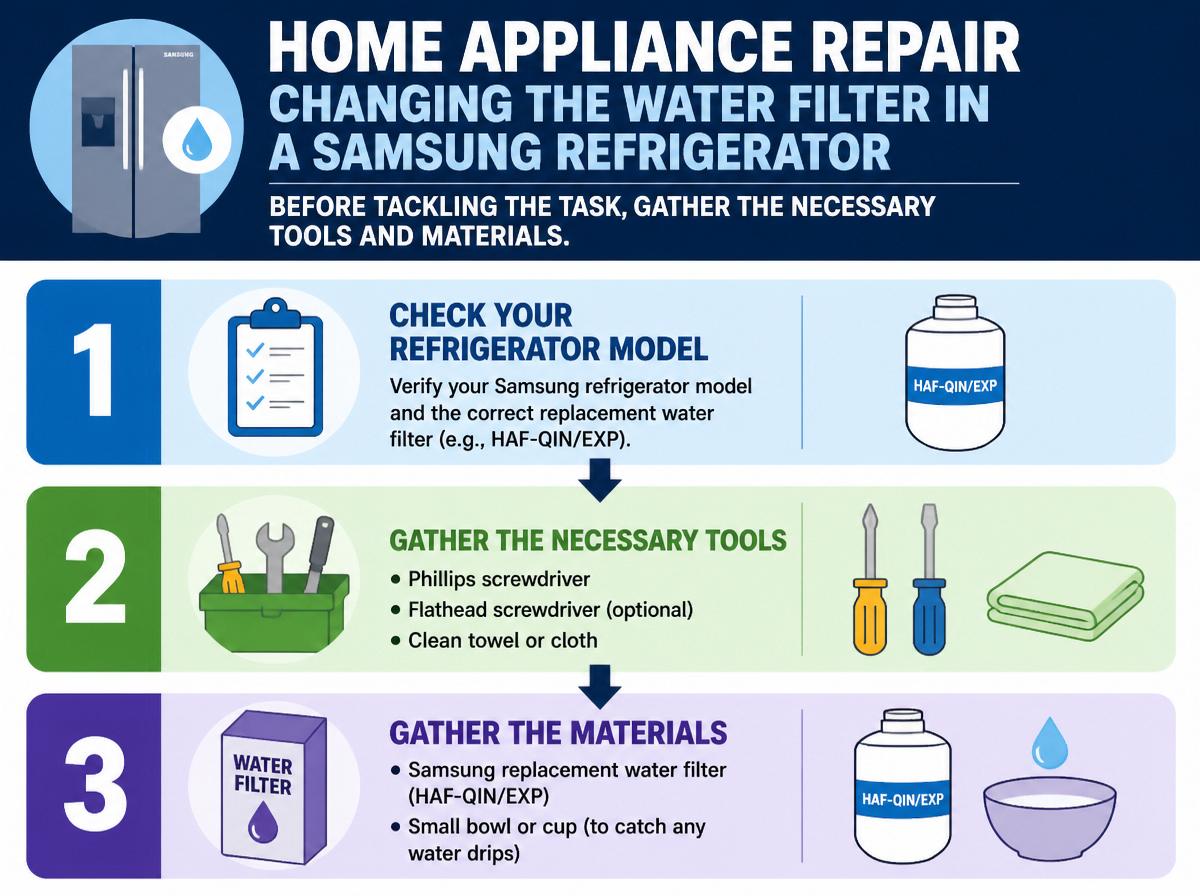
Before tackling the task of changing the water filter in a Samsung refrigerator, it’s important to gather the necessary tools and materials. First, grab a pair of gloves—these protect your hands during the job. Next, have a few towels handy to wipe up any spills. Of course, you’ll need the best water filters specific to your model, which you can buy from the store or online. Follow some simple filter maintenance tips, like checking the installation instructions closely. Being prepared guarantees the process goes smoothly. Remember, a little laughter can lighten the task; after all, it’s just a filter change, not a science project! Embrace the challenge, and soon you’ll be sipping fresh, clean water from your fridge.
Locate the Water Filter in Your Refrigerator
To locate the water filter in a Samsung refrigerator, one first needs to identify its specific location. Depending on the model, it might be in the upper right corner, inside the refrigerator section, or behind a cover panel. Once the spot is found, removing the cover panel can reveal the filter, making the process a breeze and a little adventure!
Identify Filter Location
Finding the water filter in a Samsung refrigerator can feel like searching for treasure hidden in plain sight. These filters are often tucked away, but with a little patience, anyone can discover them. Generally, they can be found inside the refrigerator, near the top right or at the bottom grill. Understanding the different filter types can help streamline the process.
Here are some simple tips to assist with installation:
| Filter Location | Filter Type |
|---|---|
| Top Right | Internal Filter |
| Bottom Grill | External Filter |
| Next to Ice Maker | Inline Filter |
| Compartment Shelf | Cartridge Filter |
| Back Wall | Replacement Filter |
With these installation tips, replacing the filter becomes a straightforward task. Now, happy treasure hunting!
Check Refrigerator Model
Knowing the filter location is half the battle, and now it’s time to check the refrigerator model to pinpoint the exact water filter setup. Each Samsung refrigerator has unique features and model specifications that can affect the filter type and location. Identifying your model is key to a successful replacement.
Here are three steps to help you identify your refrigerator model:
- Check the Inside: Open the refrigerator door and look for the model number on the walls or inside the door.
- Look at the Manual: If you still have the user manual, the model should be listed there.
- Online Search: Visit the Samsung website and enter your refrigerator’s features for easy identification.
With this information, you’re ready to move on to the next steps!
Remove Cover Panel
Before diving into the process, it’s important to gently remove the cover panel, as this often shields the water filter from view. Typically made of sturdy plastic, cover panel materials can vary, so understanding how they attach is essential. Readers should inspect for screws or clips that hold it in place. Using the right removal techniques, like applying gentle pressure or a twist, can help avoid damaging the panel. This task might feel a bit tricky, but with patience and care, it turns into a simple task! Once off, the hidden water filter will become easily visible, ready for replacement. Remember, every little step you take is a leap towards fresher water in your home!
Prepare Your Refrigerator for Filter Replacement
Preparing your refrigerator for a water filter replacement is a simple yet important task. First, it’s helpful to gather the necessary tools, such as a towel and a new filter. Next, locating the filter compartment will guarantee that everything goes smoothly, so you can enjoy revitalizing water sooner!
Gather Required Tools
When tackling the task of changing a water filter in a Samsung refrigerator, gathering the right tools first makes everything easier and more enjoyable. Being prepared is key to a successful filter replacement. Here are three essential items to have on hand:
- New Water Filter Ensure you know your refrigerator’s filter types to choose the right one.
- Screwdriver Depending on the model, you might need this for easier access to the filter compartment.
- Towel or Bucket It’s a smart idea to catch any spills during the change.
With these tools ready, following the maintenance tips can make the process smooth and efficient. Remember, a planned approach not only boosts confidence but also keeps the refrigerator running its best!
Locate Filter Compartment
Finding the filter compartment in a Samsung refrigerator can feel like a mini adventure! First, open the refrigerator door and look inside. Many Samsung models have the filter located in the upper right corner, while others might hide it in the base grille or near the water dispenser. Understanding where it’s located is essential for effective filter maintenance. Keeping track of where to find the filter helps guarantee water quality remains high. If it’s hidden, take a moment to explore; this quest can help create a rejuvenating journey to cleaner water! Remember, a well-maintained filter means better tasting water for you and your family. So, embrace the challenge—your refrigerator is waiting to be your trusty ally in this filter-changing task!
Remove the Old Water Filter
To kick off the process of changing the water filter, it’s essential to safely remove the old one. This step guarantees the water quality benefits can be realized. First, grasp the old filter firmly, turning it counterclockwise. Second, gently pull it out, being careful not to apply too much force. Finally, wipe away any water residue from the filter compartment to maintain cleanliness. Here are some filter maintenance tips to keep in mind:
Safely remove the old water filter to ensure optimal water quality and maintain a clean filter compartment.
- Always check your filter every six months for a change.
- Confirm you have the correct replacement filter on hand for easy swapping.
- Regularly clean the filter housing to prolong life.
Clean the Filter Housing
Cleaning the filter housing is an essential step that guarantees your Samsung refrigerator continues to provide fresh water. It helps to remove any leftover debris and keeps everything sparkling clean. With the right tools in hand, like a soft cloth and warm, soapy water, the task becomes quick and easy—just like a game of tag!
Importance of Cleanliness
Although keeping the filter housing clean might seem like a small task, it plays a huge role in maintaining the quality of water from the refrigerator. A clean filter housing guarantees clean water and enhances hygiene benefits. If the housing is neglected, dirt and residue can build up, affecting water quality and taste. Here are three reasons cleanliness matters:
- Prevent Contamination: Regular cleaning stops harmful bacteria from growing.
- Extend Filter Life: A clean environment helps the filter work more efficiently.
- Improve Taste: Clean housing guarantees the water tastes fresh and crisp.
Cleaning Tools Needed
Here’s a handy list of tools you might need:
| Tool | Purpose | Where to Use |
|---|---|---|
| Soft Cloth | Wipe down the housing | Inside the filter space |
| Mild Cleaner | Break down grime | Around the filter area |
| Toothbrush | Scrub those tricky corners | In tight spaces |
| Bucket | Hold soapy water | For soaking cloths if needed |
With these tools at hand, cleaning the filter housing becomes a breeze!
Unpack the New Water Filter
Unpacking the new water filter can feel like unwrapping a special gift, especially when it promises to provide crisp, clean water straight from the fridge. When choosing a new filter, it’s essential to verify its filter compatibility with your Samsung model. After selecting the right one, it’s time to unbox it.
To make the unpacking process smoother, follow these steps:
- Carefully remove the filter from its packaging. Take your time to avoid damage.
- Check for any protective covers or seals. These pieces must be discarded for proper installation.
- Recycle the packaging materials. By recycling, you contribute to a healthier planet!
Now, with the filter ready to go, you’re one step closer to revitalizing water!
Install the New Water Filter
Once the new water filter is unpacked, it’s time to plunge into the installation process. First, verify the refrigerator is off for safety. Locate the filter compartment, typically inside the fridge or lower part. Align the new filter with the compartment and push it in gently until it clicks into place. Remember the filter installation tips: twisting or turning may be necessary, depending on your model. After securing the filter, check for any gaps or leaks. Installing a new water filter brings numerous water filtration benefits, like cleaner, tastier water! Plus, it keeps the ice fresh. With this, you’re one step closer to enjoying a revitalizing glass, and you’ve done it all by yourself—well done!
Reset the Water Filter Indicator Light
After successfully installing the new water filter, the next step involves resetting the water filter indicator light. This important part of indicator maintenance guarantees that the refrigerator provides accurate information about filter changes. Utilizing simple reset techniques makes the process easy and straightforward for everyone.
- Locate the “Filter Resetbutton, usually found on the control panel.
- Press and hold the button for about 3 seconds until the light turns off.
- If your model lacks a button, simply unplug the refrigerator for 30 seconds before plugging it back in.
Resetting the indicator light is a small task that keeps your fridge running smoothly. Remember, a little effort goes a long way in maintaining clean, drinkable water!
Run Water Through the New Filter
Running water through the new filter is an essential step to guarantee that everything is working perfectly. After installing the filter, one should let water flow through it for a few minutes. This process helps clear out any particles or carbon dust left from manufacturing. Plus, it checks that the filter effectiveness is on point! If the water flows smoothly and tastes fresh, you know you’re in good shape. However, if there are any weird tastes or odd splutters, it might mean the filter isn’t seated properly. Trust in this step—your future sipping needs it! Remember, a little water now saves a lot of disappointments later when you reach for that crisp drink. Cheers to awesome hydration!
Dispose of the Old Filter Properly
Time to tackle the task of disposing of the old filter! Proper disposal is key to reducing environmental impact, and it can be as simple as following these steps:
- Check Local Recycling Programs: Before throwing it away, see if your area has programs that accept filters for recycling. Many cities have special facilities for this purpose.
- Seal the Filter: To prevent leaks or contamination, place the old filter in a plastic bag and seal it tightly. This helps keep both the home and environment clean!
- Dispose According to Guidelines: Follow your local waste disposal guidelines. This guarantees that the old filter won’t harm the environment.
Recycling the filter not only helps the planet but also makes you a responsible homeowner. Great job taking care of our Earth!
Frequently Asked Questions
How Often Should I Change My Samsung Refrigerator Water Filter?
The water filter in a Samsung refrigerator should typically be changed every six months. Following a filter replacement schedule is essential, and selecting the best filter brands can enhance water quality and taste considerably.
Can I Use a Generic Water Filter Instead of a Samsung One?
Using a generic water filter may seem tempting, but its effectiveness can vary considerably, leading to potential filter compatibility issues with Samsung refrigerators. Caution is warranted before opting for alternatives, lest quality be compromised.
What Happens if I Forget to Reset the Water Filter Indicator?
Forgetting to reset the water filter indicator can lead to confusion about water filter maintenance, resulting in potential delays in replacing the filter. The filter indicator’s importance lies in ensuring ideal water quality and filtration efficiency.
Is It Safe to Drink Water Before Changing the Filter?
It is generally not advisable to drink water before changing the filter, as reduced filter performance may compromise water safety. However, temporary use is possible if the filter has been regularly maintained and replaced.
Where Can I Buy Replacement Water Filters for My Samsung Refrigerator?
Replacement water filters for Samsung refrigerators can be purchased online at major retailers, in appliance stores, or directly from manufacturers. Popular water filter brands offer various replacement filter options compatible with Samsung models, ensuring clean drinking water.
Conclusion
Now that you’ve successfully switched out your water filter, your refrigerator is ready to keep providing clean and fresh water! Remember, it’s as easy as pie once you know how. Just keep an eye on that filter indicator light for future changes. With these ten simple steps, you’ve tackled a handy home task, showing that you can handle anything that comes your way. So, give yourself a pat on the back—you’ve earned it!
Explore This Topic
- Back to maintenance tips
- Back to Internal Components
Related guides in this cluster: